Add a New Tail Gate Logo
by Bill Johnston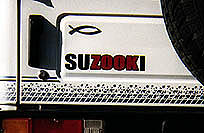 Have you ever had the urge to look just a little bit different from the rest? Sometimes
doing something unique can cause a head or two to turn. That may be why some of us stick
with Zooks instead of going with the rest of the crowd. Have you ever had the urge to look just a little bit different from the rest? Sometimes
doing something unique can cause a head or two to turn. That may be why some of us stick
with Zooks instead of going with the rest of the crowd.
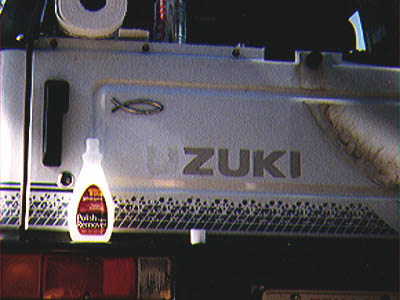
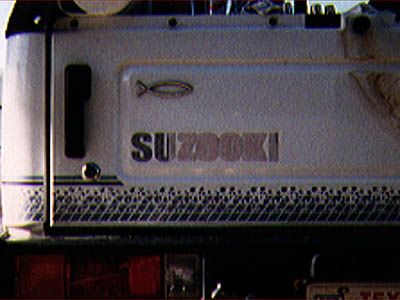
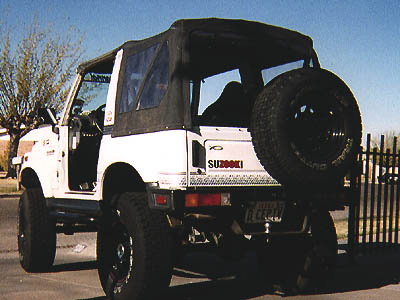
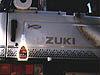
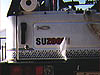
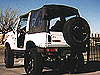
A little while back, the letter "S" in Suzuki on the tailgate of my 92 Sammy
took a hit. Not enough to scratch the paint or dent the sheetmetal, but enough to make it
look shabby. I decided to replace it. But it had to be unique! A quick trip to my local
auto graphics shop with an idea and a few dollars later - Voila! Now I just had to figure
out how to get the old factory decal off.
I used a few supplies that one may have around the house.
- Blow Dryer
- Fingernail Polish
Remover
- Paper Towels
- Glass Cleaner
  I used
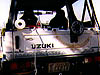
the blow dryer to heat up the factory decal. I also had to remove the spare tire to get to
the last letters on the right side. Now remember that I am in Texas, where the temperature
today was 74 degrees. If you are in a colder climate, do it inside the garage or wait
until spring! The blow dryer softened the decal enough to peel it away from the body, but
it left some ugly glue. While peeling heat the decal first and then pull evenly. If you
try to heat the decal -while- pulling, it will weaken the decal and it will tear. I used
the blow dryer to heat up the factory decal. I also had to remove the spare tire to get to
the last letters on the right side. Now remember that I am in Texas, where the temperature
today was 74 degrees. If you are in a colder climate, do it inside the garage or wait
until spring! The blow dryer softened the decal enough to peel it away from the body, but
it left some ugly glue. While peeling heat the decal first and then pull evenly. If you
try to heat the decal -while- pulling, it will weaken the decal and it will tear.
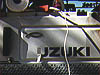
  Next
you have to get the glue cleaned off. I started with some (cheap) fingernail polish
remover on a folded paper towel. It worked extremely well at first. It took off all of the
big stuff, but left a greasy smear. This may not be detectable on darker paint, but on
white it stuck out big time. And the new decal would never stick smoothly to the paint
until it is completely clean! I snuck into the house and found my wifes expensive stuff...
It took about three swipes with the paper towel to make it sparkle! Just don't tell Candis
or I'll be in the dog house, the good stuff is expensive. Next
you have to get the glue cleaned off. I started with some (cheap) fingernail polish
remover on a folded paper towel. It worked extremely well at first. It took off all of the
big stuff, but left a greasy smear. This may not be detectable on darker paint, but on
white it stuck out big time. And the new decal would never stick smoothly to the paint
until it is completely clean! I snuck into the house and found my wifes expensive stuff...
It took about three swipes with the paper towel to make it sparkle! Just don't tell Candis
or I'll be in the dog house, the good stuff is expensive.
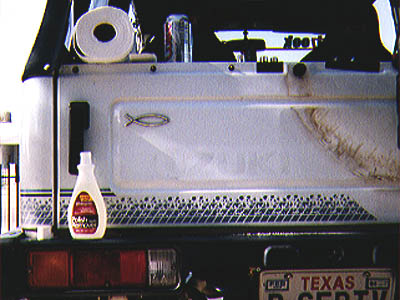
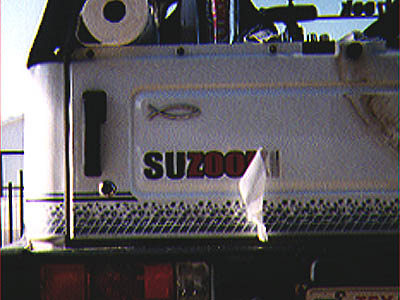
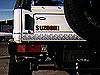
I then saturated the area with glass cleaner to aid with the positioning of the new
decal. As I said earlier, I didn't want it to look boring so I used a design I built for
IZook.

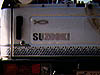  I am
running 31 inch tires and they covered the edge of the factory decal, so I made this one a
little shorter. Now it is easy to see the new decal without obstruction! But I'm getting
ahead of myself. Position the new decal where you want it and use a squeegy or credit card
to to force the bubbles out from under the decal. Slowly remove the cover tape from the
decal and smooth out any edges that may come up with the tape. Then sit back and admire
your work (and sneak the good/expensive nail polish remover back into the
house!). I am
running 31 inch tires and they covered the edge of the factory decal, so I made this one a
little shorter. Now it is easy to see the new decal without obstruction! But I'm getting
ahead of myself. Position the new decal where you want it and use a squeegy or credit card
to to force the bubbles out from under the decal. Slowly remove the cover tape from the
decal and smooth out any edges that may come up with the tape. Then sit back and admire
your work (and sneak the good/expensive nail polish remover back into the
house!).
 |