On Board Air - Air Conditioner Conversion When you have old air conditioning parts in the garage and an air tank sitting there staring you in the face, what do you do? You build an On Board Air System! I wanted to make it simple yet functional. I also wanted mount everything out of the way so it didn't look too jumbled under the hood. This will provide a way to air up the tires after a trail or even provide air for an air locker. |
||
|
|
||
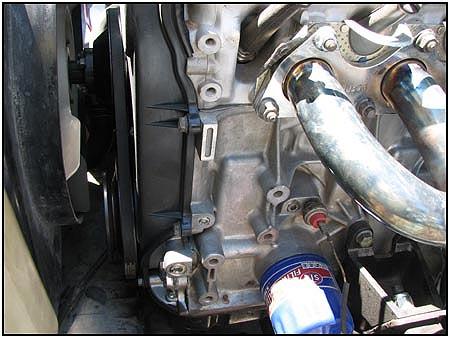
  The
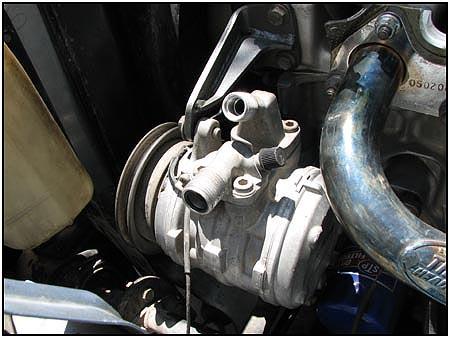
first part was simple, just bolting the air conditioner compressor into
place with factory brackets and adding a new belt to link it to the factory
double row crank pulley. If you can find factory hoses it will make the
installation easier and less expensive. The
first part was simple, just bolting the air conditioner compressor into
place with factory brackets and adding a new belt to link it to the factory
double row crank pulley. If you can find factory hoses it will make the
installation easier and less expensive. |
||
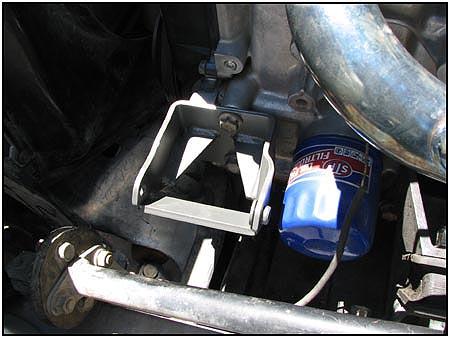
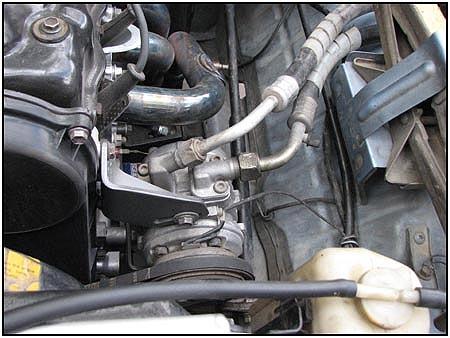  As
you can see we attached the factory hoses for the air output (next to block)
and intake (closer to fender) and routed them over to the fender. This
retains a very stock look while most folks won't realize the hoses no longer
point in the direction the factory intended. We (carefully) took some of the
bend out of the metal hose ends to direct the hoses away from the hot
exhaust manifold. As
you can see we attached the factory hoses for the air output (next to block)
and intake (closer to fender) and routed them over to the fender. This
retains a very stock look while most folks won't realize the hoses no longer
point in the direction the factory intended. We (carefully) took some of the
bend out of the metal hose ends to direct the hoses away from the hot
exhaust manifold. |
||
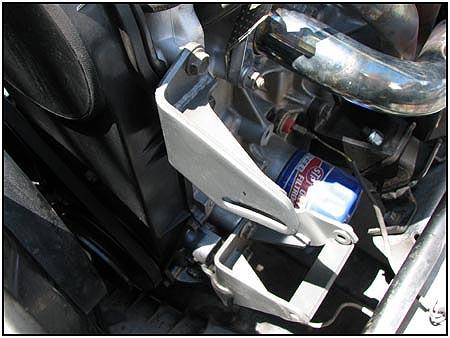
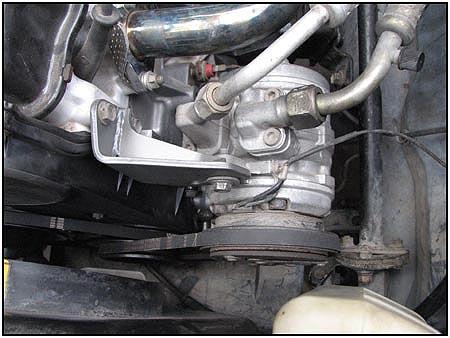
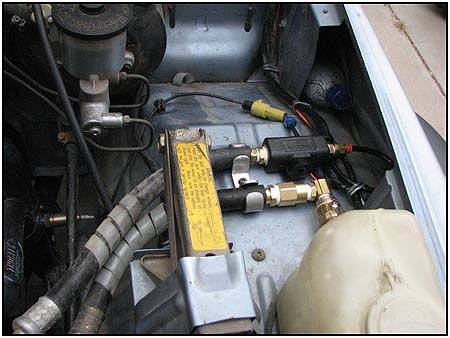 We
ran the hoses to two new components. The intake hose connects to some brass
fittings that have an inline oiler mounted at a 90 degree angle. This lets
us monitor the oil level instead of letting the oiler disappear into the
fender. The air conditioning compressor is normally lubricated by the gases
in a continuously circulating air conditioning system. Because we are not
using a closed loop system, we have to constantly supply lubrication to the
compressor to keep it from burning up. The oil will be removed from the
system farther down the line. We
ran the hoses to two new components. The intake hose connects to some brass
fittings that have an inline oiler mounted at a 90 degree angle. This lets
us monitor the oil level instead of letting the oiler disappear into the
fender. The air conditioning compressor is normally lubricated by the gases
in a continuously circulating air conditioning system. Because we are not
using a closed loop system, we have to constantly supply lubrication to the
compressor to keep it from burning up. The oil will be removed from the
system farther down the line. |
||
 The
black box looking component attached to the output hose is a one-way valve
that will keep the air pressure in the rest of the system from being forced
back into the compressor after it turns off. This will extend the life of
the seals in the air compressor. The
black box looking component attached to the output hose is a one-way valve
that will keep the air pressure in the rest of the system from being forced
back into the compressor after it turns off. This will extend the life of
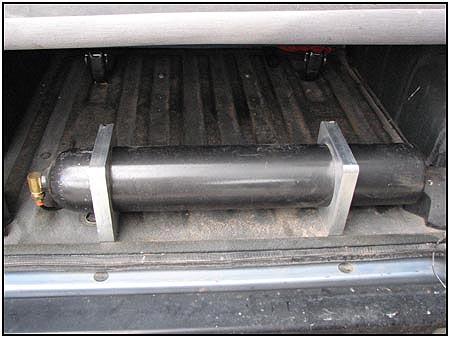
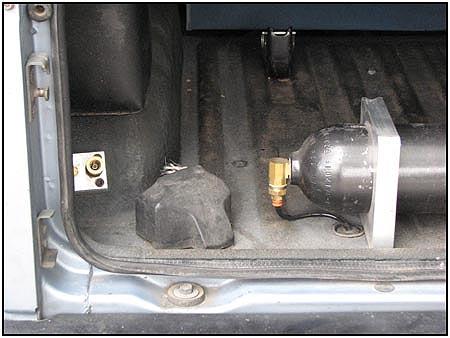
the seals in the air compressor.The air tank started life as an oxygen tank that we found in a yard sale for $10. When we found it, it still had about 3000 psi of oxygen in it, so using this tank in a system that will never see more than 150 psi is overkill the price was right. the brackets are just aluminum blocks drilled out to fit the bottle. |
||
|
|
||
|
|
||
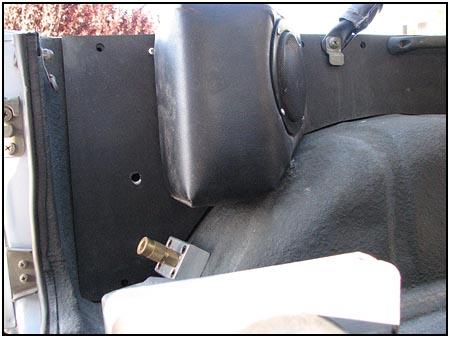
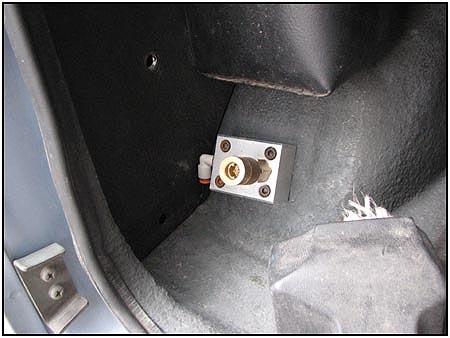
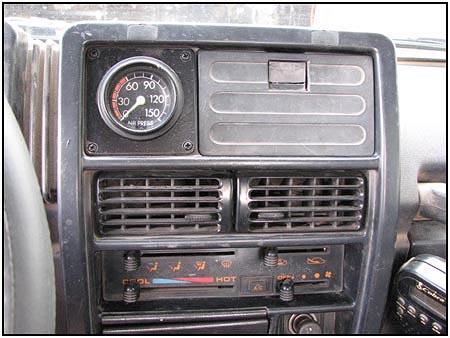
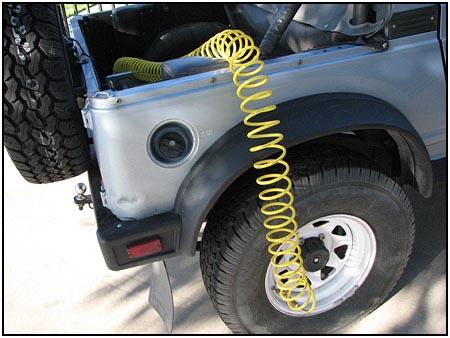
| We also added a small aluminum block (manifold)
at the tailgate for a quick disconnect. This is where we will attach our air
line to fill the tires with.
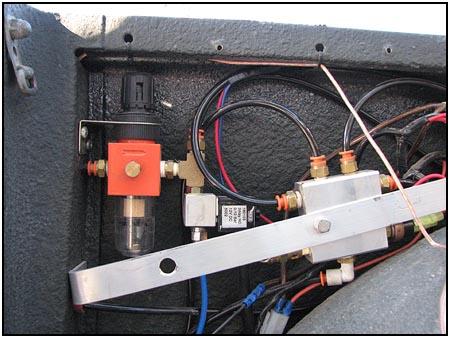
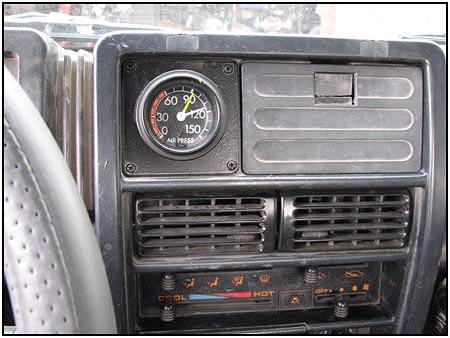
To monitor the air pressure in the system, we found a dual needle air gauge from a bus. This allows us to see how much pressure is in the system as well as how much pressure is in the regulated feeder line. |
||
|
|
||
The feeder line is run through an air regulator
that is set for 90 psi as you can see on the gauge in the picture on the far
right. The whole system is turned on just as you would turn on the air
conditioner. Turn on the fan and hit the 'AC' button!
 This was originally an
AC equipped vehicle so the wiring was still there from the factory. This was originally an
AC equipped vehicle so the wiring was still there from the factory.
This is not a critical system to have when out on the trail, until you need it. Many times you will find others on the trail with you that have air you can use to re-inflate that spare, or air up all of your tires at the end of a good trail ride. But it feels good to be able to do it yourself. |
08/22/22 13:48