

|
Tuffy® Samurai Security Console
Installation with Bill Johnston
Tuffy® Security Products debuted their Samurai Security Console in Moab earlier this year making us all run for our checkbooks! It was a perfect fit for an installation between the stock seats... oops... Many of us had already replaced our stock seats with the popular (wider) racing seats that you see in many of the vehicles at IZook and in print magazines. This posed a problem. Tuffy® listened to our need and responded with a security console identical in just about every way - except skinnier! This console measures a scant 5.125" across and fits easily between the larger seats. The heavy duty padded armrest, pry-proof door and dual cup holder with choice of two mounting positions are the same as in the original unit. |
||
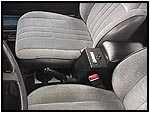 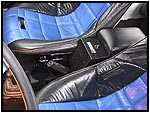 Although
the console has been redesigned with the larger seats in mind it doesn't
mean that you are out of luck if you still have comfortable stockers. As
you can see on the right, it fits nicely there too! Although
the console has been redesigned with the larger seats in mind it doesn't
mean that you are out of luck if you still have comfortable stockers. As
you can see on the right, it fits nicely there too! |
||
|
||
|
||
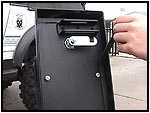 To
the left you can see the final seal being applied. You can also see the
unique locking mechanism. With the door shut and locked, it makes the lid
virtually pry-proof. If a thief really wanted to get into the console, any
lock would only serve to slow him down, but this lock would make him
revert to using a torch because there is no easy way to get in with a pry
bar. To
the left you can see the final seal being applied. You can also see the
unique locking mechanism. With the door shut and locked, it makes the lid
virtually pry-proof. If a thief really wanted to get into the console, any
lock would only serve to slow him down, but this lock would make him
revert to using a torch because there is no easy way to get in with a pry
bar. |
||
|
||
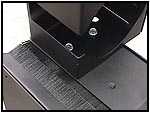 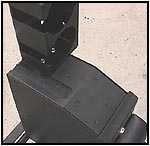 Here
you see the dual cup holders mounted to the front of the console. These
cup holders can handle anything from a one liter cola bottle to your
favorite 'koozy' filled with your choice of beverage. They are also of a
steel construction so they are just as 'tuff' as the console itself. Here
you see the dual cup holders mounted to the front of the console. These
cup holders can handle anything from a one liter cola bottle to your
favorite 'koozy' filled with your choice of beverage. They are also of a
steel construction so they are just as 'tuff' as the console itself. |
||
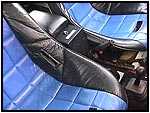 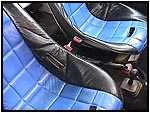 As
you can see by the stock seat belt placement between the racing seats,
there is very little room for much of anything. If you rotate the
seatbelts forward they will give the needed space for the security console
and still be accessible. Many people have completed the race ensemble by
adding a set of racing belts that include a shoulder harness. You may
notice the slots in the seats where they are designed to come through. Be
sure to check your state laws covering such an upgrade though, because it
may be illegal in your state to remove the stock belts. Since this is a daily driver and
it needs to pass annual safety inspections the stock belts have been
retained. As
you can see by the stock seat belt placement between the racing seats,
there is very little room for much of anything. If you rotate the
seatbelts forward they will give the needed space for the security console
and still be accessible. Many people have completed the race ensemble by
adding a set of racing belts that include a shoulder harness. You may
notice the slots in the seats where they are designed to come through. Be
sure to check your state laws covering such an upgrade though, because it
may be illegal in your state to remove the stock belts. Since this is a daily driver and
it needs to pass annual safety inspections the stock belts have been
retained. |
||
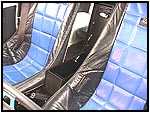 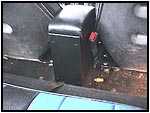 As
you can see the fit is very close. If your emergency brake raises above a
45 degree angle it needs to be adjusted to snug up a little sooner. The unit fits up against the
raised rear section in the transmission tunnel where it meets the rear cargo area. This
gives about 1/4" of space extra space up front for those of you that pull the
brake handle a little too hard. The light bristles that hide the
handle mechanism didn't stay on very well, but after talking with the
folks at Tuffy®, it seems that they are looking for
alternative adhesives that will fix this problem. As
you can see the fit is very close. If your emergency brake raises above a
45 degree angle it needs to be adjusted to snug up a little sooner. The unit fits up against the
raised rear section in the transmission tunnel where it meets the rear cargo area. This
gives about 1/4" of space extra space up front for those of you that pull the
brake handle a little too hard. The light bristles that hide the
handle mechanism didn't stay on very well, but after talking with the
folks at Tuffy®, it seems that they are looking for
alternative adhesives that will fix this problem. |
||
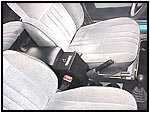 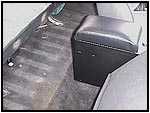 With
the stock seats, the position is identical because the emergency brake handle is
in the same position in both applications. The difference is that there is
more room for the stock seat belts. Also notice that there is very little clearance
between the emergency brake handle and the cup holder (if you choose to
install it up front). You must be careful not to hit the steel cup holder
with your hand. Steel is not very forgiving. With
the stock seats, the position is identical because the emergency brake handle is
in the same position in both applications. The difference is that there is
more room for the stock seat belts. Also notice that there is very little clearance
between the emergency brake handle and the cup holder (if you choose to
install it up front). You must be careful not to hit the steel cup holder
with your hand. Steel is not very forgiving. |
||
The two holes to the rear of the box are easy to drill and only require slight pressure on the drill for completion. The two holes toward the front of the box will be passing through the thicker steel plate that crosses from one side of the transmission tunnel to the other to form a stronger mounting point for the seatbelts. This will require a sharp drill bit and some patience. It also gives a more solid mounting point that will withstand lots of abuse.
|
||
|
Check out the Component Review! |
||
|
Source: Tuffy® Security Products |
||
03/21/17 21:06