|
Redesigning the ARB with Bill Johnston You're on a really wild trail, you have wacked the pumpkins a few times but all seems to be fine. You get your front end up on a radical waterfall... and then you hear it! The dreaded hiss of an air leak coming from somewhere underneath the vehicle. Your spotter checks the tires, no problems. Then he tells you that a front tire is not turning... the locker isn't engaging! He checks the air lines and they are fine - the leak is inside the differential housing! Uh-oh... |
||
  The most common air leak for an ARB is when the line gets snagged on
something underneath and it rips the line. There are kits available on the
market to keep in your glove box to quickly remedy that problem. But what
happens when you can't get to the leak because it is inside the
differential? The most common air leak for an ARB is when the line gets snagged on
something underneath and it rips the line. There are kits available on the
market to keep in your glove box to quickly remedy that problem. But what
happens when you can't get to the leak because it is inside the
differential? |
||
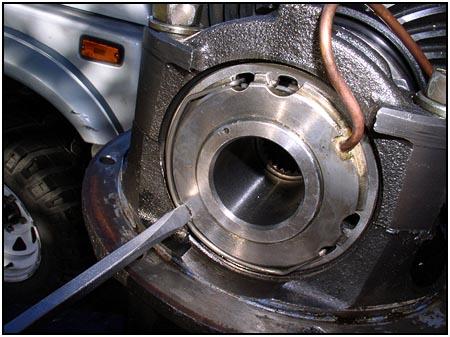
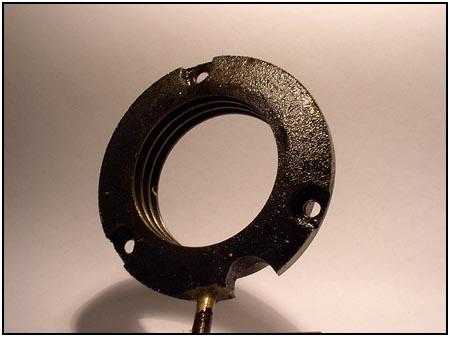
 Three screws are installed with loc-tite, but if you over-torque the screws
you can deform the clamping plate and it will result in a failure (the plate
to the left is supposed to be flat...). During
installation, you do not see the plate, so unless you are very careful with
the torque wrench you won't know there is a problem until it fails. As we
all know, this will almost always happen at the wrong moment. Three screws are installed with loc-tite, but if you over-torque the screws
you can deform the clamping plate and it will result in a failure (the plate
to the left is supposed to be flat...). During
installation, you do not see the plate, so unless you are very careful with
the torque wrench you won't know there is a problem until it fails. As we
all know, this will almost always happen at the wrong moment. |
||
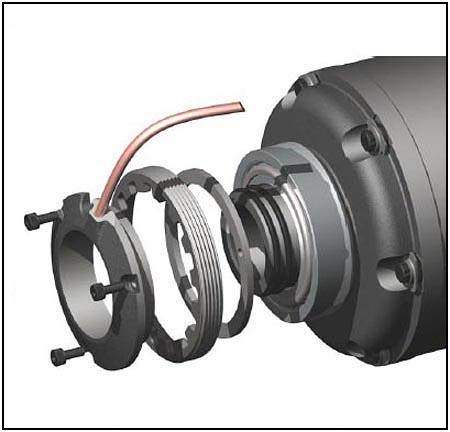
  The
fix is a new type of seal housing that uses a heavy duty spring clip to hold
it in place. The components on the left will now be replaced by the
components on the right. The original components are still very viable
parts, and they will work very well for the life of your locker. But if the
installation was faulty (and you won't know until it fails) then having the
updated components will give you more confidence in your equipment. The
fix is a new type of seal housing that uses a heavy duty spring clip to hold
it in place. The components on the left will now be replaced by the
components on the right. The original components are still very viable
parts, and they will work very well for the life of your locker. But if the
installation was faulty (and you won't know until it fails) then having the
updated components will give you more confidence in your equipment. |
||
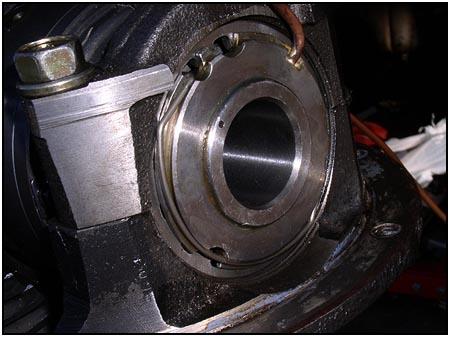
 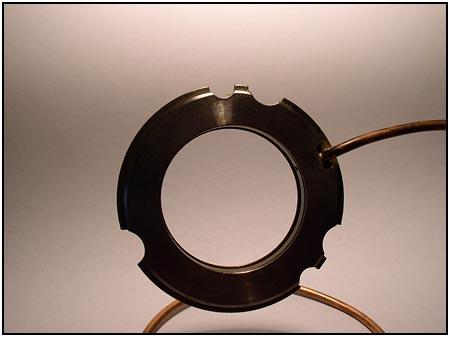 Instead
of a cast component, the new housing looks machined to spec. It has locating
notches instead of screw holes and it has a lip that will retain the spring
clip under pressure. Instead
of a cast component, the new housing looks machined to spec. It has locating
notches instead of screw holes and it has a lip that will retain the spring
clip under pressure. |
||
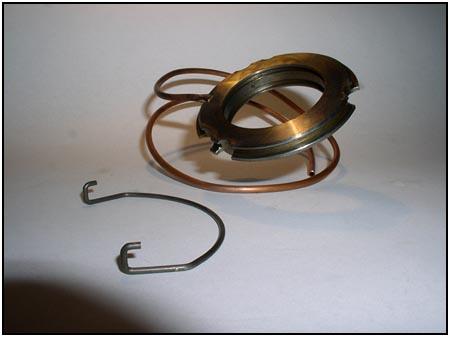
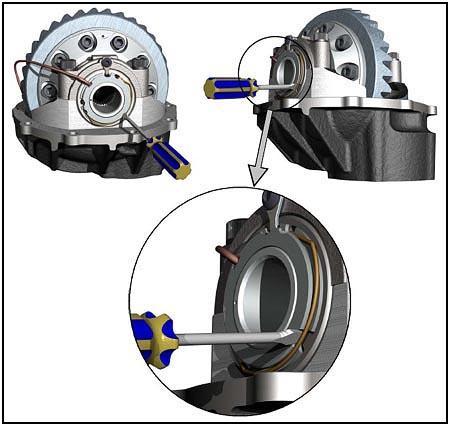 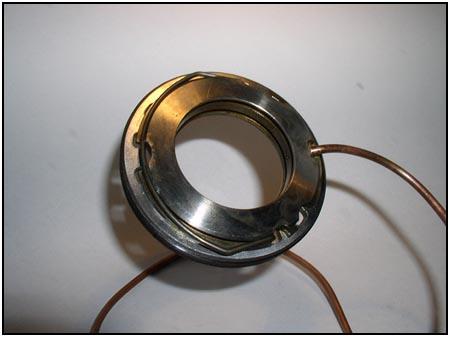 With
the spring clip installed, you can see how it grips the large adjuster nut
on the left. A more detailed drawing on the right is provided by ARB. You
can see how much easier the installation goes because at this point you only
have to use the screwdriver to pull the clip over the lip. With
the spring clip installed, you can see how it grips the large adjuster nut
on the left. A more detailed drawing on the right is provided by ARB. You
can see how much easier the installation goes because at this point you only
have to use the screwdriver to pull the clip over the lip. |
||
|
|
||
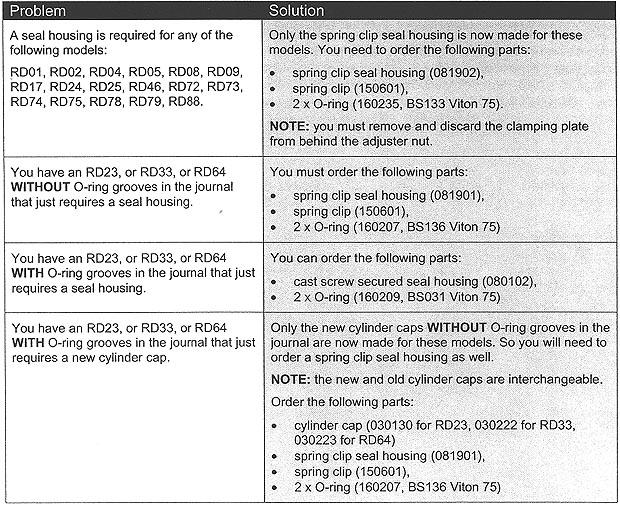
| If you have never installed or serviced an ARB Air Locker, you are probably confused about how all this works. But if you have had any experience with these lockers you are probably jumping for joy right about now... Here is a table to help you get the parts you need. | ||
 |
||
| *NOTE*In addition, upgrading from a screw secured seal housing to a spring clip secured housing will require fitment of the '3.5mm O-ring Bulkhead Kit' (Part No. 170105) due to the 3.5mm copper tube used on the spring clip secured seal housings. | ||
|
Component Source:
ARB Corporation Limited |
||
|
|
08/22/22 13:56:43