You got Crabs?
|
||
  When
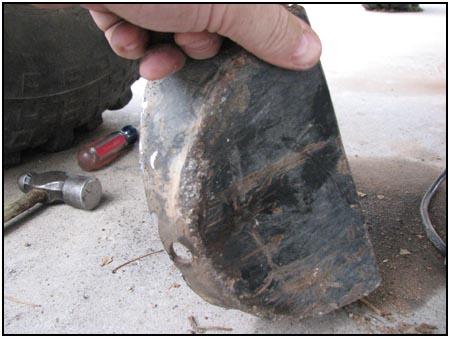
I first started rock crawling (probably the biggest reason for a bashed
differential) I installed a bash guard that did the job, but looked pretty
rugged. As I removed it I realized that there was a lot going on behind that
cover that wasn't for the better. When
I first started rock crawling (probably the biggest reason for a bashed
differential) I installed a bash guard that did the job, but looked pretty
rugged. As I removed it I realized that there was a lot going on behind that
cover that wasn't for the better. |
||
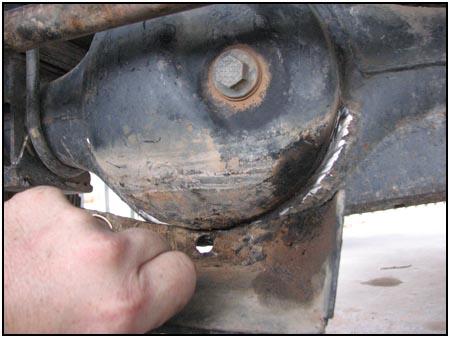
  While
my old bash guard kept the the big rocks from crushing the axle housing into
my gears, the drain hole wasn't large enough and had been filled with trail
debris. Over the years, water and mud sat there until it got dumped out in a
twisty obstacle. Luckily I live in an area where rust doesn't rear its ugly
head or I would have had a half eaten axle housing... The new Crab will fix
this problem. While
my old bash guard kept the the big rocks from crushing the axle housing into
my gears, the drain hole wasn't large enough and had been filled with trail
debris. Over the years, water and mud sat there until it got dumped out in a
twisty obstacle. Luckily I live in an area where rust doesn't rear its ugly
head or I would have had a half eaten axle housing... The new Crab will fix
this problem. |
||
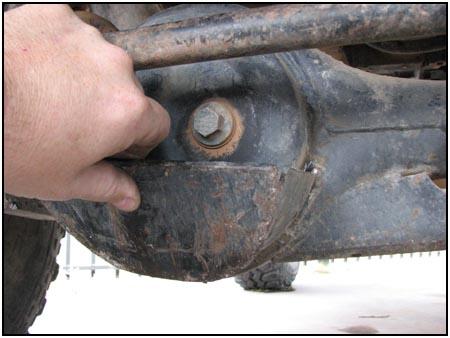
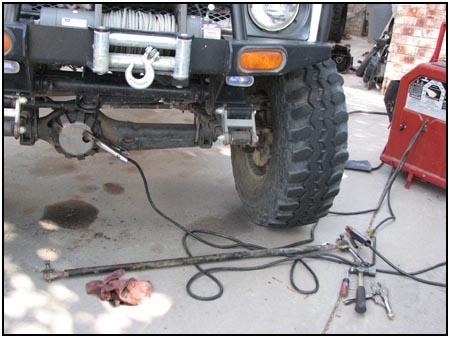
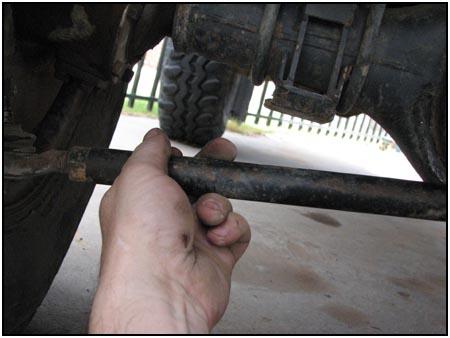  Removing
the tie rod let me get better access to the front of the differential. This
also gave me an excuse to straighten out that little bend that a rock or two
had helped me with. Removing
the tie rod let me get better access to the front of the differential. This
also gave me an excuse to straighten out that little bend that a rock or two
had helped me with. |
||
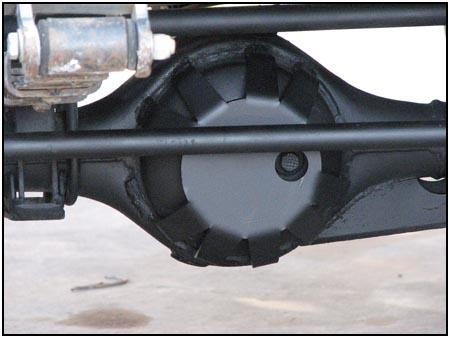
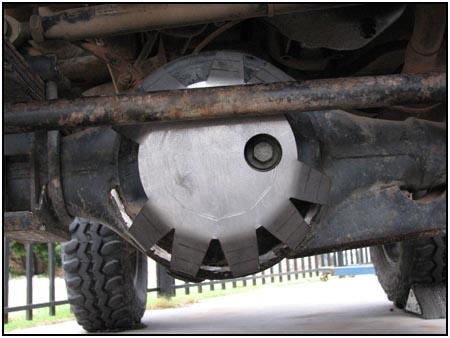
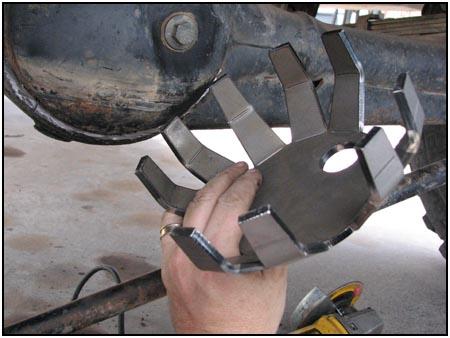 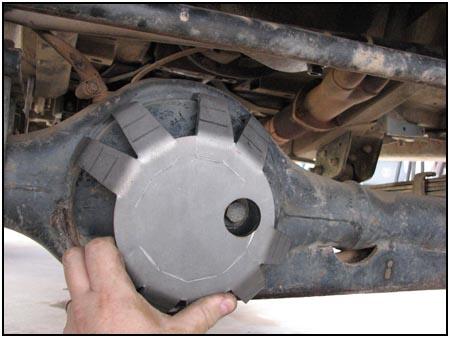 The
Crab easily fits over the front of the differential, all you have to do is
line up the oil plug. If the 'legs' don't grasp the cover tightly, just tap
the legs with a hammer until they do. During this installation we are
upgrading the front axle. The Crab for the rear axle is almost identical but
has longer legs. The
Crab easily fits over the front of the differential, all you have to do is
line up the oil plug. If the 'legs' don't grasp the cover tightly, just tap
the legs with a hammer until they do. During this installation we are
upgrading the front axle. The Crab for the rear axle is almost identical but
has longer legs. |
||
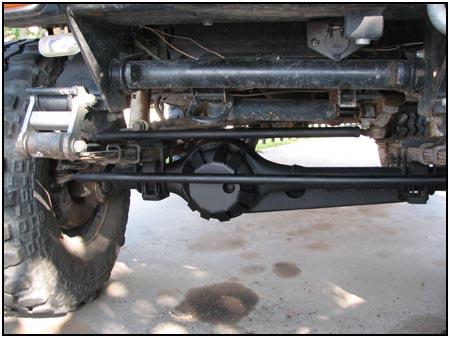
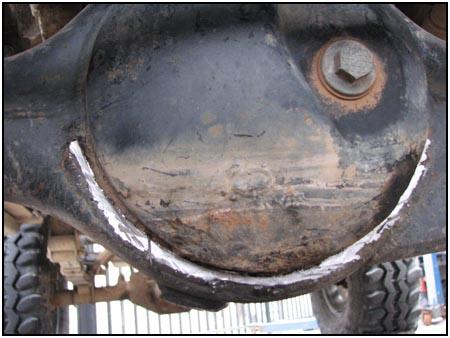
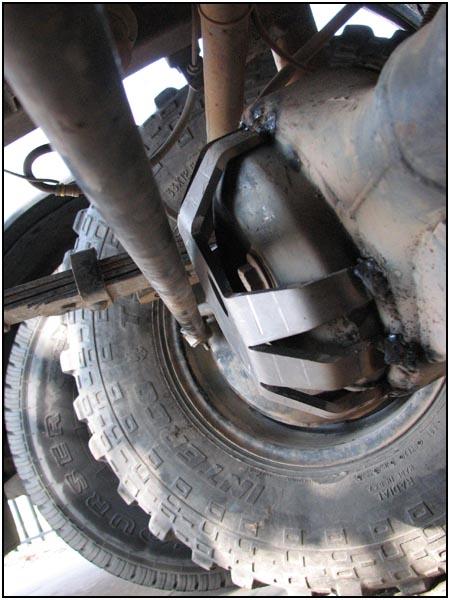
 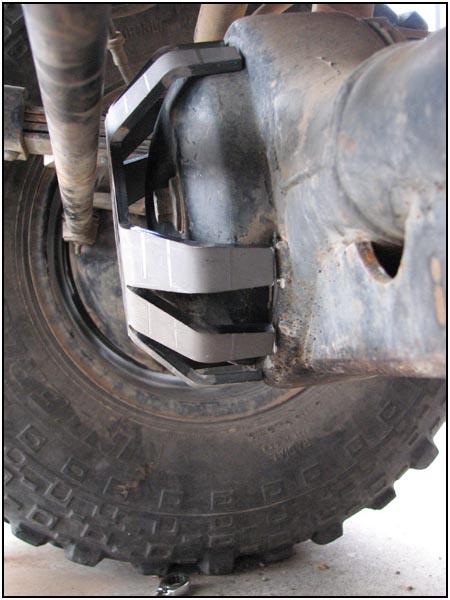 The
Crab is made to give you a little 'bash' room, but some steering components
may get a little too close to weld them on straight from the box. These
pictures show how close this one comes to the tie rod with the tires pointed
straight ahead. The
Crab is made to give you a little 'bash' room, but some steering components
may get a little too close to weld them on straight from the box. These
pictures show how close this one comes to the tie rod with the tires pointed
straight ahead.These legs make it easy for mud and water to drain out instead of pooling up and eventually rusting through the axle housing. No more clogged drain holes... |
||
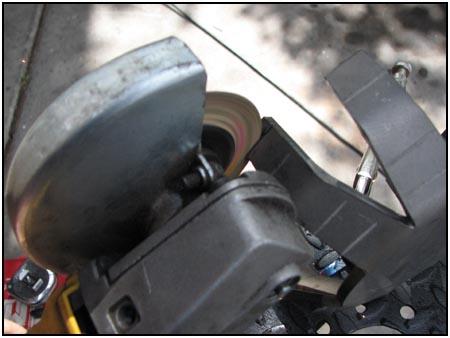
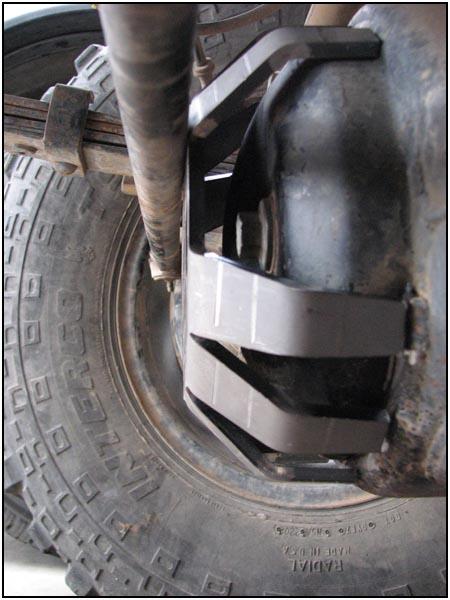  When
the wheel was turned all the way to one side you can see that there is
definite contact, and that is not good. But you can see just how much room
there is to play with just between the Crab and the differential housing.
With a little careful measuring, we cut down the upper legs with an angle
grinder and a cutoff disc. In this case, we only needed to remove a quarter
of an inch of material. This trimming may not be needed for your
application, so measure just to make sure. With so many high steer and axle relocation options
out there, your mileage may vary. When
the wheel was turned all the way to one side you can see that there is
definite contact, and that is not good. But you can see just how much room
there is to play with just between the Crab and the differential housing.
With a little careful measuring, we cut down the upper legs with an angle
grinder and a cutoff disc. In this case, we only needed to remove a quarter
of an inch of material. This trimming may not be needed for your
application, so measure just to make sure. With so many high steer and axle relocation options
out there, your mileage may vary.*NOTE* At the time of this installation, the legs needed to be trimmed. We have been assured by the manufacturer that any Crabs built AFTER this installation will have shorter legs and trimming may not be required. Check and measure for clearance first. |
||
|
|
||
  Within
just a few minutes we had the legs just the length we needed and it was time
to weld. Unlike some bash guards, we didn't need to make long beads of weld,
just about an inch of weld on each foot gave the Crab plenty of stability.
Just remember to line up the oil plug! Within
just a few minutes we had the legs just the length we needed and it was time
to weld. Unlike some bash guards, we didn't need to make long beads of weld,
just about an inch of weld on each foot gave the Crab plenty of stability.
Just remember to line up the oil plug! |
||
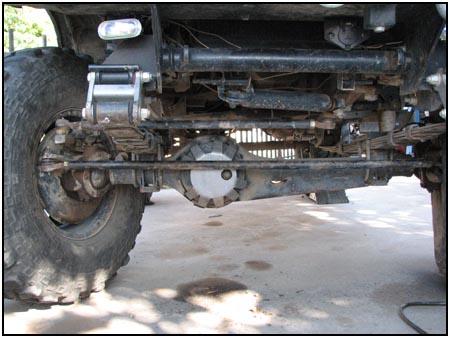  After
putting the (straightened) tie rod back into place we checked for fit. At
full lock (wheel turned all the way to one side) we still had a quarter of
an inch of clearance between the Crab and the tie rod. That is plenty! There
was still almost a quarter of an inch of air between the Crab and the
differential face, so the fit was perfect. After a little paint we were
finished. After
putting the (straightened) tie rod back into place we checked for fit. At
full lock (wheel turned all the way to one side) we still had a quarter of
an inch of clearance between the Crab and the tie rod. That is plenty! There
was still almost a quarter of an inch of air between the Crab and the
differential face, so the fit was perfect. After a little paint we were
finished.
|
||
|
"My Zuk has Crabs, DOES YOURS?" |
||
| Source:
Zuks
Off Road |
08/22/22 13:57