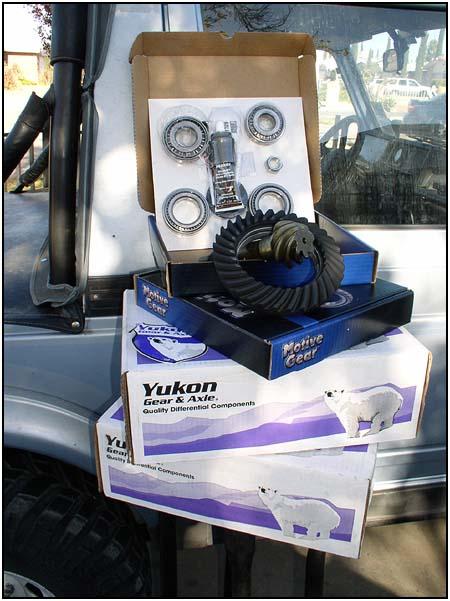
 4.57 Yukon Gears from Low Range Off-Road 4.57 Yukon Gears from Low Range Off-Roadwith Bill Johnston
|
||
 But
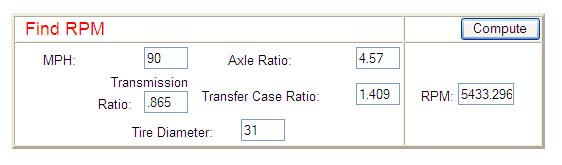
how did we decide on these gears, and what benefits will they provide? Using
the Gearing Tables on iZook.com we gathered all the numbers we needed. We are
installing the gears in a 1988.5 Samurai, so we use 0.865:1 ratio for
fifth gear in the transmission. We have also moved from a 27" tire (factory
stock) to a 31" tire. Also, because we are concerned with highway
speed in this gear change, we need to use the high range ratio in the
transfer case which is 1.409:1. These numbers will not change through
the calculations. But
how did we decide on these gears, and what benefits will they provide? Using
the Gearing Tables on iZook.com we gathered all the numbers we needed. We are
installing the gears in a 1988.5 Samurai, so we use 0.865:1 ratio for
fifth gear in the transmission. We have also moved from a 27" tire (factory
stock) to a 31" tire. Also, because we are concerned with highway
speed in this gear change, we need to use the high range ratio in the
transfer case which is 1.409:1. These numbers will not change through
the calculations.One thing to remember though, you can make it look like the vehicle can easily run over 100 mph with stock gears and larger tires, but if the engine doesn't have the power to push the vehicle at those speeds then it is a worthless calculation. These are calculations to start with, then real world testing will tell you if it really works. |
||
 Then
we went to the Gear
Calculator page and plugged in those numbers to show where we were
starting from. We then plugged in the numbers for the new gears to see where
we could go. Then
we went to the Gear
Calculator page and plugged in those numbers to show where we were
starting from. We then plugged in the numbers for the new gears to see where
we could go.
|
||
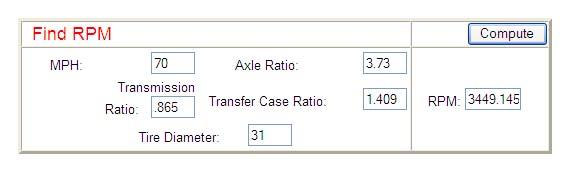
| Above you can see that to make seventy miles an hour with stock gears (3.73:1) the engine will be running below the power band. This means that any hill or wind gust will severely effect the speed. The 1.3ltr motor doesn't really show any power to start to overcome those problems until after the start of the power band (about 3800 rpm). And even then, the steeper the hill or stronger the wind, the more resistance has to be overcome by rpm's or more torque. | ||
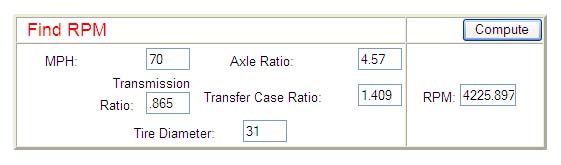 When
using the 4.57's you can see that the engine rpm's are up into the power
band. But do we stop at 70mph? When
using the 4.57's you can see that the engine rpm's are up into the power
band. But do we stop at 70mph?Naw... |
||
 As
you can see the RPMs are going to be up there, so you better have a fresh
engine built to handle the revolutions... As
you can see the RPMs are going to be up there, so you better have a fresh
engine built to handle the revolutions... |
||
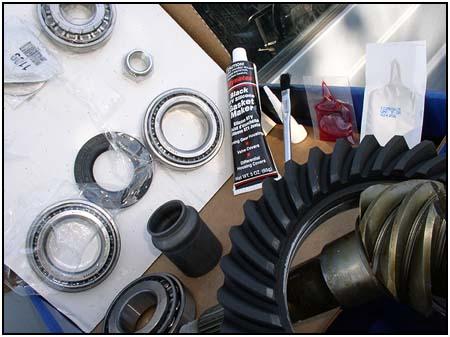
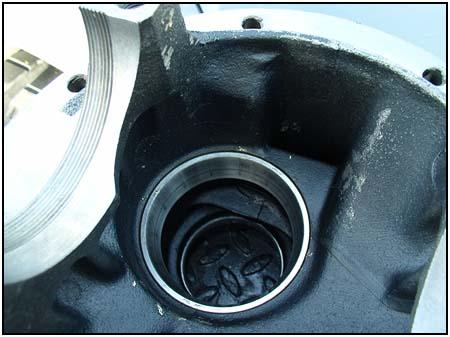
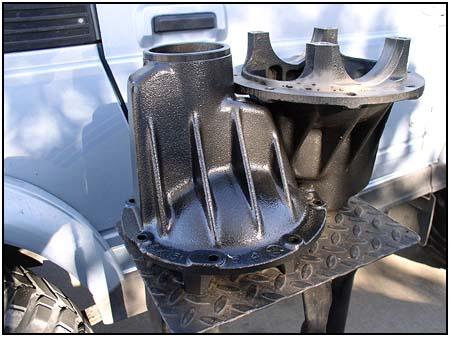 Next
we prepped a set of Samurai steel third members. We had the tanked when we
did our engine, so they are nice and clean. A fresh coat of paint will keep
the rust and corrosion down. Then we install the new bearing races for the
pinion. The master kit from Low Range Offroad had all the replacement
components you need. Next
we prepped a set of Samurai steel third members. We had the tanked when we
did our engine, so they are nice and clean. A fresh coat of paint will keep
the rust and corrosion down. Then we install the new bearing races for the
pinion. The master kit from Low Range Offroad had all the replacement
components you need. |
||
|
|
||
 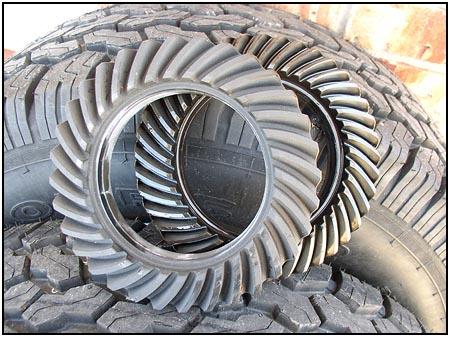 You
can definitely see the difference in the pinions. the old pinion has quite a
few more teeth. The ring gear also looks a bit different, as there are fewer
teeth (although beefier). You
can definitely see the difference in the pinions. the old pinion has quite a
few more teeth. The ring gear also looks a bit different, as there are fewer
teeth (although beefier). |
||
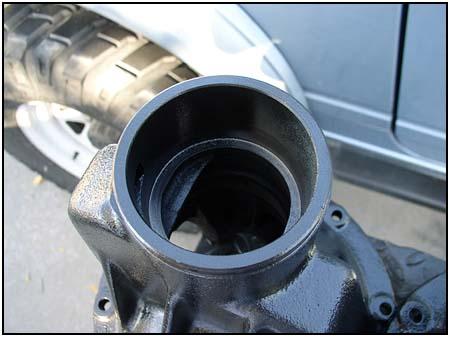
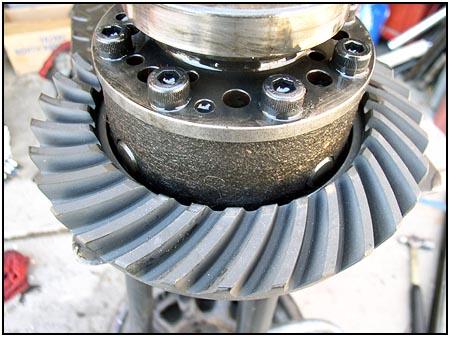 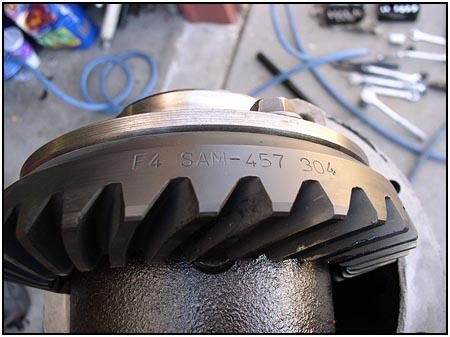 The
aftermarket Yukon gears fit nicely. You don't need a conversion can and
spacer when using these. You can also verify the ratio by reading the specs
stamped into the ring gear. he gears come with a great instruction book from
Yukon that shows how to set the backlash. The
aftermarket Yukon gears fit nicely. You don't need a conversion can and
spacer when using these. You can also verify the ratio by reading the specs
stamped into the ring gear. he gears come with a great instruction book from
Yukon that shows how to set the backlash. |
||
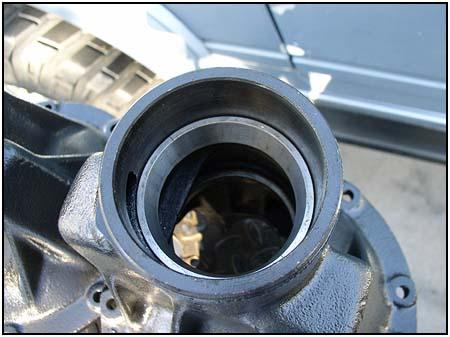
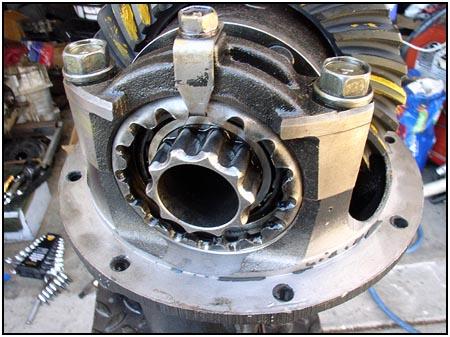 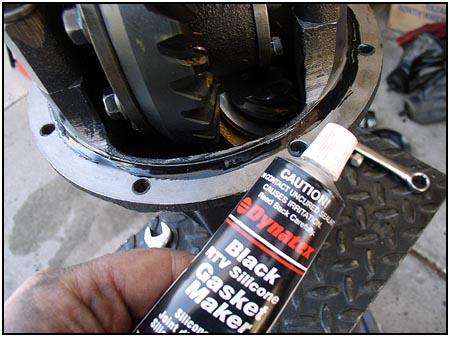  The
picture on the left will look a little different from your carrier. This is
a locking flange for the KAM electric locker we have in the rear of the
Stalker. The opposite side can be adjusted as usual and when everything is
ready to go in we used the RTV that came with the kit. The
picture on the left will look a little different from your carrier. This is
a locking flange for the KAM electric locker we have in the rear of the
Stalker. The opposite side can be adjusted as usual and when everything is
ready to go in we used the RTV that came with the kit. |
||
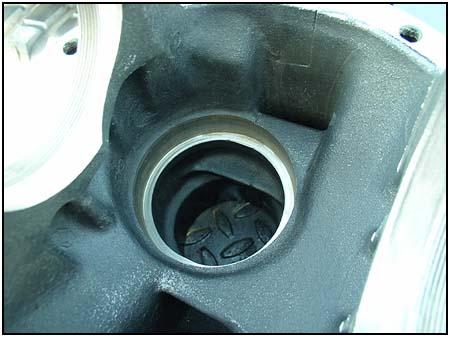
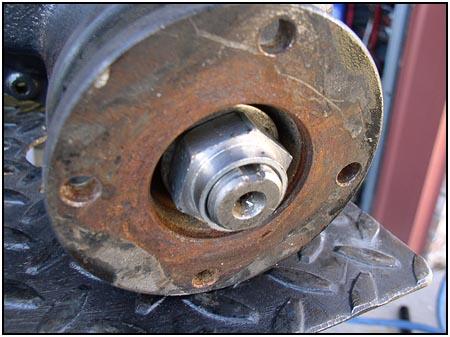 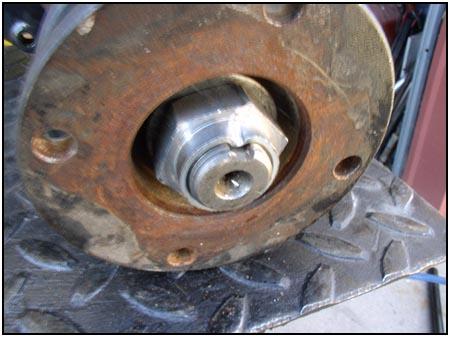 After
getting the backlash correct, this is probably the most important part of
the gear installation (don't ask how I know). There is a reason why there is
a sleeve end on the nut, and a cut in the pinion. If you don't 'stake' the
nut, it will leave you under high vibration. Don't be 'That Guy' on
the trail. After
getting the backlash correct, this is probably the most important part of
the gear installation (don't ask how I know). There is a reason why there is
a sleeve end on the nut, and a cut in the pinion. If you don't 'stake' the
nut, it will leave you under high vibration. Don't be 'That Guy' on
the trail. |
||
| Bottom line: Aftermarket gears aren't much different to install than stock gears, and you can customize your performance with more options than just the stock ratios. Work the numbers and find out what YOU need for your application. | ||
|
Source:
Low Range Off-Road, LC sales@lowrangeoffroad.com
Regular Business Hours |
08/22/22 14:00:44