|
26 Spline RCV Performance Axles from Spidertrax by Bill Johnston
|
|||
Since Tom wrote this, he has been true to his word as they are now available for the price goal they originally set. They are not very difficult to install, so let's get to it! |
|||
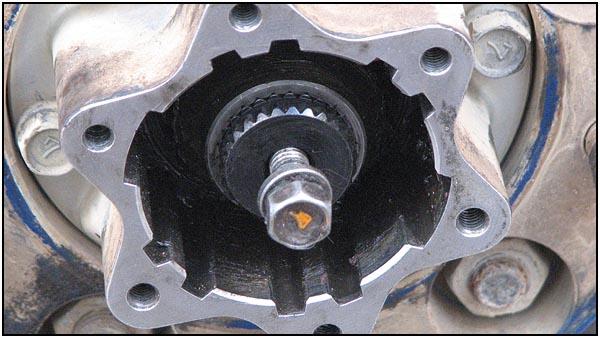
 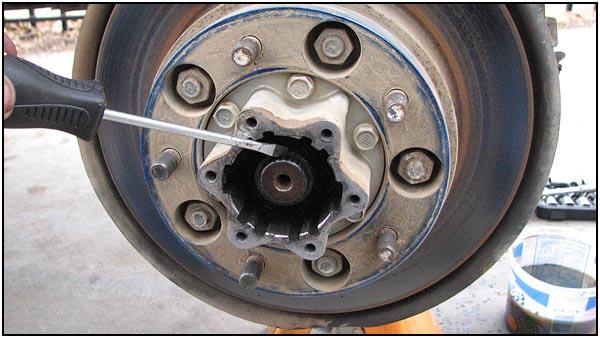 After
putting the front axle up on jack stands for safety, the tires came off. The
caps came off easily from the locking hubs and the 'C' clip was removed from
the end of the outer axle stub. After
putting the front axle up on jack stands for safety, the tires came off. The
caps came off easily from the locking hubs and the 'C' clip was removed from
the end of the outer axle stub. |
|||
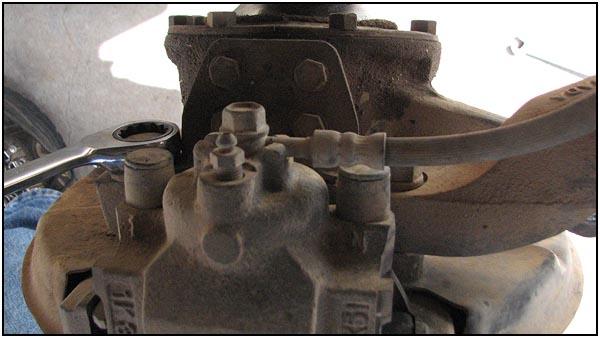
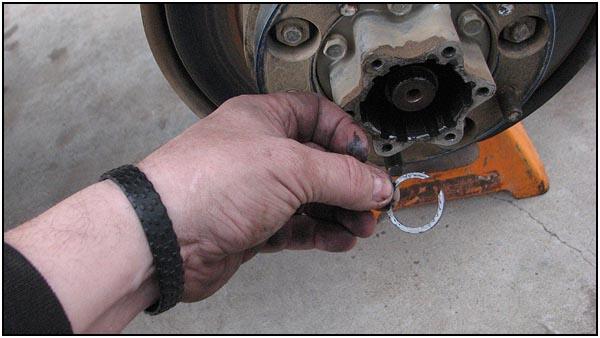  This
'C' clip will fit onto the new stub shaft, so keep it handy. Next, to make
it easy, remove the tie rod. This rig is outfitted with one of the original
'high steer' conversions, so the additional arm in the picture to the right
attaches to the drag link. This
'C' clip will fit onto the new stub shaft, so keep it handy. Next, to make
it easy, remove the tie rod. This rig is outfitted with one of the original
'high steer' conversions, so the additional arm in the picture to the right
attaches to the drag link. |
|||
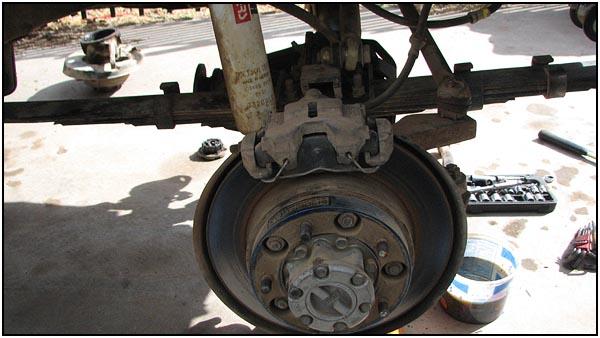
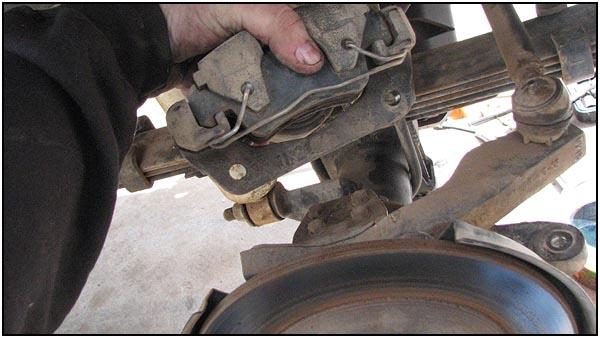  Next
comes the brake caliper. Remove it and push it out of the way. Next
comes the brake caliper. Remove it and push it out of the way. |
|||
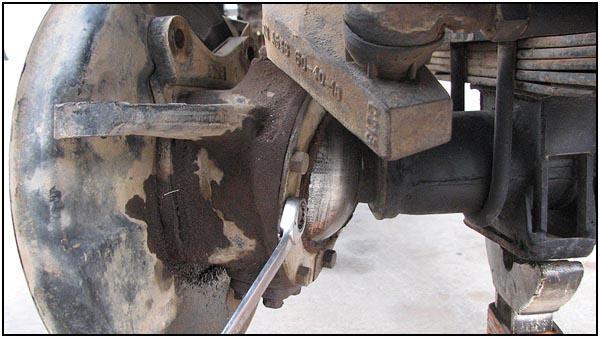
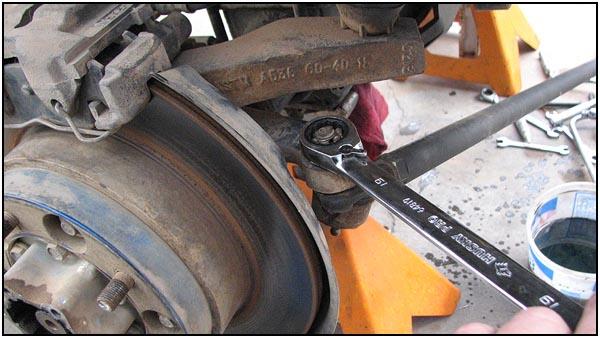
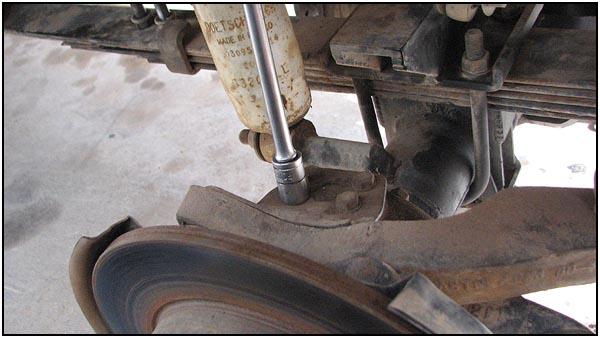  The
kingpins (top and bottom) are next. Pull the bolts but leave the kingpins in
place until you are ready to remove the knuckle. Again you can see the high
steer bracket, but ignore it if you still have stock steering. The
kingpins (top and bottom) are next. Pull the bolts but leave the kingpins in
place until you are ready to remove the knuckle. Again you can see the high
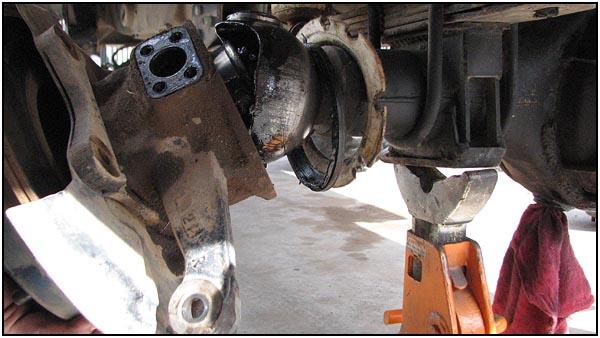
steer bracket, but ignore it if you still have stock steering.When removing the seal retainers that hold in the felts and rubber gasket, be careful not to damage them. Otherwise you might want to think about replacing them with new components... remember this is a twenty year old vehicle. |
|||
|
|
|||
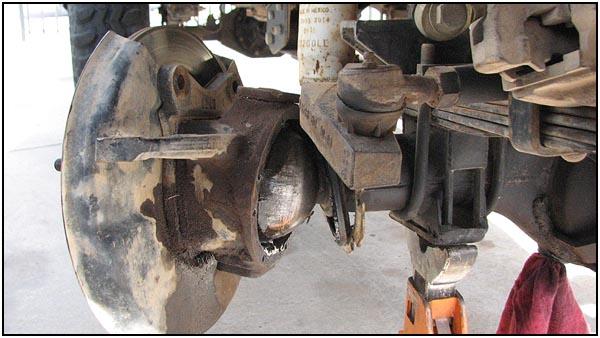
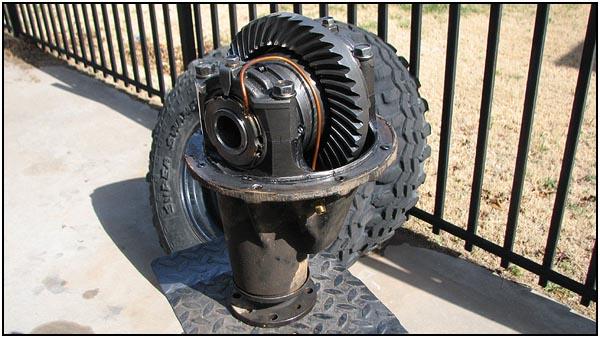
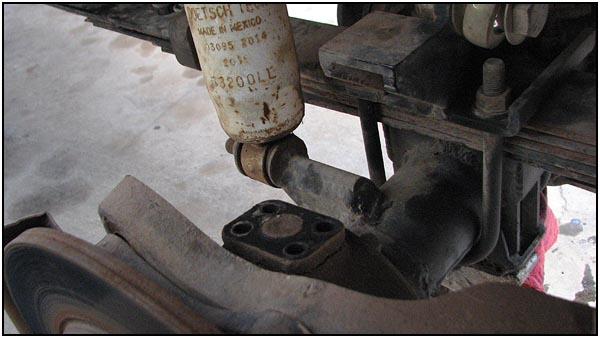
| Once the seals are released, the knuckle is ready to be removed from the axle housing. The kingpins are removed while the knuckle is supported and pulled from the housing letting the outer stub slide out. Then the stub shaft/birfield and inner shaft are pulled from the housing. Do it gently and you may not have to replace the seal inside the end of the housing. | |||
    |
|||
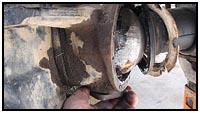
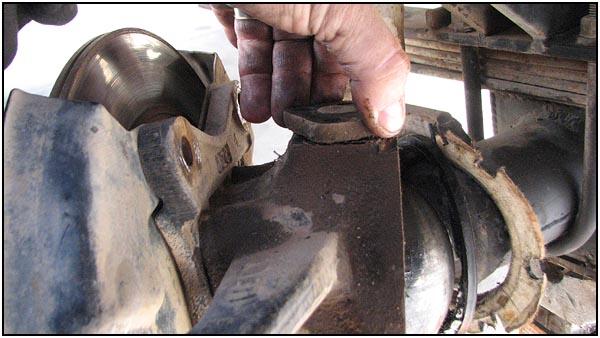
 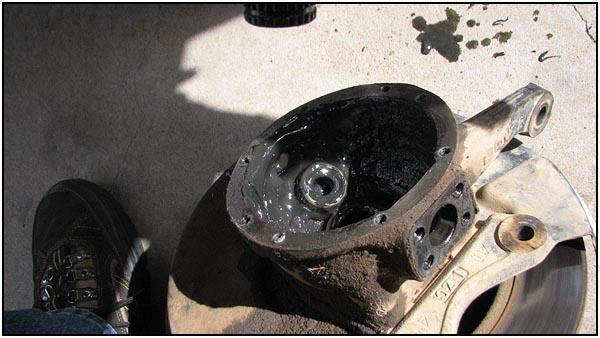 If
you find a bunch of sludge in the knuckle, you should consider new seals as
this is from the gear oil in the housing leaking into the grease in the
knuckle and making an oily mud mixture that doesn't do anyone any good. If
you find a bunch of sludge in the knuckle, you should consider new seals as
this is from the gear oil in the housing leaking into the grease in the
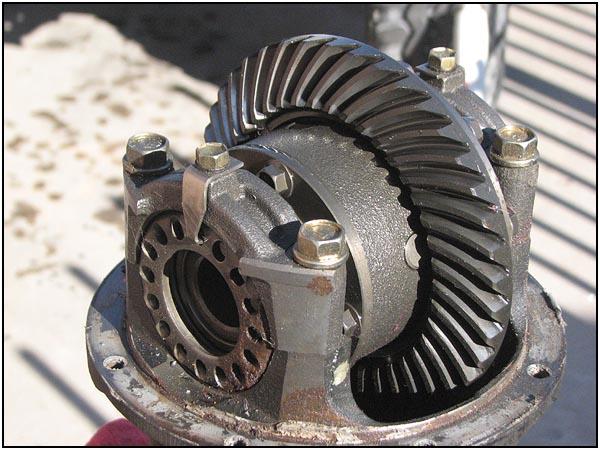
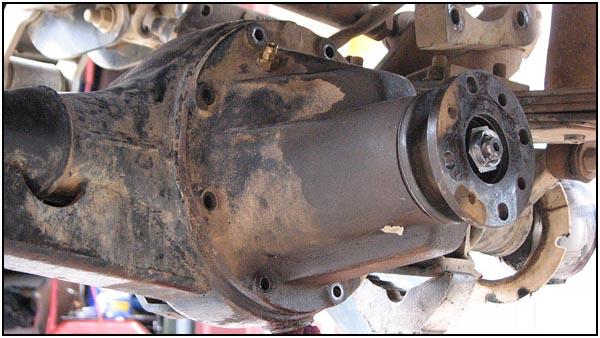
knuckle and making an oily mud mixture that doesn't do anyone any good.After removing the knuckles from both sides, it is time to remove the differential from the axle housing. |
|||
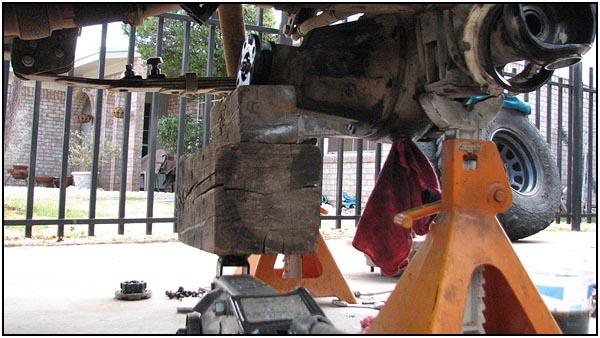 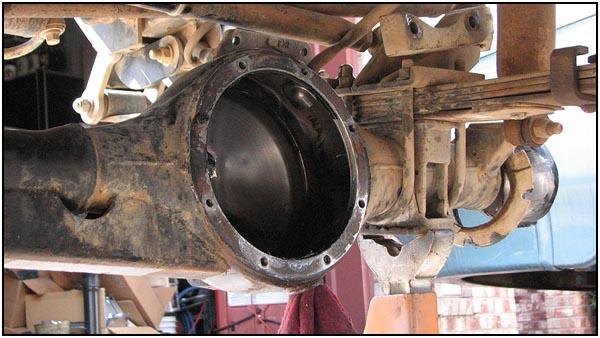 Sometimes
removing the differential can be a very sticky, stubborn problem. You can
break the seal if you use a floor jack to force the front of the
differential up until the seal gives way. Be careful you don't lift the axle
housing off of the jack stands or you could have a problem as the vehicle
could slide off and hurt you badly. Sometimes
removing the differential can be a very sticky, stubborn problem. You can
break the seal if you use a floor jack to force the front of the
differential up until the seal gives way. Be careful you don't lift the axle
housing off of the jack stands or you could have a problem as the vehicle
could slide off and hurt you badly. |
|||
|
To see a |
|||
|
To see an |
|||
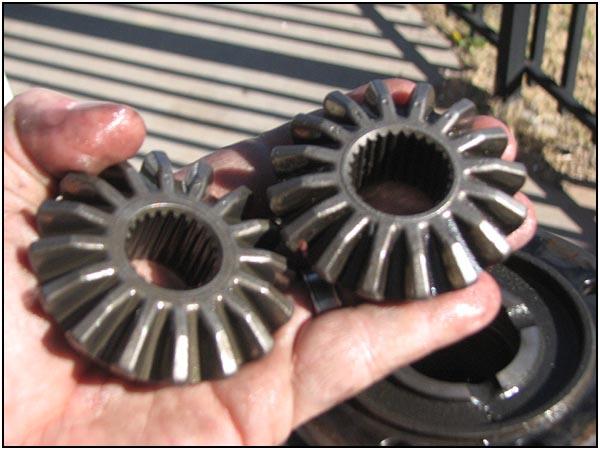
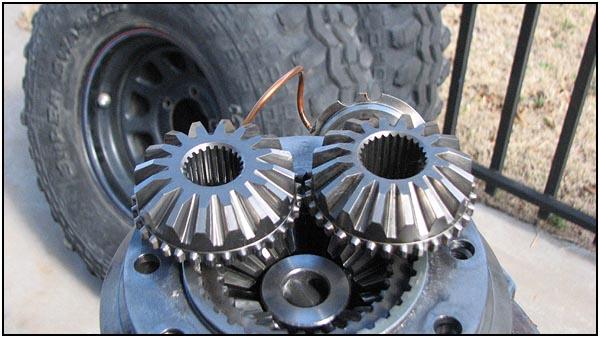
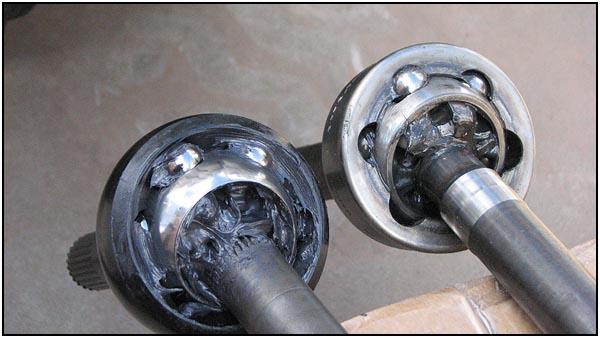
  Once
the sidegears have been swapped out in the differential we can start looking
at the new shafts. Just looking at the side by side comparison should show
you that they are beefy. The stock components look like toys (and I don't
mean Toyota's!). Once
the sidegears have been swapped out in the differential we can start looking
at the new shafts. Just looking at the side by side comparison should show
you that they are beefy. The stock components look like toys (and I don't
mean Toyota's!). |
|||
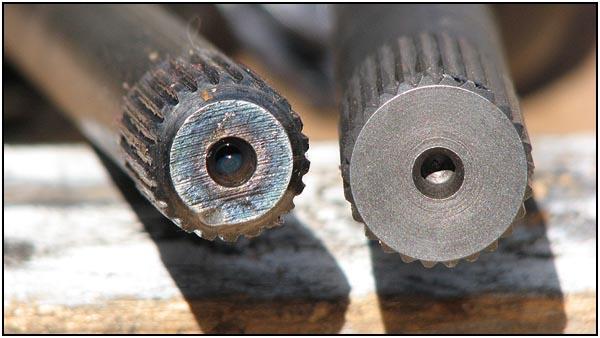
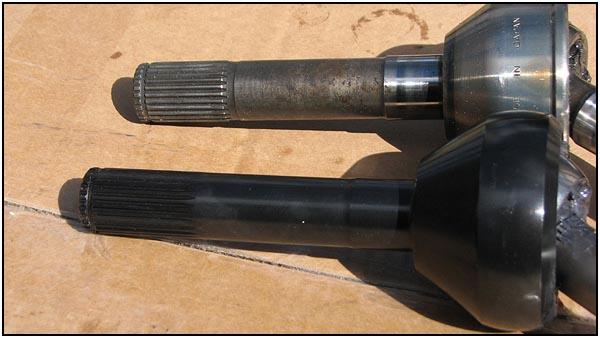
 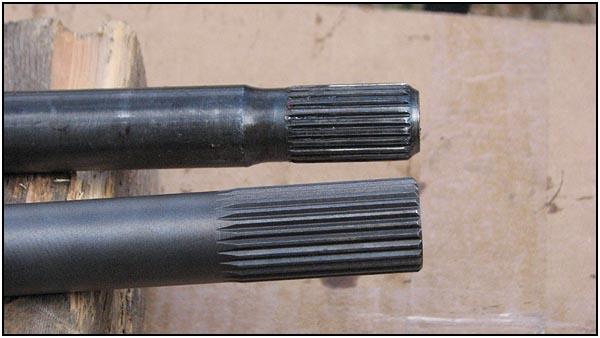 You
can see how the factory components 'neck down' to the size required to fit
the smaller 22 spline opening. You can also see how the surface is built up
to meet the sealing surface. The new axle shafts just start big and stay big
- all the way across. You
can see how the factory components 'neck down' to the size required to fit
the smaller 22 spline opening. You can also see how the surface is built up
to meet the sealing surface. The new axle shafts just start big and stay big
- all the way across. |
|||
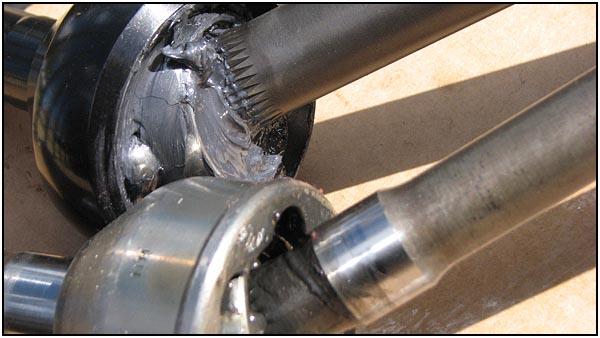
  The
birfield is also a new unit. Designed stronger and larger than stock, it
still has the same articulation capability. The
birfield is also a new unit. Designed stronger and larger than stock, it
still has the same articulation capability. |
|||
 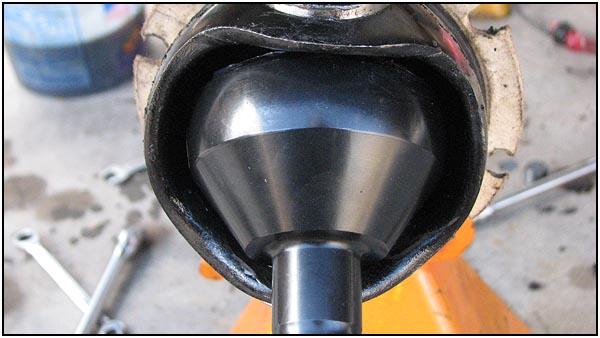 The
stub shaft is also a stronger design. After seeing the black finish, we call
it the 'Darth Vader' of birfields! The
stub shaft is also a stronger design. After seeing the black finish, we call
it the 'Darth Vader' of birfields! |
|||
|
|
|||
|
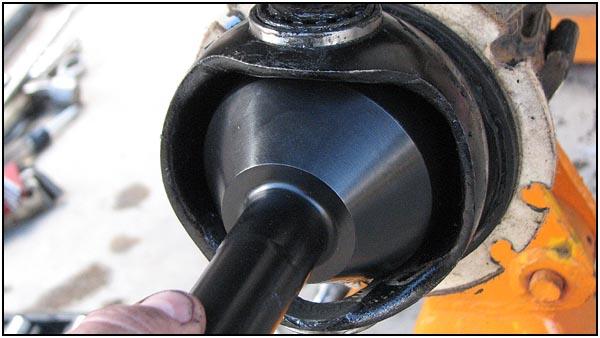
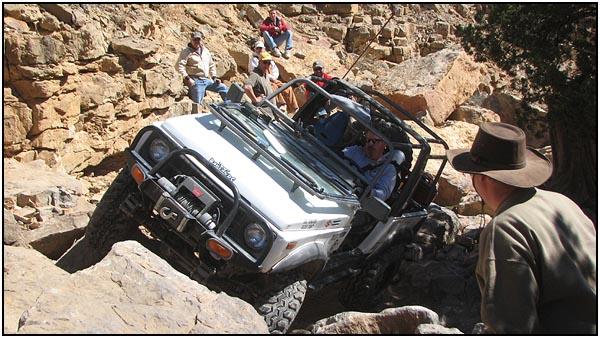
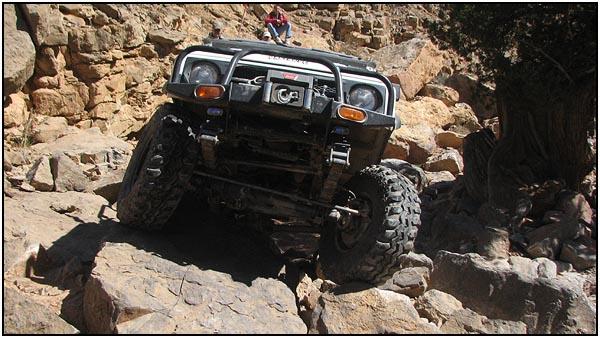
Although the new birfield design seems to be a very tight fit, it will still
fit with no additional clearancing of the inner knuckle. They were also
thoughtful enough to retain the factory tapped hole at the end that you can
use to pull the stub out far enough to install that 'C' clip we saw up at
the top of the article. You can use a kingpin bolt as a handle. My first trip out for testing was to explore the trails north of Las Cruces, New Mexico during the 2008 Chile Challenge. I have broken many front axle shafts in these canyons, but this trip I found that any concerns I had before were gone. I could wheel the lines I wanted without worrying about putting too much stress on the equipment when the wheels were turned. Great going Spidertrax! |
|||
|
|
|||
 Source: Source:
Spidertrax Inc. Phone Fax |
|||
08/22/22 14:03:57