
|
Rock
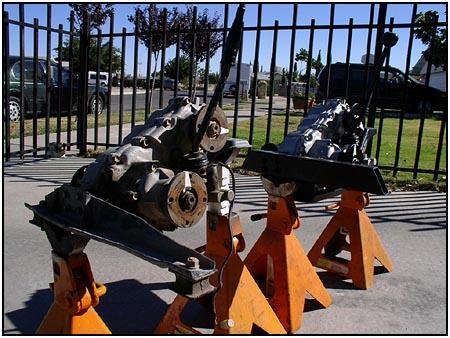
Monster 6.4:1 Transfer Case Gears with Bill Johnston Going from stock transfer case gears to something lower can be as easy or as hard as you want to make it. You can get a 'kit' from an aftermarket manufacturer/distributor that includes gears, seals and bearings or you can just buy a complete case to swap out. The decision is easy to make, because if you have a Factory Service Manual (also available from an aftermarket manufacturer/distributor), the proper tools and the mechanical knowledge, you will save some money. But if you want to just bolt in the goods and go wheeling you can do that to. But first things first. So you want to figure out what gears you have without pulling splitting the case? If you are not the first owner of your Zook, then here is how you can tell what you have without taking the previous owners word for it. Here is an easy way to check them out. This can be done with the case still in the vehicle, but as long as we were swapping out components we thought we would show you a clearer picture with the case on a stand. |
||
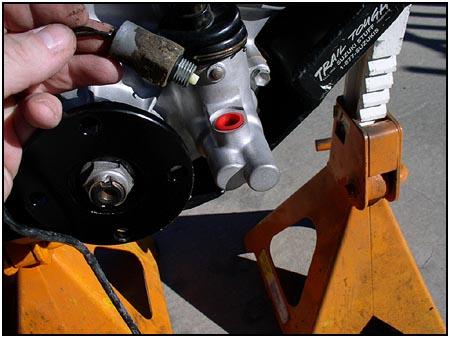
 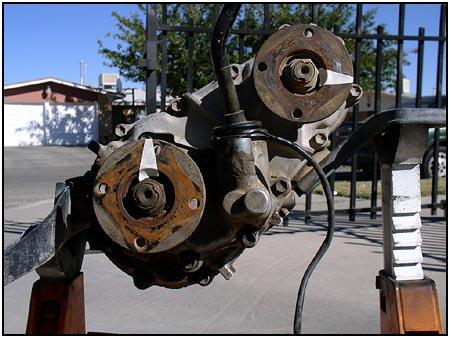 If
the case is still in the vehicle you can put the rear axle on jack stands
or just remove the driveshaft from the rear output flange so it will turn
while parked. We have added some small arrows to the flanges to show the
start and finish points a little easier. You can see the front output
flange that connects the case to the front axle the lower left side of the
picture. The Flange on the upper right portion of the picture is the input
flange that connects the case to the transmission (through the jack
shaft). Both flange arrows are pointing straight up, and your goal is to
make one full revolution on the output flange (lower left). Turn the input
flange clockwise and count the revolutions. The stock transfer case ratio
for 4Low is 2.268:1 so you can see that after two revolutions the flange
still has to go a little more than a quarter turn to bring the output
flange arrow back to the 'straight up' position. If
the case is still in the vehicle you can put the rear axle on jack stands
or just remove the driveshaft from the rear output flange so it will turn
while parked. We have added some small arrows to the flanges to show the
start and finish points a little easier. You can see the front output
flange that connects the case to the front axle the lower left side of the
picture. The Flange on the upper right portion of the picture is the input
flange that connects the case to the transmission (through the jack
shaft). Both flange arrows are pointing straight up, and your goal is to
make one full revolution on the output flange (lower left). Turn the input
flange clockwise and count the revolutions. The stock transfer case ratio
for 4Low is 2.268:1 so you can see that after two revolutions the flange
still has to go a little more than a quarter turn to bring the output
flange arrow back to the 'straight up' position. |
||
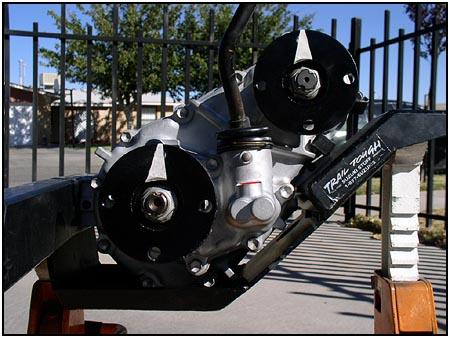  Checking
out the new case we are installing shows that the input flange must rotate
about 4/10ths past the sixth rotation to bring the output flange back to
center. This shows that we got just what we ordered. This case is equipped
with the new Trail Tough 6.4:1 Rock Monster Gears. These are one
piece gears made by the makers of the original Suzuki gears from
Japan. Checking
out the new case we are installing shows that the input flange must rotate
about 4/10ths past the sixth rotation to bring the output flange back to
center. This shows that we got just what we ordered. This case is equipped
with the new Trail Tough 6.4:1 Rock Monster Gears. These are one
piece gears made by the makers of the original Suzuki gears from
Japan. |
||
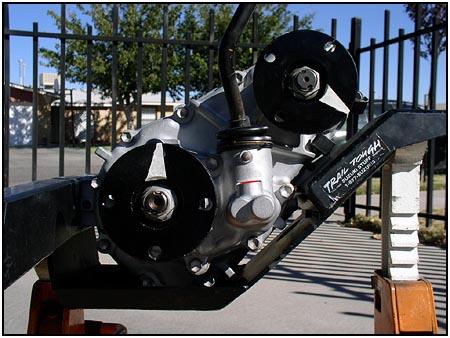
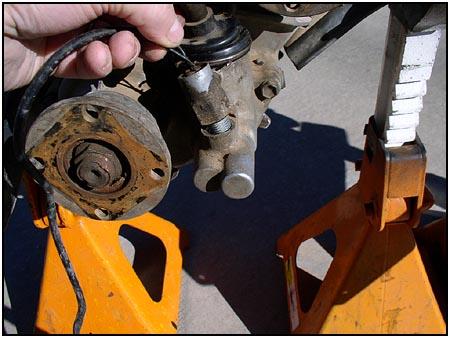  When
ordering the complete Trail Tough case, you still need to move a couple of
items over from the old case. Here you can see where we moved the 4WD
light sensor from one case to the other. Also note that Trail Tough ships
their case with a plastic plug that has to be removed before you can
install the sensor. This plug not only keeps foreign material out of the
case, but it also keeps the ball bearing in place so it doesn't get lost
in shipping. When
ordering the complete Trail Tough case, you still need to move a couple of
items over from the old case. Here you can see where we moved the 4WD
light sensor from one case to the other. Also note that Trail Tough ships
their case with a plastic plug that has to be removed before you can
install the sensor. This plug not only keeps foreign material out of the
case, but it also keeps the ball bearing in place so it doesn't get lost
in shipping. |
||
  Also
notice that in these pictures you see a shifter handle in each case. The
newly rebuilt case does not come with one, you must transfer your shifter
from the stock case. We put an extra shifter in place to make it easier to
shift into gear for this demonstration. Also
notice that in these pictures you see a shifter handle in each case. The
newly rebuilt case does not come with one, you must transfer your shifter
from the stock case. We put an extra shifter in place to make it easier to
shift into gear for this demonstration. |
||
| On the street, the transfer case gears didn't make any sound that we could hear. They were nice and quiet. On the trail we only heard the gears when we were in 4Low at high RPM. But that sound is normal. Overall performance - Awesome! Trail photos will be coming soon. | ||
| Source:
Trail Tough Products |
||
08/22/22 14:05:03