
|
Super Hub Bolt Upgrade Kit With Bill Johnston
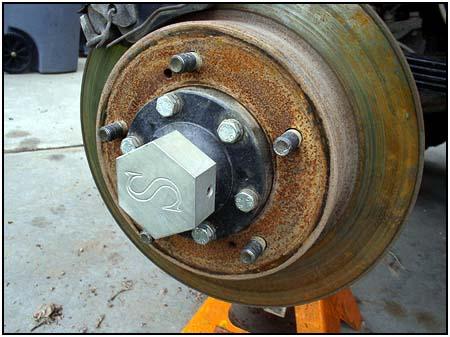
Ok, so the hub on the right doesn't seem very stock looking. But believe me, it's got legit Suzuki roots. We just added some bling we built ourselves and combined it with some muscle from Spidertrax. |
||
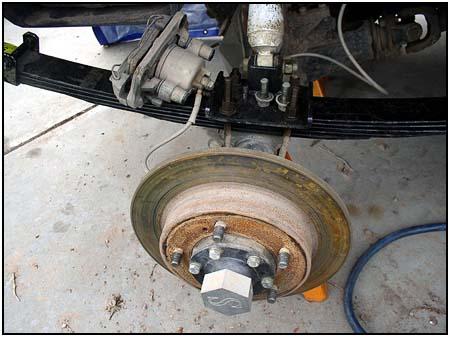
  Now
the hub on the left looks a bit more like you would expect on a
Zook, and this upgrade works just as well on the stock hubs, but we
had problems with our beefed up back axle that was outfitted with a
Spidertrax Full Floater Sidewinder. We kept blowing out stock
hub bolts and then aftermarket replacements. Now
the hub on the left looks a bit more like you would expect on a
Zook, and this upgrade works just as well on the stock hubs, but we
had problems with our beefed up back axle that was outfitted with a
Spidertrax Full Floater Sidewinder. We kept blowing out stock
hub bolts and then aftermarket replacements. |
||
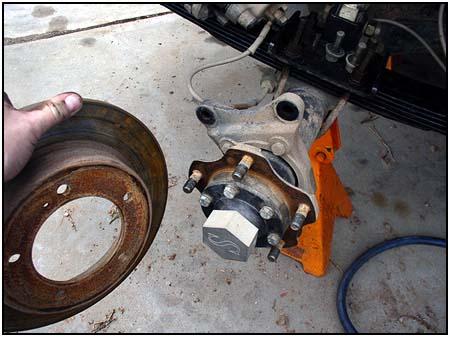
 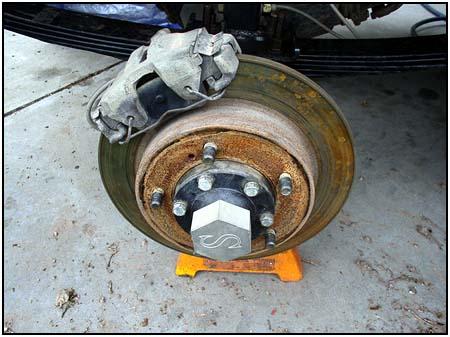 Although
this looks similar to a front setup, we set the rear up with front
disc brake calipers. That is why we know it will work up front just
as well. We will probably do the front next to keep everything
consistent. The first thing to do was to remove the brake calipers. Although
this looks similar to a front setup, we set the rear up with front
disc brake calipers. That is why we know it will work up front just
as well. We will probably do the front next to keep everything
consistent. The first thing to do was to remove the brake calipers. |
||
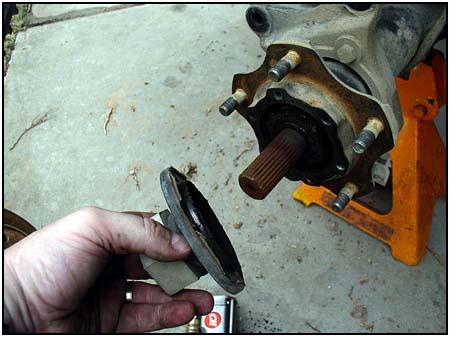
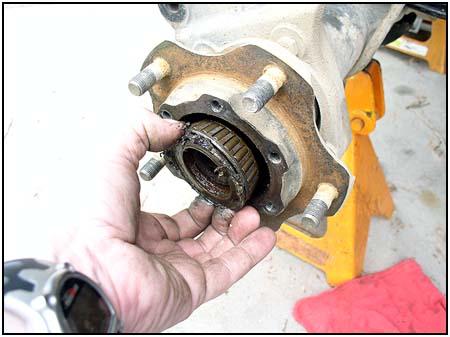
  After
removing the brake rotor, we removed the aftermarket bolts and saw
just how trashed they were. And these bolts were the ones that
survived! The bolts have a limited surface in which to 'grab' onto
the threads in the housing. There just isn't enough 'grab' to keep
the bolts from vibrating loose, even with loc-tite. After
removing the brake rotor, we removed the aftermarket bolts and saw
just how trashed they were. And these bolts were the ones that
survived! The bolts have a limited surface in which to 'grab' onto
the threads in the housing. There just isn't enough 'grab' to keep
the bolts from vibrating loose, even with loc-tite. |
||
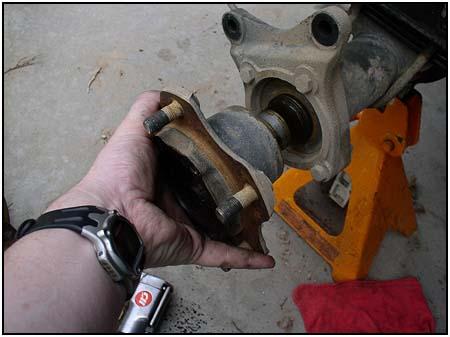
 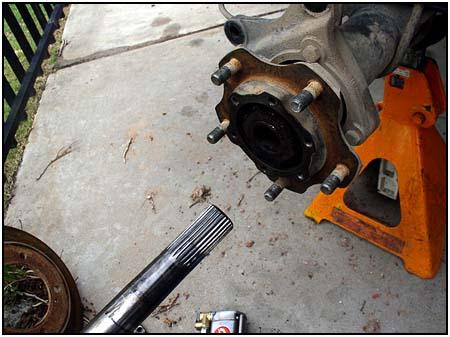 These
two pictures are where the front and rear look a bit different.
Because of the strength of the full floater, we used the drive
flange from the front of a four door sidekick that didn't come with
locking hubs. This took away the possibility of blowing a rear hub
under power. Then we pulled the axle shafts to get them out of the
way. These
two pictures are where the front and rear look a bit different.
Because of the strength of the full floater, we used the drive
flange from the front of a four door sidekick that didn't come with
locking hubs. This took away the possibility of blowing a rear hub
under power. Then we pulled the axle shafts to get them out of the
way. |
||
    |
||
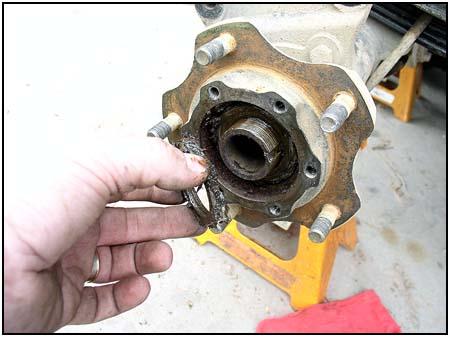
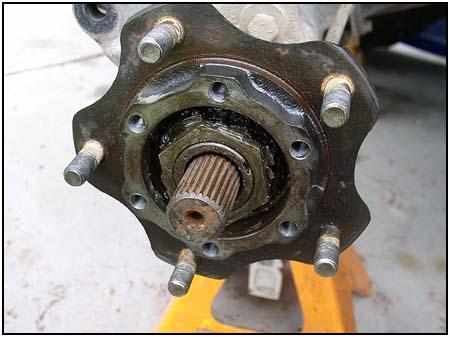
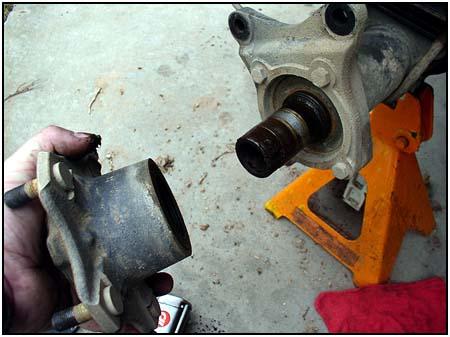  We
needed to remove the wheel hub so that we could work on it easier.
Work on it? Yup. If we are going to use larger hub bolts, we
definitely need to increase the size of the bolt holes. If the
bearings looked worn, this would be the time to take care of it. We
needed to remove the wheel hub so that we could work on it easier.
Work on it? Yup. If we are going to use larger hub bolts, we
definitely need to increase the size of the bolt holes. If the
bearings looked worn, this would be the time to take care of it. |
||
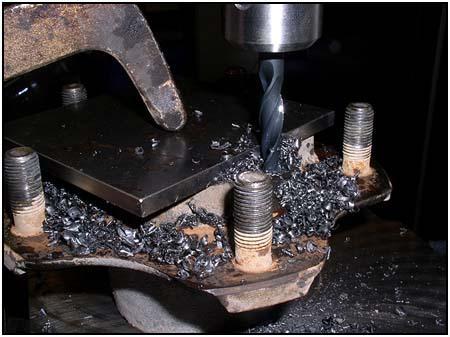
  We
then took the drive flanges and the wheel hubs over to the drill
press to make sure the changes were done with the least amount of
problems. This is not a job for hand tools. While the drive flange
isn't really critical, you still want the bolt to fit perfectly so
that there is no 'wobble room'. We used the 3/8" drill bit and
cutting oil that Spidertrax included in the kit. We
then took the drive flanges and the wheel hubs over to the drill
press to make sure the changes were done with the least amount of
problems. This is not a job for hand tools. While the drive flange
isn't really critical, you still want the bolt to fit perfectly so
that there is no 'wobble room'. We used the 3/8" drill bit and
cutting oil that Spidertrax included in the kit. |
||
  Next,
we changed out the drill bit for the 'Q' bit from the kit. Using the
cutting oil again, we drilled out the threads in the wheel hubs. The
new bolts are not only larger in diameter, they are also longer.
This adds 81.4% more thread engagement and 41.8% more cross
sectional area per bolt. Next,
we changed out the drill bit for the 'Q' bit from the kit. Using the
cutting oil again, we drilled out the threads in the wheel hubs. The
new bolts are not only larger in diameter, they are also longer.
This adds 81.4% more thread engagement and 41.8% more cross
sectional area per bolt. |
||
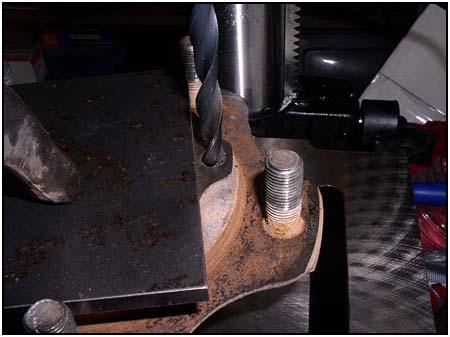
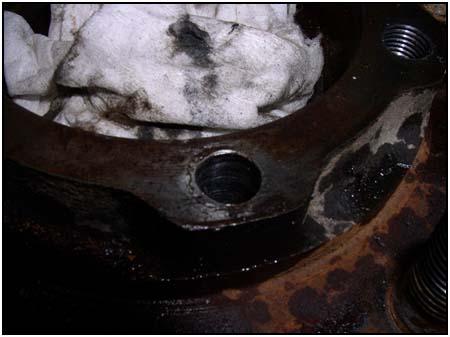
  The
bolt is about a half inch longer, and would bottom out at the stock
depth. This means that it would be better if you just plunged
straight through and out the back of the hub. Just a little pressure
and some more cutting oil will let the new drill bit cut through
like butter. The back side of the hub is not a flat surface, so take
your time and don't force the drill. Be patient. The
bolt is about a half inch longer, and would bottom out at the stock
depth. This means that it would be better if you just plunged
straight through and out the back of the hub. Just a little pressure
and some more cutting oil will let the new drill bit cut through
like butter. The back side of the hub is not a flat surface, so take
your time and don't force the drill. Be patient. |
||
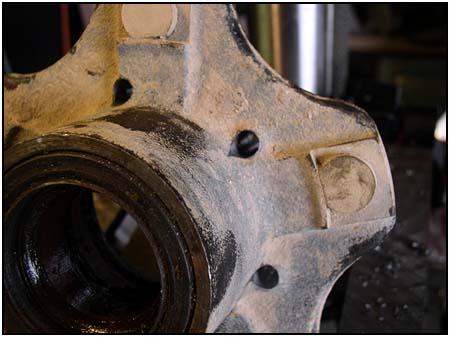
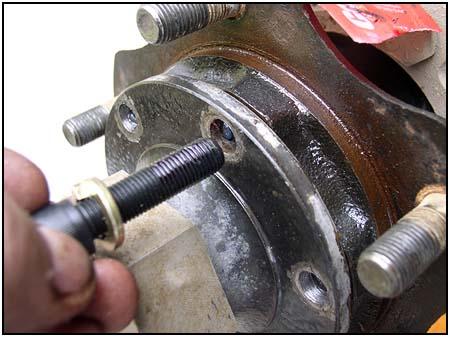
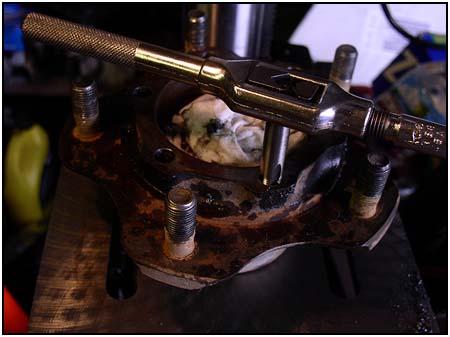  Here
is where a steady hand will make all the difference. We used the tap
from the kit to get the 3/8" fine thread ready for the new bolts.
Here is where we tapped deep, going all the way out the bottom of
the wheel hub. Here
is where a steady hand will make all the difference. We used the tap
from the kit to get the 3/8" fine thread ready for the new bolts.
Here is where we tapped deep, going all the way out the bottom of
the wheel hub. |
||
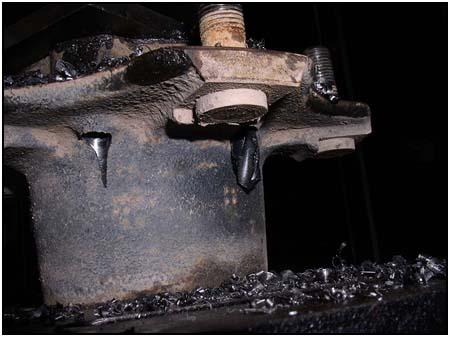
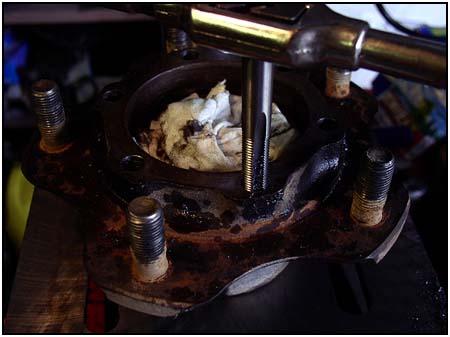
  You
will need to click though to see the detail in these two pictures,
but you can see the threads as they go all the way through. You
will need to click though to see the detail in these two pictures,
but you can see the threads as they go all the way through. |
||
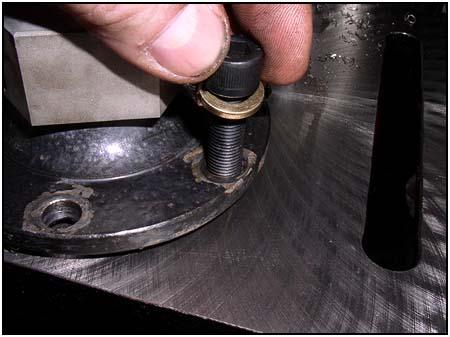
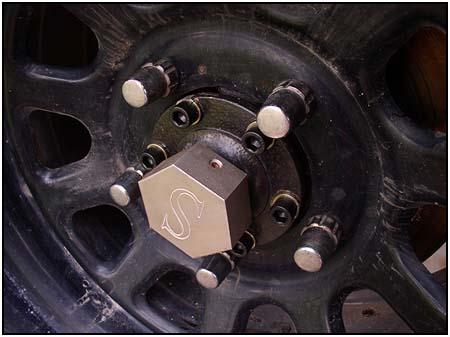
 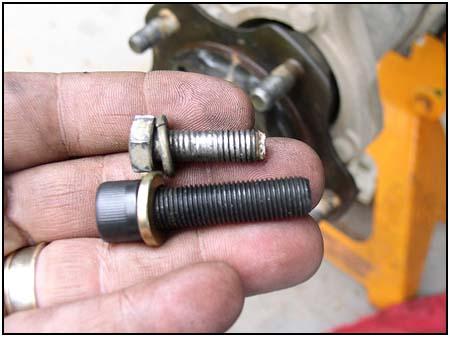 Once
everything is cleaned up and you are satisfied that there are no
metal shavings in or on the hubs, you can install the hubs back onto
the spindle. Once
everything is cleaned up and you are satisfied that there are no
metal shavings in or on the hubs, you can install the hubs back onto
the spindle.
You can also see on the right just how much larger the new bolts actually are. |
||
 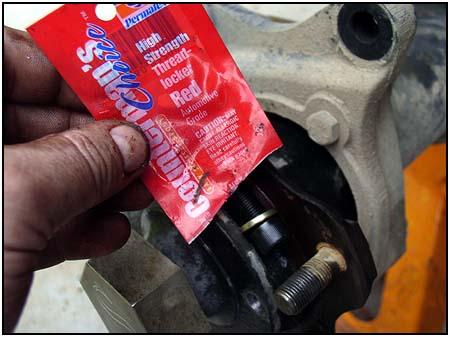 After
reassembling the hub, the bolts are prepared using the locktite that
is supplied with the kit. After
reassembling the hub, the bolts are prepared using the locktite that
is supplied with the kit. |
||
  Although
you are installing the bolts quickly so the thread locking compound
doesn't get sticky - It will still take about 24 hours to completely
cure. Although
you are installing the bolts quickly so the thread locking compound
doesn't get sticky - It will still take about 24 hours to completely
cure. |
||
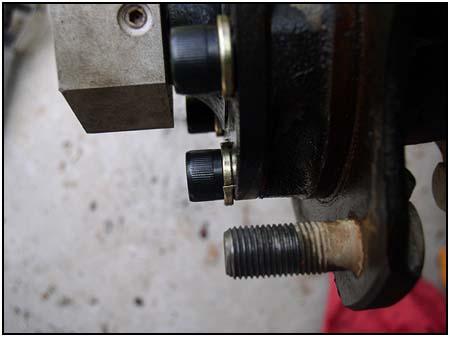  One
small glitch in the installation is the size of the lock-washers. As
you can see to the left, the washer sticks out beyond the edge of
the hub. The brake rotor and the wheel would never fit past this. So
a quick pass with the grinder leveled the washers with enough room. One
small glitch in the installation is the size of the lock-washers. As
you can see to the left, the washer sticks out beyond the edge of
the hub. The brake rotor and the wheel would never fit past this. So
a quick pass with the grinder leveled the washers with enough room. |
||
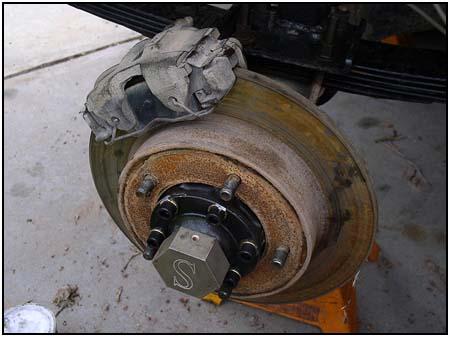  Final
re-assembly is quick and easy. We now have a stronger attachment to
our wheels! It also looks pretty trick. The Spidertrax site says
this can only be used on Warn Premium Hubs... I think not.
Just remember to plunge straight out the back of the hub for the
longer bolts! Final
re-assembly is quick and easy. We now have a stronger attachment to
our wheels! It also looks pretty trick. The Spidertrax site says
this can only be used on Warn Premium Hubs... I think not.
Just remember to plunge straight out the back of the hub for the
longer bolts!
Oh, to answer that question about the not-so-stock-looking cap on the hub flange, we had to come up with something to replace the press on caps the flange comes with... gotta admit it gets the discussions flowing after a hard day on the trail. |
||
|
Source:
Spidertrax Offroad |
08/22/22 14:06
