
|
Rebuilding your Transmission with Bill Johnston
|
||
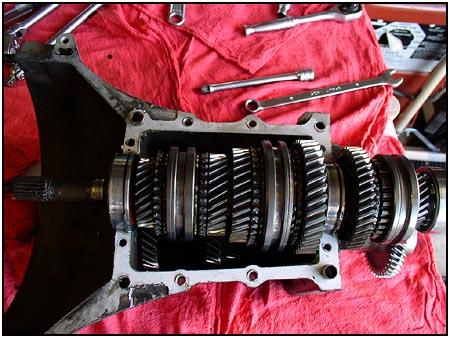
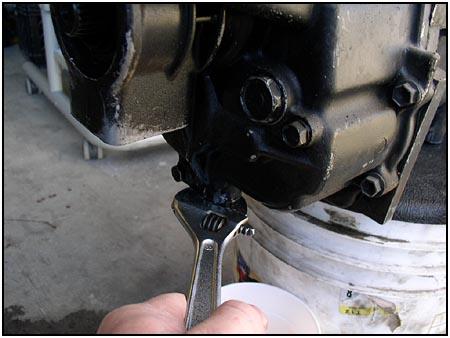  Everything
starts with simply draining the oil. Check the oil as it comes out for metal
shavings or flakes. Large metal chunks could be a bad thing depending on
where they came from. If the shifter locator pin has broken off in the past
it will eventually end up down here in the bottom of the case. If it got
wedged in the gearing on the way down, then you may have more to replace
than you planned on. Everything
starts with simply draining the oil. Check the oil as it comes out for metal
shavings or flakes. Large metal chunks could be a bad thing depending on
where they came from. If the shifter locator pin has broken off in the past
it will eventually end up down here in the bottom of the case. If it got
wedged in the gearing on the way down, then you may have more to replace
than you planned on. |
||
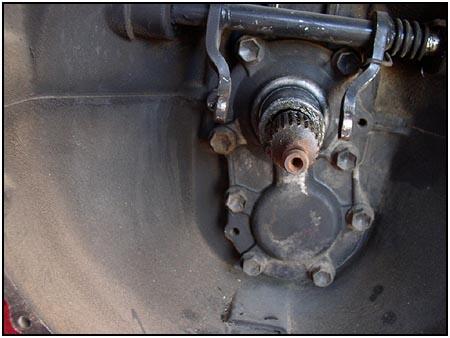
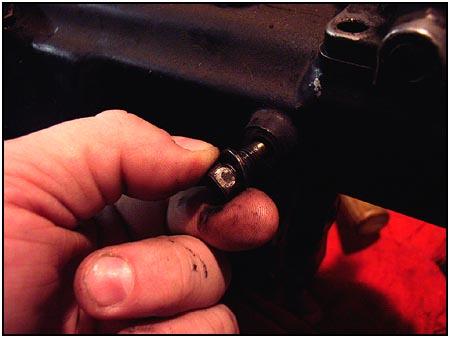 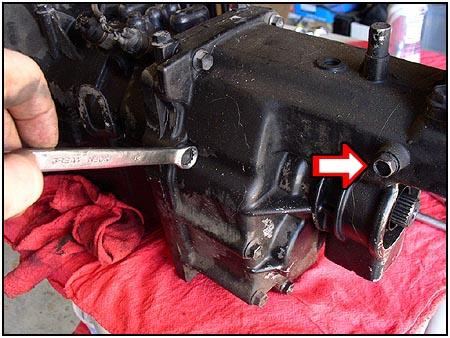 Next
it's time to go inside to check out the condition of the components. To do
that you can start at the back and remove all the bolts holding the tail
housing to the main section. Don't forget to remove the reverse shift rim
bolt. You can see the arrow pointing at it in the photo on the left. When
you remove it you will notice that it looks pretty unique... Don't
lose it, we will talk more about this later. Next
it's time to go inside to check out the condition of the components. To do
that you can start at the back and remove all the bolts holding the tail
housing to the main section. Don't forget to remove the reverse shift rim
bolt. You can see the arrow pointing at it in the photo on the left. When
you remove it you will notice that it looks pretty unique... Don't
lose it, we will talk more about this later. |
||
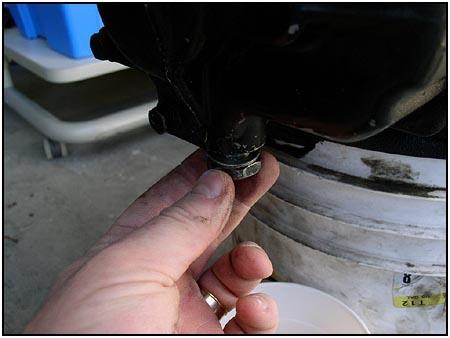
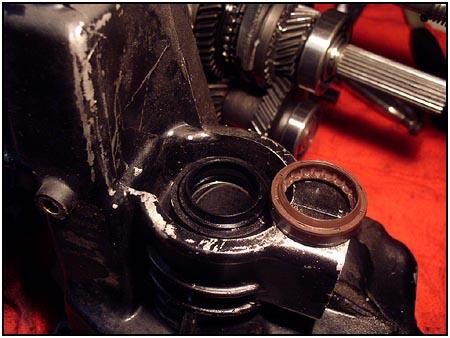  Separate
the tail shaft housing (extension case) from the main section and turn it up on end. Here
you see the tail shaft seal. You should take this time to replace it and
then clean out the case. Then set it aside for later. Separate
the tail shaft housing (extension case) from the main section and turn it up on end. Here
you see the tail shaft seal. You should take this time to replace it and
then clean out the case. Then set it aside for later. |
||
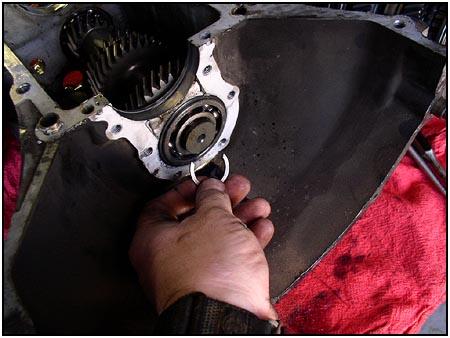
  Next
we go to the front of the transmission and remove the clutch release
bearing. Now you can see the 8 bolts that hold the input shaft bearing
retainer in place. You will also note that even when the bolts have been
removed, it is very difficult to remove the retainer. Next
we go to the front of the transmission and remove the clutch release
bearing. Now you can see the 8 bolts that hold the input shaft bearing
retainer in place. You will also note that even when the bolts have been
removed, it is very difficult to remove the retainer. |
||
  There
are three small bolt holes that look unused, these will help. Use 3
conventional 6mm bolts to 'pop' the retainer from its home. There
are three small bolt holes that look unused, these will help. Use 3
conventional 6mm bolts to 'pop' the retainer from its home. |
||
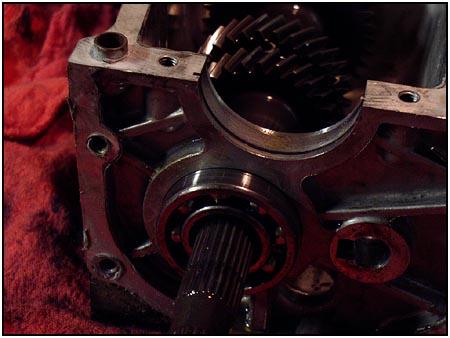
 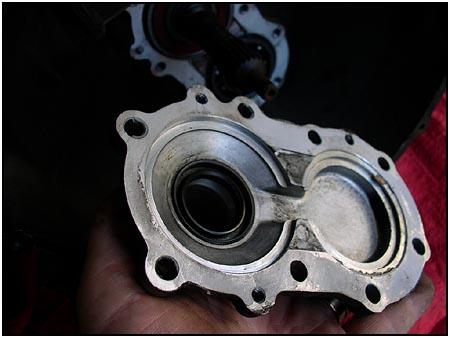 Here
is the input shaft seal. It is the other seal that needs to be replaced
during a rebuild. Replace it and then set it aside and turn your attention back to the
case. Here
is the input shaft seal. It is the other seal that needs to be replaced
during a rebuild. Replace it and then set it aside and turn your attention back to the
case.
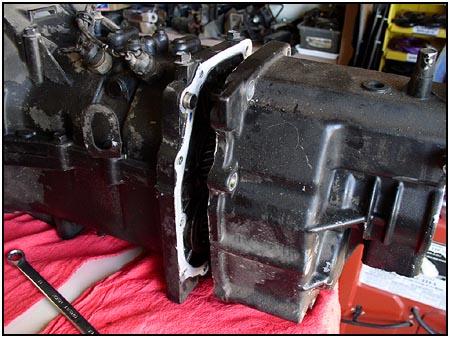
Next we remove all the bolts holding the upper and lower cases together. |
||
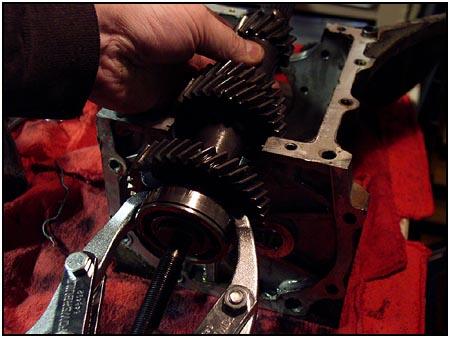
 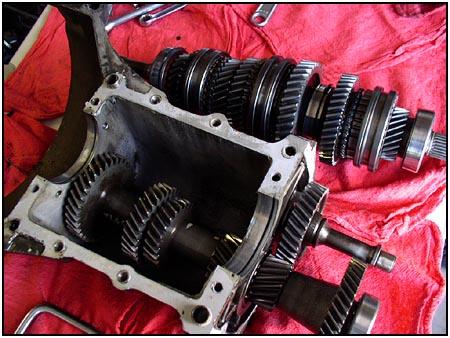 Removing
the upper case reveals the main shaft assembly. This can now be lifted
easily from the case and set aside for now. Removing
the upper case reveals the main shaft assembly. This can now be lifted
easily from the case and set aside for now. |
||
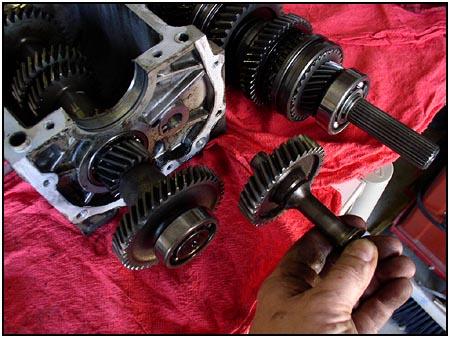  Back
at the lower case, you can easily remove the reverse gear shaft and idler gear.
Set it aside. Next we turn our attention to the countershaft. Back
at the lower case, you can easily remove the reverse gear shaft and idler gear.
Set it aside. Next we turn our attention to the countershaft. |
||
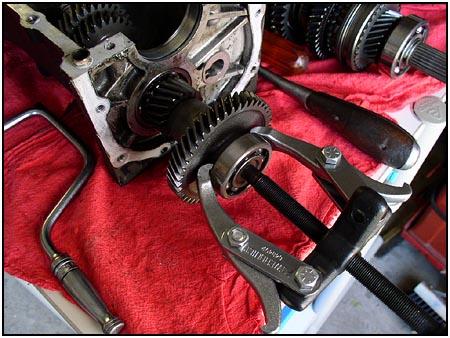  Using
a bearing puller, remove the countershaft rear bearing. This is the first of
three bearings you will replace on the countershaft. Using
a bearing puller, remove the countershaft rear bearing. This is the first of
three bearings you will replace on the countershaft. |
||
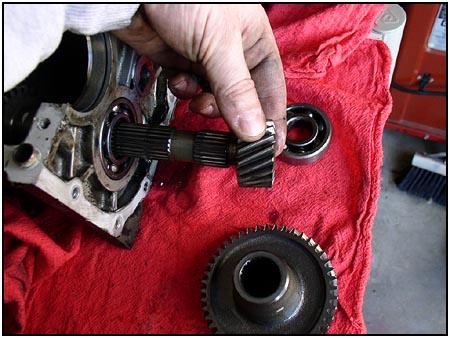  Being
careful not to damage the gear teeth, remove the countershaft 5th gear and
the countershaft reverse gear. They both just slide off of the countershaft. Being
careful not to damage the gear teeth, remove the countershaft 5th gear and
the countershaft reverse gear. They both just slide off of the countershaft. |
||
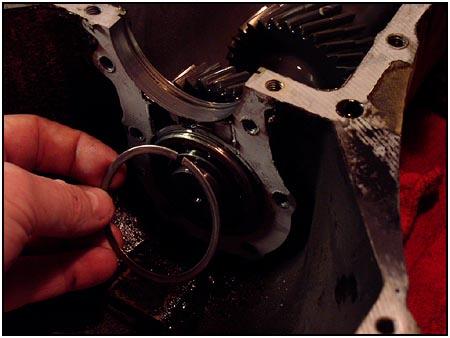  Now
we go to the opposite end of the countershaft and remove the c-clip from the
end of the countershaft, and the large c-clip that surrounds the
countershaft front bearing. Now
we go to the opposite end of the countershaft and remove the c-clip from the
end of the countershaft, and the large c-clip that surrounds the
countershaft front bearing. |
||
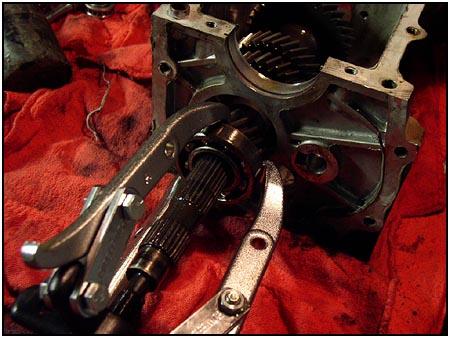
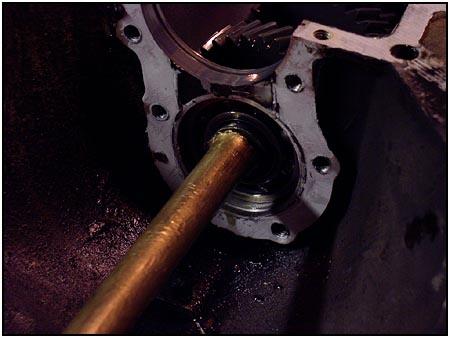 The
factory service manual says to press out the countershaft using a hydraulic
press. I accomplished the same thing using a brass drift and a small sledge
hammer. Do not use the hammer by itself, you WILL damage the countershaft
and you run the risk of cracking the case if you miss... The
factory service manual says to press out the countershaft using a hydraulic
press. I accomplished the same thing using a brass drift and a small sledge
hammer. Do not use the hammer by itself, you WILL damage the countershaft
and you run the risk of cracking the case if you miss... |
||
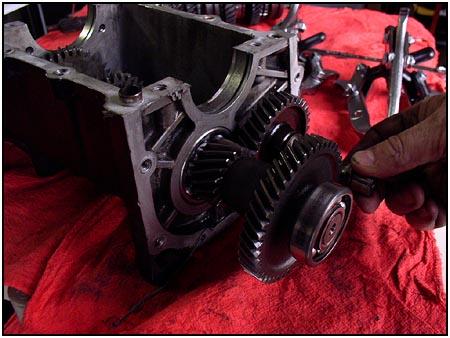
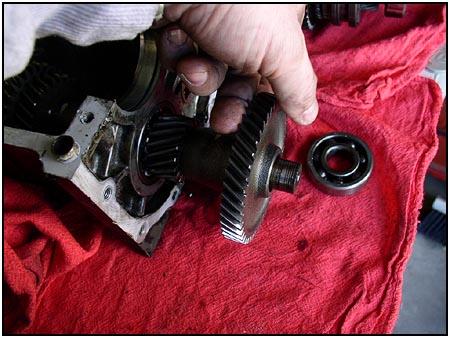
 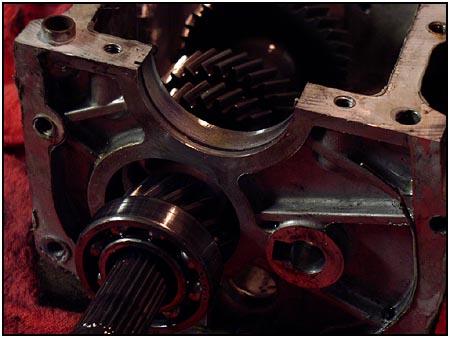 You
can see the progress at the other end as the other bearing slides out. Be
careful as the bearings leave the casting, do not damage the gear as it
enters the race. You
can see the progress at the other end as the other bearing slides out. Be
careful as the bearings leave the casting, do not damage the gear as it
enters the race. |
||
  Using
the bearing puller again, remove the bearing without damaging the gear
behind it. Using
the bearing puller again, remove the bearing without damaging the gear
behind it. |
||
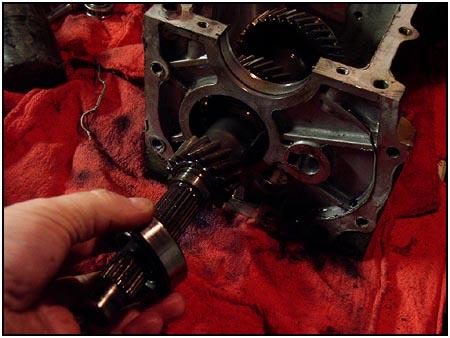
  You
can then pull the countershaft up and out of the lower case. Then remove the
remaining bearing with the bearing puller and then reverse what you just
did. Install new bearings and reassemble the countershaft and reinstall it
in the lower case. Set the whole assembly aside and turn your attention to
the main shaft again. You
can then pull the countershaft up and out of the lower case. Then remove the
remaining bearing with the bearing puller and then reverse what you just
did. Install new bearings and reassemble the countershaft and reinstall it
in the lower case. Set the whole assembly aside and turn your attention to
the main shaft again. |
||
08/22/22 14:14:00

