| Twin
Sticks Anyone? with Bill Johnston
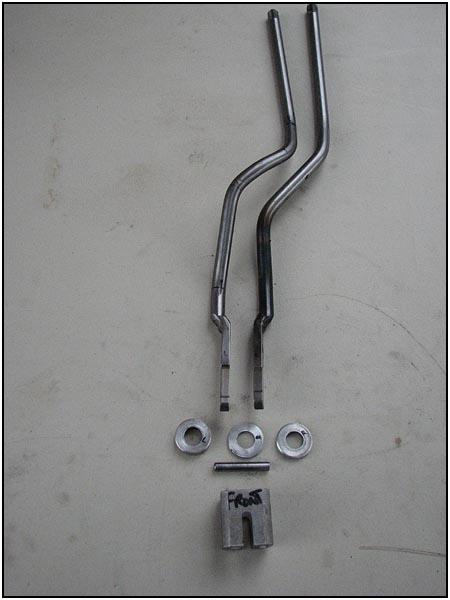
Rock 4XFabrication is providing a place for Troy Martin, designer and fabricator of the twin stick to sell his work. Scott Yach, owner of Rock 4X Fabrication has designed and produced a trick shifter boot assembly that works with it to make the whole thing viable for the shade tree mechanic to install. |
||
|
|
||
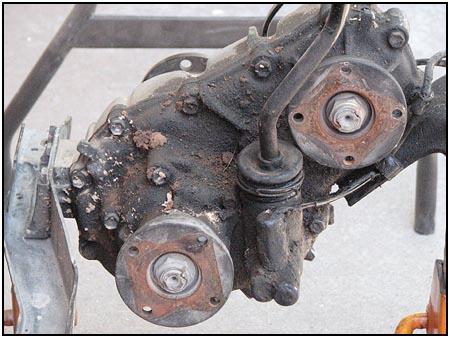
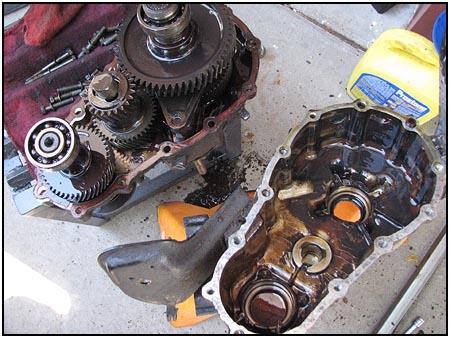
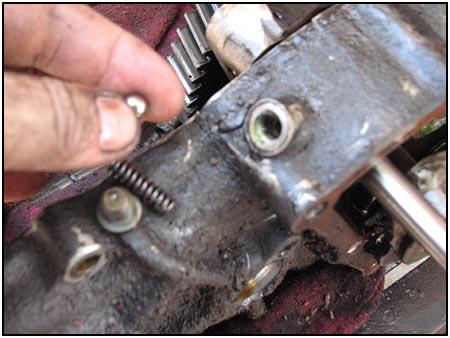
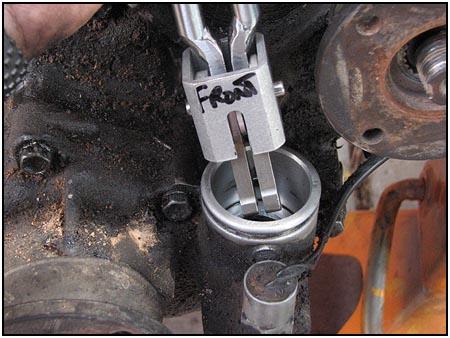
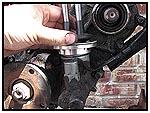
| But before we get to the fun stuff, one change has to happen within the stock transfer case to make it work. The stock shifter system is designed so that only one rod (inside the case) can move at a time. One moves a certain way, stops, and then the other can move. This is controlled by a small ball bearing (detent ball). That ball must be removed so that the two new sticks can move independently. The problem is the ball is in the center of the case, and can only be removed by pulling it apart. | ||
|
|
||
|
|
||
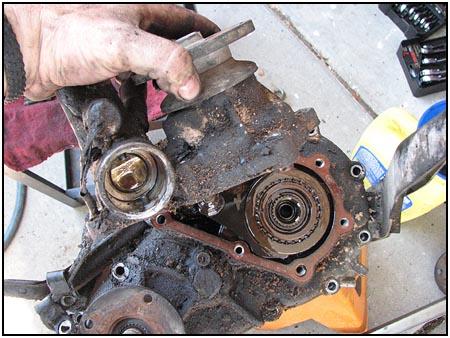
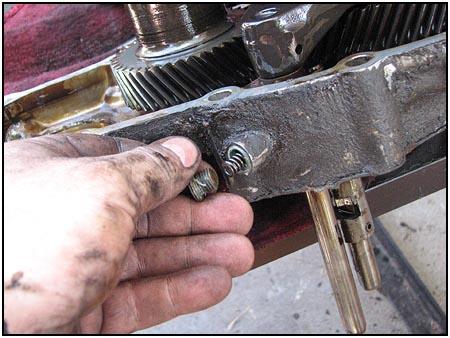
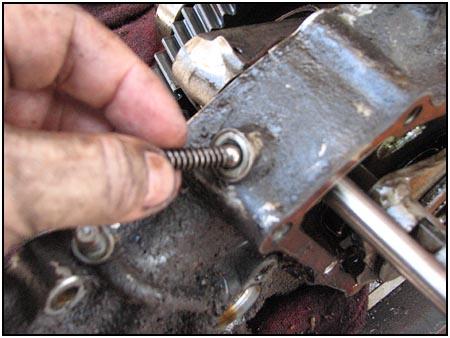
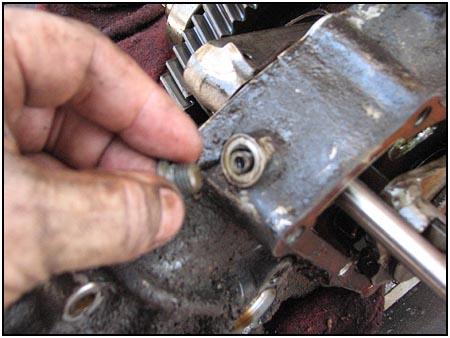
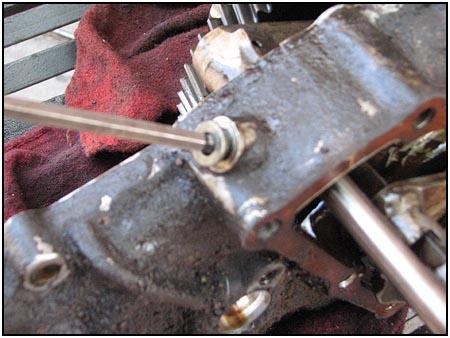
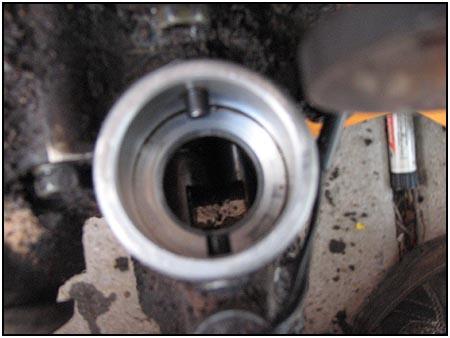
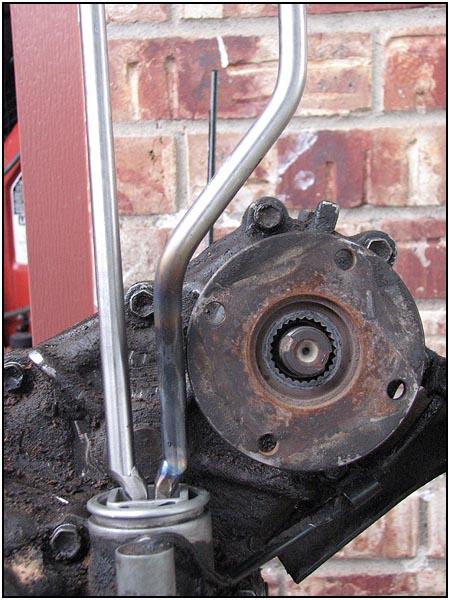
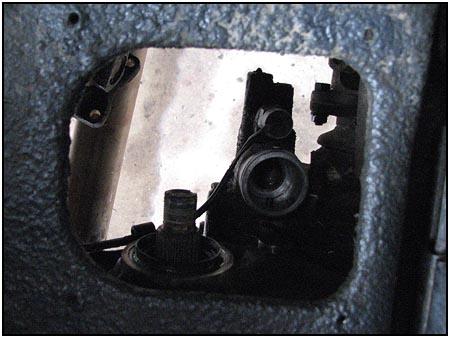
 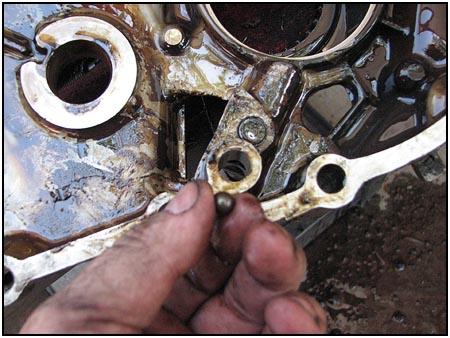 The
small track that the ball rides in is accessible from the outside of the
case, but the detent ball we need to remove actually lives between the rods.
So one of the rods must come out to let the ball free. Click on the photo to
the right and you can see the opening of the track down inside of the larger
hole where one of the shifter rods live. The
small track that the ball rides in is accessible from the outside of the
case, but the detent ball we need to remove actually lives between the rods.
So one of the rods must come out to let the ball free. Click on the photo to
the right and you can see the opening of the track down inside of the larger
hole where one of the shifter rods live. |
||
|
|
||
| If you are not comfortable rebuilding a transfer case, then you need to take it to someone that is. After you have done it a few times it seems easy, but for the rookie mechanic it can be a very daunting task. | ||
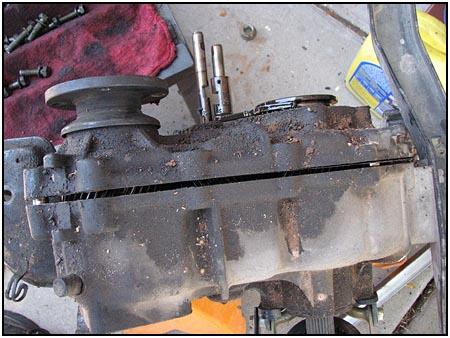
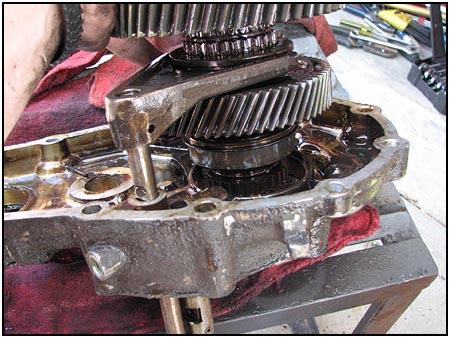
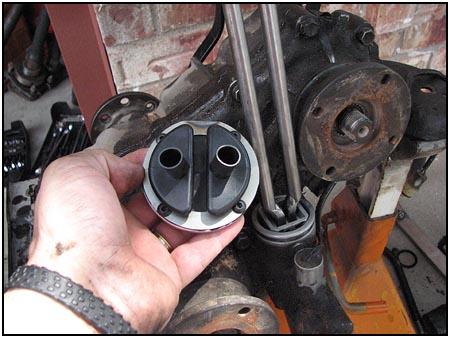
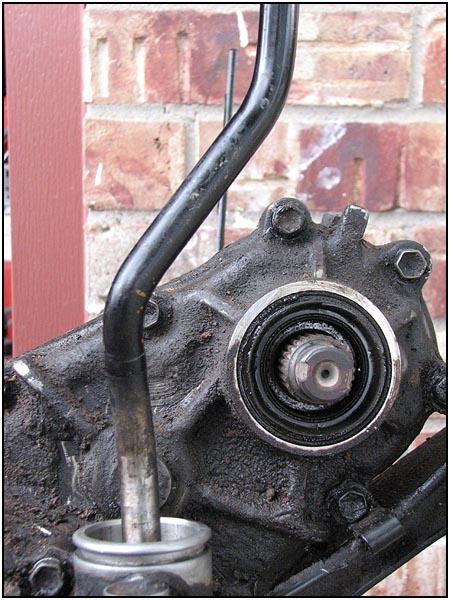
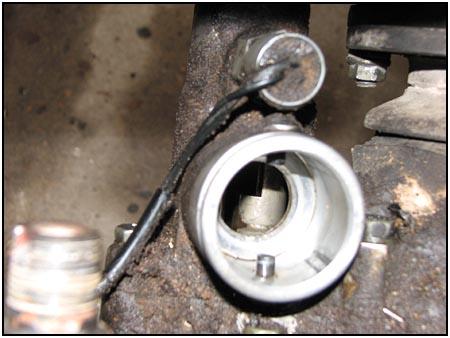
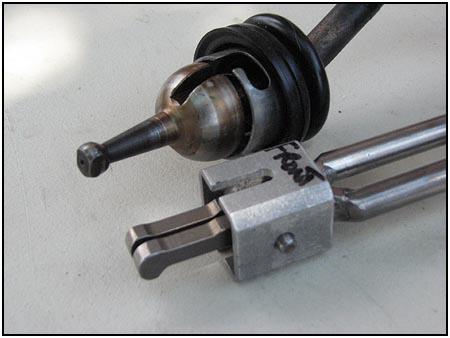  Once
that is all put back together again, we can concentrate on the 'sticks' at
hand. As you can see, the guts look a bit different. Instead of using a ball
and socket configuration (using a rubber/poly shifter sheet), the new
shifters us a single plane of movement. Each one moves forward and back
independently. Instead of moving back and forth between the two shifter rods
in the transfer case, each one has its own rod to manage. After removing the
old shifter sheet from the opening, the new component slides right into
place. Once
that is all put back together again, we can concentrate on the 'sticks' at
hand. As you can see, the guts look a bit different. Instead of using a ball
and socket configuration (using a rubber/poly shifter sheet), the new
shifters us a single plane of movement. Each one moves forward and back
independently. Instead of moving back and forth between the two shifter rods
in the transfer case, each one has its own rod to manage. After removing the
old shifter sheet from the opening, the new component slides right into
place. |
||
|
|
||
|
|
||
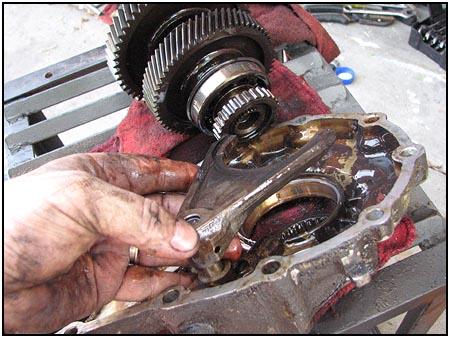
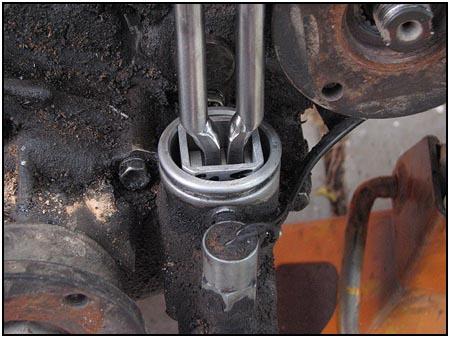
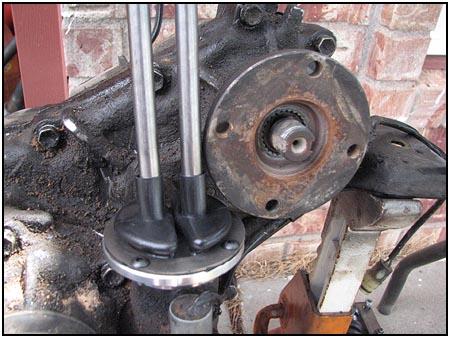
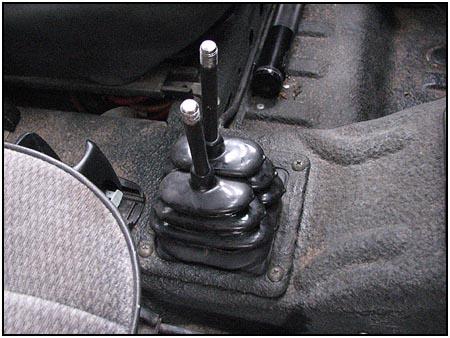
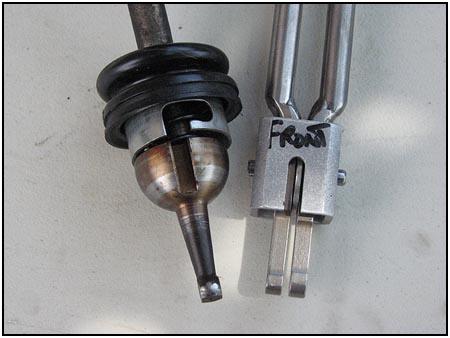
  The
boot assembly wil hold it in place, but you need to slide that assembly all
the way down the sticks... As you can see, the front output flange is in the
way and must be removed to install the boot securely. The next step is to
make the straight sticks curve around the other components like the stock
stick did. The
boot assembly wil hold it in place, but you need to slide that assembly all
the way down the sticks... As you can see, the front output flange is in the
way and must be removed to install the boot securely. The next step is to
make the straight sticks curve around the other components like the stock
stick did. |
||
|
|
||
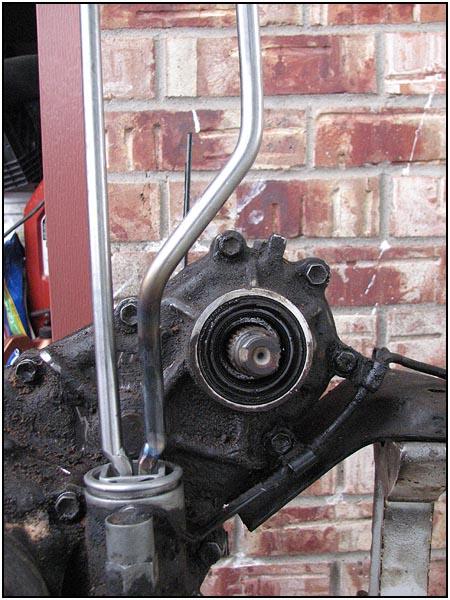
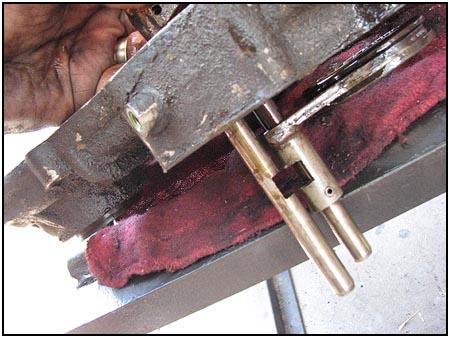
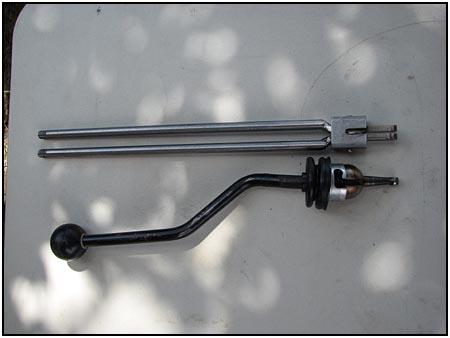
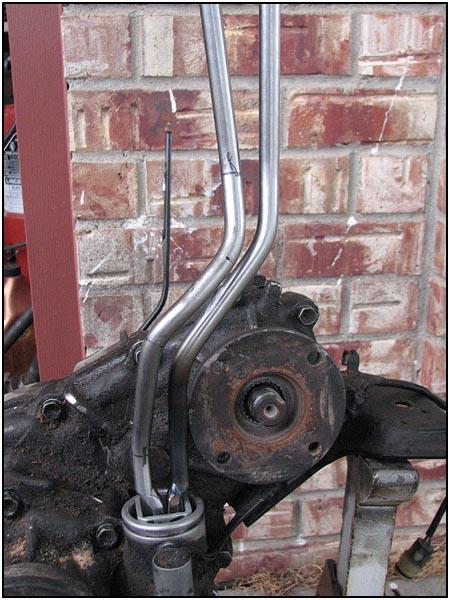  It
is a tight fit, but with the help of a press, or some heat (if you have a
torch) you can make it fit nicely. Make sure you leave some space so they
don't hit each other. It is also suggested that you space the top of the
sticks out just a little because you still have to add the shifter balls on
top when you are finished. It doesn't do you any good if they bump each
other and impede each others travel. It
is a tight fit, but with the help of a press, or some heat (if you have a
torch) you can make it fit nicely. Make sure you leave some space so they
don't hit each other. It is also suggested that you space the top of the
sticks out just a little because you still have to add the shifter balls on
top when you are finished. It doesn't do you any good if they bump each
other and impede each others travel. |
||
  The
final fitting and installation needs to be inside the vehicle to make sure
everything fits just right. It is also easier to install the transfer case
without the shifters, so it works out. Remember to leave the front output
flange off for now until the installation is complete. The
final fitting and installation needs to be inside the vehicle to make sure
everything fits just right. It is also easier to install the transfer case
without the shifters, so it works out. Remember to leave the front output
flange off for now until the installation is complete. |
||
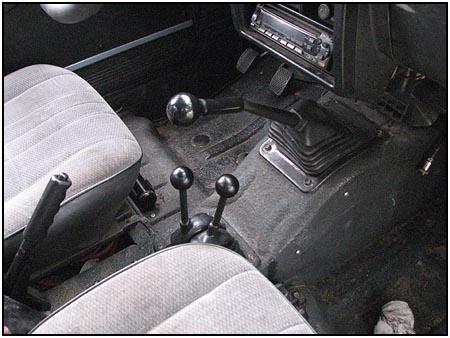
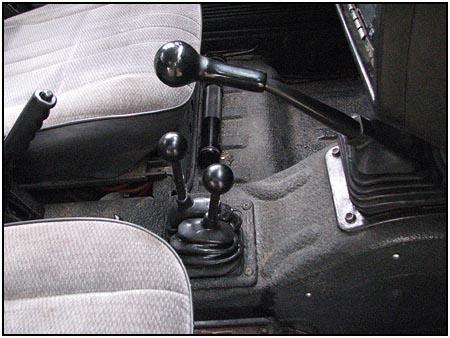
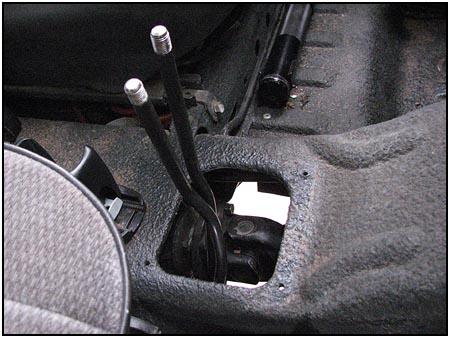  As
the sticks go in you will notice that the shifting is now crisp instead of
'wiggly'. the sticks must also be evenly spaced within the shifter opening.
Use the drivers side shifter to judge position, you should find low, neutral
and high gears. Make sure high and low both leave the same amount of
clearance to the edge of the opening. If not, take them out and bend them a
little more. As
the sticks go in you will notice that the shifting is now crisp instead of
'wiggly'. the sticks must also be evenly spaced within the shifter opening.
Use the drivers side shifter to judge position, you should find low, neutral
and high gears. Make sure high and low both leave the same amount of
clearance to the edge of the opening. If not, take them out and bend them a
little more. |
||
 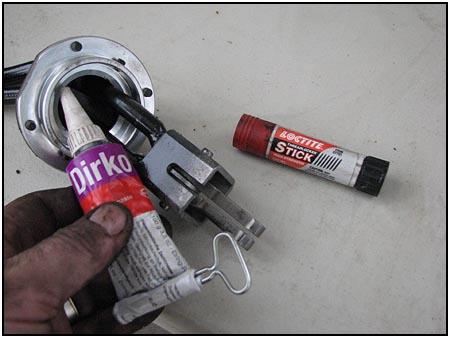 Add
a ring of sealant inside the boot assembly to seal against leaks. The
shifter boot slides down and gets secured with two set screws that hold onto
the original boot depression. It is easier to tighten those down from under
the vehicle. Add
a ring of sealant inside the boot assembly to seal against leaks. The
shifter boot slides down and gets secured with two set screws that hold onto
the original boot depression. It is easier to tighten those down from under
the vehicle. |
||
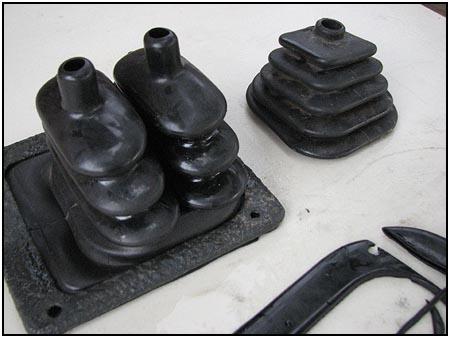  One
thing that is not included in the 'kit' is an interior boot. Here we have
taken a Dana 300 twin stick boot (available from most 4x4 accessory stores)
and inserted it from underneath up into the original Sami boot after
trimming the Sami boot at the top of the first accordion fold. We then
trimmed the 300 boot where it extended past the hold down bracket. we also
applied a a good helping of sealant (black) into the joint from underneath
to get an airtight seal. One
thing that is not included in the 'kit' is an interior boot. Here we have
taken a Dana 300 twin stick boot (available from most 4x4 accessory stores)
and inserted it from underneath up into the original Sami boot after
trimming the Sami boot at the top of the first accordion fold. We then
trimmed the 300 boot where it extended past the hold down bracket. we also
applied a a good helping of sealant (black) into the joint from underneath
to get an airtight seal.Bolt it to the floor and then you are done. The drivers side controls your high/low and the passenger side controls the 2wd/4wd. Yes, now you can use 2wd low if you need to. Cool. |
||
|
|
||
|
Source:
Rock 4X
Fabrication |
08/22/22 14:17