|
Rebuilding a U-Joint with Bill Johnston
|
||
|
|
||
  Most
of the time we end up hearing the 'Klunk - bap bap bap bap... and pull to
the side of the road (trail). Unfortunately this makes it a little harder to
fix, and that's if you had the foresight to have one or two new u-joints in
the spares box. If you don't have one and you are stuck on the trail,
remember you have three drive shafts... And you really only need two
to get to where you can get another u-joint. If you lose a u-joint on the
front driveshaft, just put it into 2wd and unlock the hubs. If the bad
u-joint is on the rear or intermediate (tranny to t-case) shaft, you can
pull the front shaft and harvest one from there. Most
of the time we end up hearing the 'Klunk - bap bap bap bap... and pull to
the side of the road (trail). Unfortunately this makes it a little harder to
fix, and that's if you had the foresight to have one or two new u-joints in
the spares box. If you don't have one and you are stuck on the trail,
remember you have three drive shafts... And you really only need two
to get to where you can get another u-joint. If you lose a u-joint on the
front driveshaft, just put it into 2wd and unlock the hubs. If the bad
u-joint is on the rear or intermediate (tranny to t-case) shaft, you can
pull the front shaft and harvest one from there. |
||
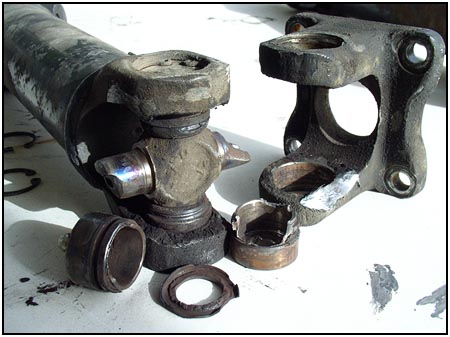
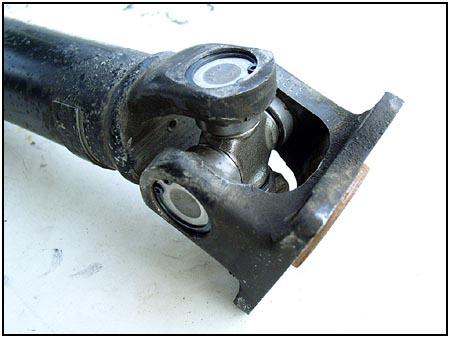
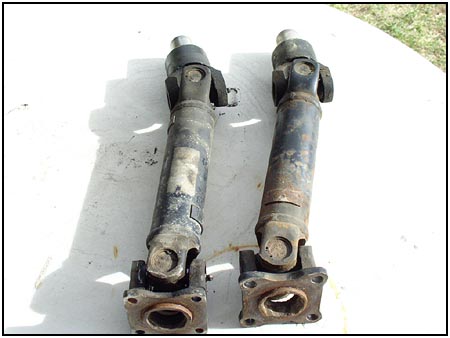  If
you want to pack along an extra driveshaft or three for a long trip through
the Rubicon, make sure you pay attention to what you pick up. The two
intermediate shafts on the left look identical, but on closer inspection you
notice the flanges are a little different. The older (pre-88) models use a
small bolt pattern. The newer Zooks use a larger bolt pattern with larger
(stronger) bolts. Same u-joints, same shafts, different flanges. If
you want to pack along an extra driveshaft or three for a long trip through
the Rubicon, make sure you pay attention to what you pick up. The two
intermediate shafts on the left look identical, but on closer inspection you
notice the flanges are a little different. The older (pre-88) models use a
small bolt pattern. The newer Zooks use a larger bolt pattern with larger
(stronger) bolts. Same u-joints, same shafts, different flanges. |
||
  The
smaller flange pattern measures 2 3/16" from bolt center to bolt center. It
can also be recognized by the use of smaller bolts that use a pair of 12mm
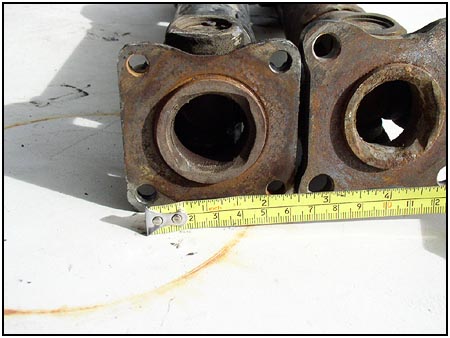
wrenches for removal. The
smaller flange pattern measures 2 3/16" from bolt center to bolt center. It
can also be recognized by the use of smaller bolts that use a pair of 12mm
wrenches for removal.
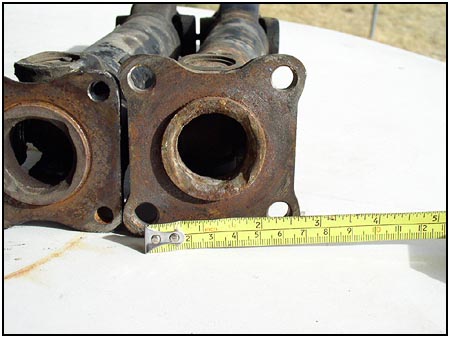
The large flange pattern measures 2 5/16" from bolt center to bolt center. Its larger nuts and bolts can be removed with a pair of 14mm wrenches. |
||
 Believe
it or not, OEM (factory) u-joints are stronger than most of the u-joints you
will find at your local auto parts suppliers. Believe
it or not, OEM (factory) u-joints are stronger than most of the u-joints you
will find at your local auto parts suppliers.
 So
stick with those. We went to
Trail Tough for some
replacements. Brent sent out some Mitsubishi components that are OEM strong, but
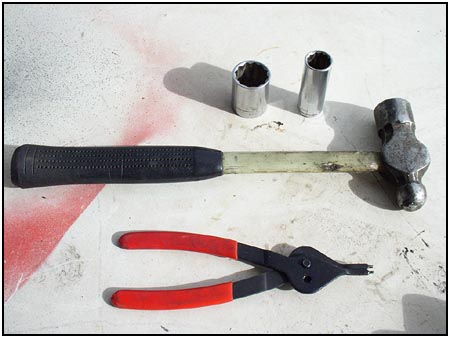
a bit less expensive but comparable to the Suzuki factory parts. The FSM says to use a Universal
Joint Assembler (Special Tool 09926-48010) along with a bench mounted vice
and a set of snap-ring pliers for this replacement, but when the timing
isn't right (see above) we can do it with a hammer, the snap-ring pliers and
a pair of sockets. For this, we used an 11/16" deep socket, and a 1"
standard socket. So
stick with those. We went to
Trail Tough for some
replacements. Brent sent out some Mitsubishi components that are OEM strong, but
a bit less expensive but comparable to the Suzuki factory parts. The FSM says to use a Universal
Joint Assembler (Special Tool 09926-48010) along with a bench mounted vice
and a set of snap-ring pliers for this replacement, but when the timing
isn't right (see above) we can do it with a hammer, the snap-ring pliers and
a pair of sockets. For this, we used an 11/16" deep socket, and a 1"
standard socket. |
||
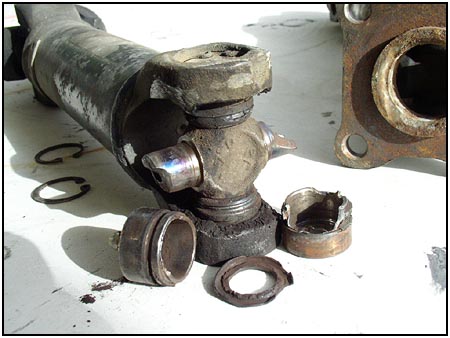
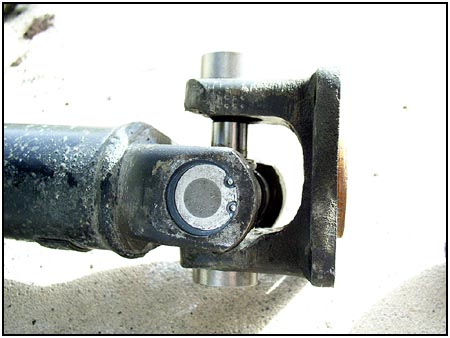
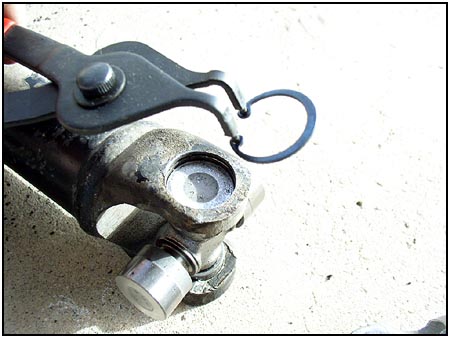
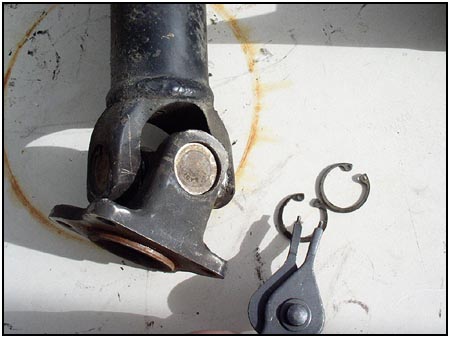 First,
we remove the circlips with the snap-ring pliers. If they are really in
there and don't want to budge, you can spray them down with penetrating oil
(WD40) to loosen them up. You may also need a small thin screwdriver to help
the lift out. First,
we remove the circlips with the snap-ring pliers. If they are really in
there and don't want to budge, you can spray them down with penetrating oil
(WD40) to loosen them up. You may also need a small thin screwdriver to help
the lift out. |
||
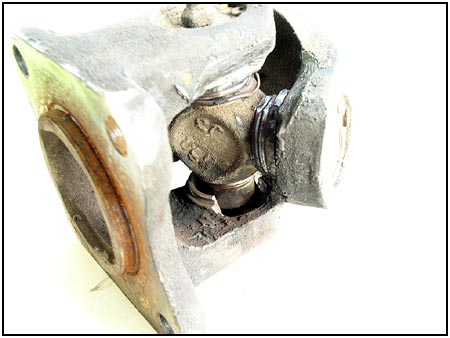
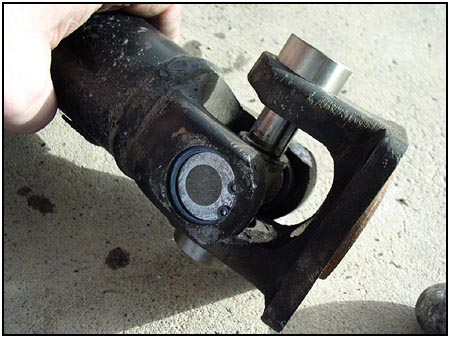
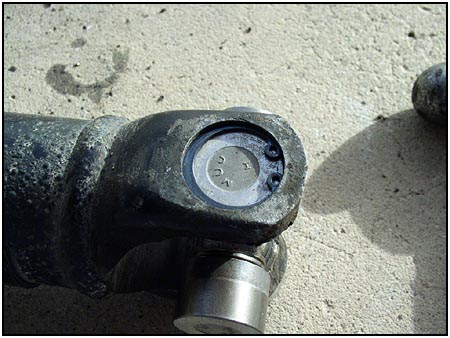
 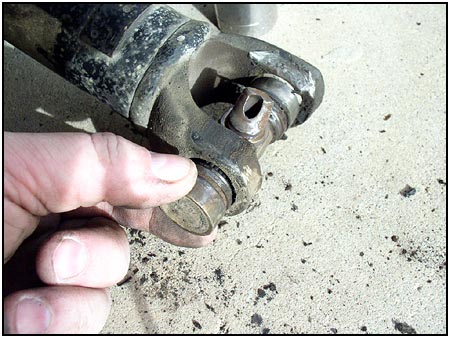  Using
the large socket underneath, and the smaller socket up top, You can tap the
bearing cap through and remove it from below. Go the opposite direction to
remove the other side. Using
the large socket underneath, and the smaller socket up top, You can tap the
bearing cap through and remove it from below. Go the opposite direction to
remove the other side. |
||
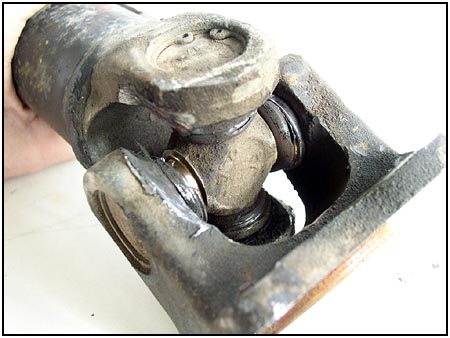
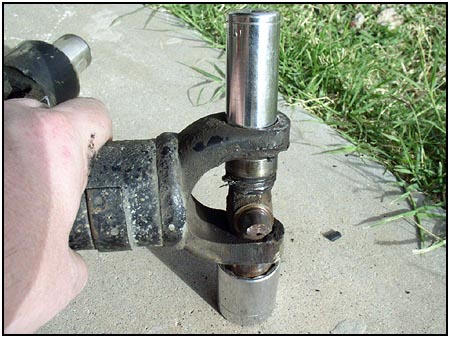
  Tapping
the new u-joint into place is as easy as sliding the caps in from the
outside and carefully trapping the u-joint in the middle. Do not hammer
directly on the cap with a steel hammer, you can damage the cap. The FSM
says to use a copper hammer... like we all have a copper hammer in the
tools box! You can use the surface of the road or even the flat top of an
aftermarket bumper. Tap the yoke with the hammer to force the cap into the
other side. Then use the socket to sink the cap below the slot for the
circlip. Tapping
the new u-joint into place is as easy as sliding the caps in from the
outside and carefully trapping the u-joint in the middle. Do not hammer
directly on the cap with a steel hammer, you can damage the cap. The FSM
says to use a copper hammer... like we all have a copper hammer in the
tools box! You can use the surface of the road or even the flat top of an
aftermarket bumper. Tap the yoke with the hammer to force the cap into the
other side. Then use the socket to sink the cap below the slot for the
circlip. |
||
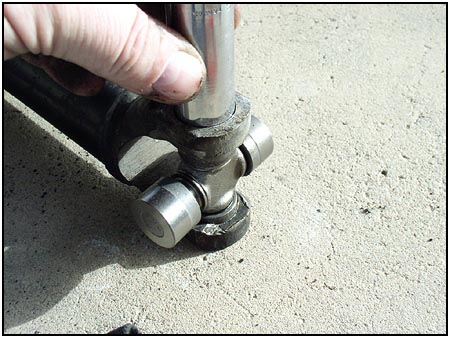
   After
installing one of the circlips, be careful not to whack the socket too hard
setting the opposite cap below the slot... you could damage the first
circlip. Installing the flange side is basically the same. Just be careful
not to loose the needle bearings. After
installing one of the circlips, be careful not to whack the socket too hard
setting the opposite cap below the slot... you could damage the first
circlip. Installing the flange side is basically the same. Just be careful
not to loose the needle bearings. |
||
|
|
||
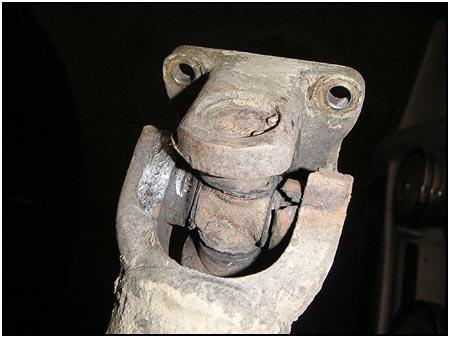
 A
u-joint is something that we have to be able to install and take for
granted. When it fails, it can take much more expensive components with it.
A loose driveshaft can destroy the transmission outputs, transfer cases, and
can even destroy vital fluid lines that are attached to the frame
underneath. Make sure you don't skimp on quality. And pay attention when you
hear a strange noise underneath, or feel a strange vibration from one or
both of the shifter handles. It's much easier to change a u-joint than it is
to empty the wallet for a new transfer case... A
u-joint is something that we have to be able to install and take for
granted. When it fails, it can take much more expensive components with it.
A loose driveshaft can destroy the transmission outputs, transfer cases, and
can even destroy vital fluid lines that are attached to the frame
underneath. Make sure you don't skimp on quality. And pay attention when you
hear a strange noise underneath, or feel a strange vibration from one or
both of the shifter handles. It's much easier to change a u-joint than it is
to empty the wallet for a new transfer case... |
||
|
Component Source:
Trail Tough Products |
||
|
|
08/22/22 14:17:35