
|
Clicky
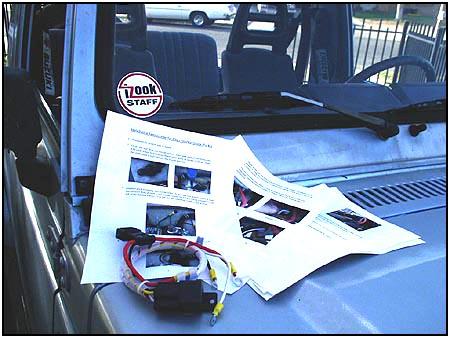
Starter Quick Fix Kit with Bill Johnston When I picked up an 88.5 Sami last year, it would start anytime, all the time, without fail. I was lucky to get such a solid vehicle. But after I started on the trip to the 2003 ZookiMelt there was a problem at the first fuel stop. After running the vehicle across the desert and through the mountains for nearly 160 miles, it was time to stop for a tank of gas. After filling up the tank I went to turn the key and there was only a click. Uh-oh... and I still had over 1400 miles to go. This is a common problem in the older Samurais. Components get hot, and then the small wire that sends power to the starter solenoid doesn't seem to have enough power to do the job right. A fix to this problem has been around for years with a relay and some additional wiring. For a couple of years now you could find kits for this fix at a few of the aftermarket distributors, and more recently, the 'clicky fixes' are becoming more prevalent on auction sites like Ebay. If you've redone the wiring in your vehicle, or you have a little knowledge of electronics, you could put together a 'kit' yourself. When I got back from the 'Melt, I built a couple myself to see what had to be done. But if you don't have the knowledge, the equipment or the time to spare then getting one of these kits is a great help. |
||
  I
saw a few out on the internet and got a chance to evaluate one of them.
This 'Clicky Starter Quick Fix Kit' came from D&D Enterprises and
retails for about $15.00* with a full lifetime limited warranty. I
saw a few out on the internet and got a chance to evaluate one of them.
This 'Clicky Starter Quick Fix Kit' came from D&D Enterprises and
retails for about $15.00* with a full lifetime limited warranty.
*Cost was approximate and current as of the time this article was written. Price may vary over time. I have to admit I was impressed with the directions even before I examined the harness. The directions were fully illustrated (in color) and take you though the install step by step. Installation time for this was only 11 minutes - total time while taking pictures at every step. |
||
 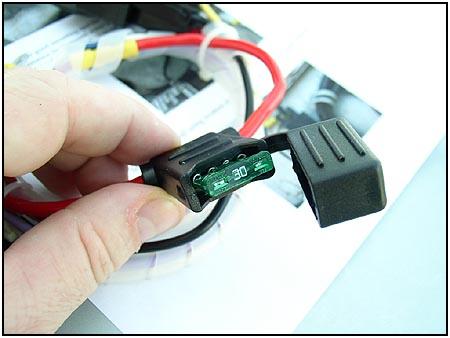 The
components in the harness were of high quality. There is a capped fuse
holder with a 30 amp fuse that protects the circuit from the battery to
the relay. The relay itself is connected to the harness with a single
female plug for a close fit. Other harnesses I had seen just used four separate
female spade connectors that normally didn't cover each connection as it
came out of the relay. If not properly covered, there is a chance of an
electrical short if something got close enough to touch the exposed blade. The
components in the harness were of high quality. There is a capped fuse
holder with a 30 amp fuse that protects the circuit from the battery to
the relay. The relay itself is connected to the harness with a single
female plug for a close fit. Other harnesses I had seen just used four separate
female spade connectors that normally didn't cover each connection as it
came out of the relay. If not properly covered, there is a chance of an
electrical short if something got close enough to touch the exposed blade. |
||
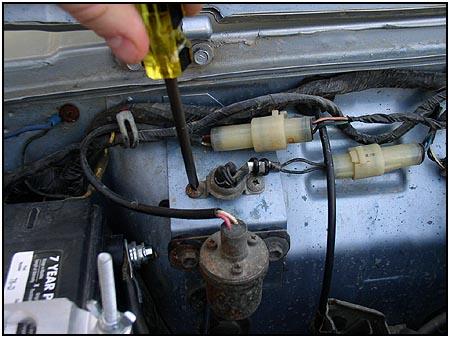  Installing
the harness isn't very hard at all using a simple phillips screwdriver.
The directions suggested using a mounting screw for the thermal sensor on
the firewall to act as the ground connection. While this seems like a
choice of convenience, it is actually a really smart move as it is a screw
that tightens into a threaded boss (nut) in a firewall bracket. This makes
a very solid electrical connection that won't loosen as easily due to
vibration. Installing
the harness isn't very hard at all using a simple phillips screwdriver.
The directions suggested using a mounting screw for the thermal sensor on
the firewall to act as the ground connection. While this seems like a
choice of convenience, it is actually a really smart move as it is a screw
that tightens into a threaded boss (nut) in a firewall bracket. This makes
a very solid electrical connection that won't loosen as easily due to
vibration. |
||
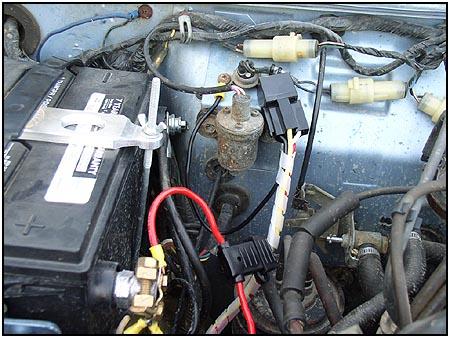
 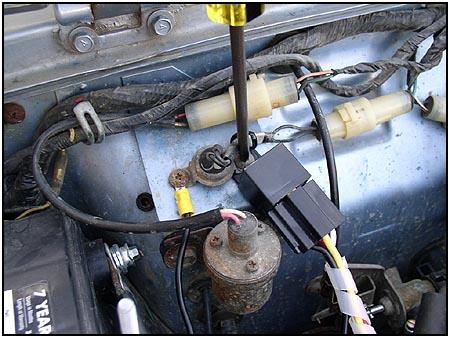 After
attaching the ground wire, the relay itself needs to be secured in a
close, convenient spot. I just used the other thermal sensor bracket
screw. This makes it easy to reach yet out of the way. After
attaching the ground wire, the relay itself needs to be secured in a
close, convenient spot. I just used the other thermal sensor bracket
screw. This makes it easy to reach yet out of the way. |
||
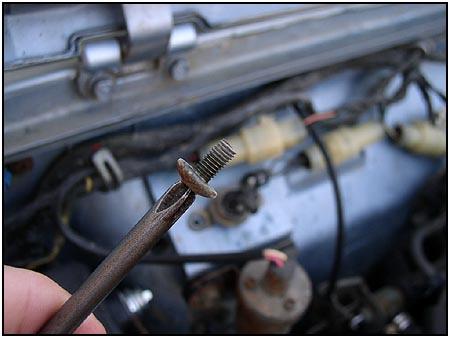
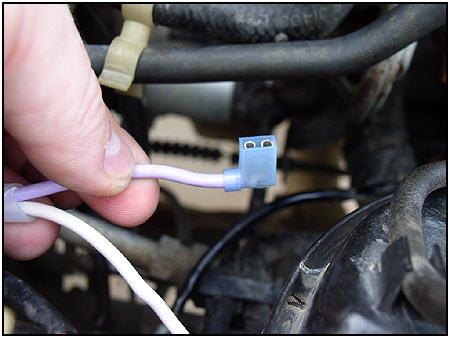
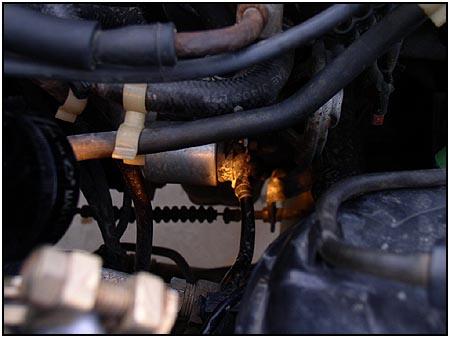  Next
you need to locate the 'trigger' wire. This is the wire that sends the
power to the solenoid which initiates the starter. When looking straight
down the passenger side of the engine, you will find it just below the
main positive power cable where it attaches to the starter. It is a small
spade connector that just pulls off and is usually corroded if it hasn't
been replaced. Next
you need to locate the 'trigger' wire. This is the wire that sends the
power to the solenoid which initiates the starter. When looking straight
down the passenger side of the engine, you will find it just below the
main positive power cable where it attaches to the starter. It is a small
spade connector that just pulls off and is usually corroded if it hasn't
been replaced. |
||
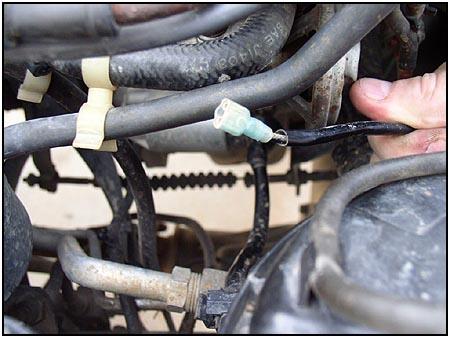  Here
you can see where the original female end for the spade connection has
been replaced with a newer connector. This is where you attach the white
wire in the new harness. The original female spade connector had an
oversized plastic sleeve that would have covered this connection
completely. Because this one was replaced previously, it will have to be
taped or shrink wrapped to form a weather tight connection. Here
you can see where the original female end for the spade connection has
been replaced with a newer connector. This is where you attach the white
wire in the new harness. The original female spade connector had an
oversized plastic sleeve that would have covered this connection
completely. Because this one was replaced previously, it will have to be
taped or shrink wrapped to form a weather tight connection. |
||
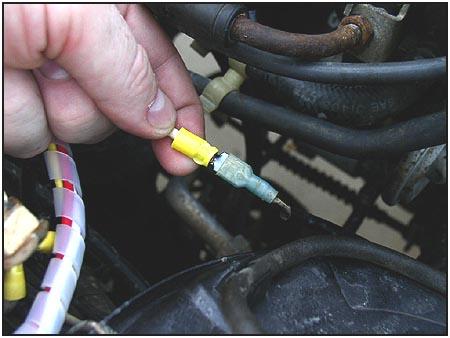
 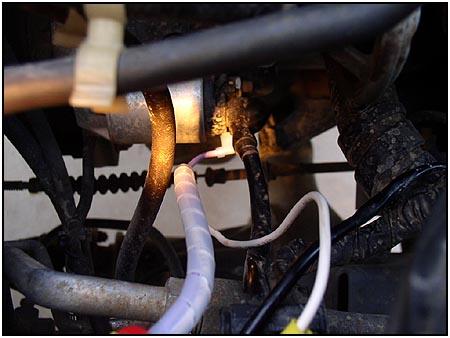 The
purple wire in the new harness now gets connected to that spade connector
on the starter. Now, instead of the stock wire having to pull enough power
to activate the solenoid, the stock wire becomes merely a trigger for the
relay. The
purple wire in the new harness now gets connected to that spade connector
on the starter. Now, instead of the stock wire having to pull enough power
to activate the solenoid, the stock wire becomes merely a trigger for the
relay. |
||
 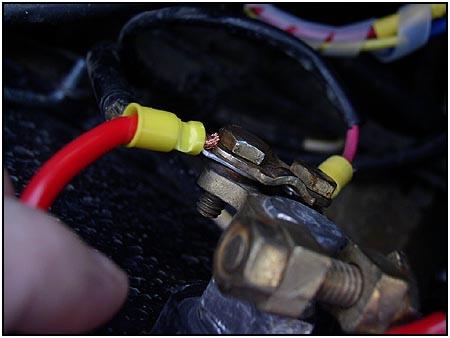 The
relay actually routes the full power of the battery into the solenoid when
the stock wire triggers it. This is why the fuse is so important. Remember
- Safety first! I pulled the fuse while connecting the heavier gauge power
wire to the battery. The
relay actually routes the full power of the battery into the solenoid when
the stock wire triggers it. This is why the fuse is so important. Remember
- Safety first! I pulled the fuse while connecting the heavier gauge power
wire to the battery. |
||
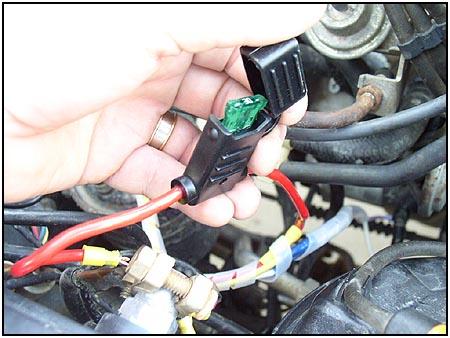  Then
it's just a matter of plugging the fuse back in and cranking up the
engine. It actually took longer to read through this article and check out
the pictures than it took to do the install... it was just THAT simple. Then
it's just a matter of plugging the fuse back in and cranking up the
engine. It actually took longer to read through this article and check out
the pictures than it took to do the install... it was just THAT simple.
As I said at the beginning, for those with the time, tools and talent it would be easy to build your own 'kit'. But for most folks out there, it's worth the money to get a decent, reliable fix that you don't have to mess around with. That's $15 and ten minutes time... a good decision in my book. |
||
| Component Source:
www.Clicky-Starter.com |
07/08/10 21:59:44