
Replacing the Clutch Cable
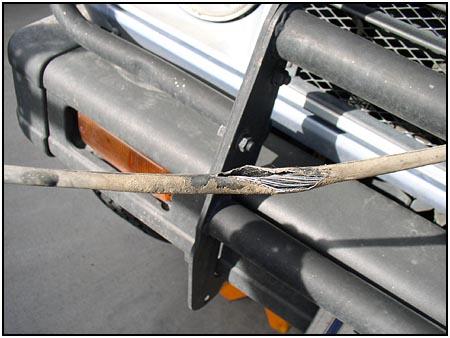
This is a common problem with the original equipment clutch cable. The cable is held together by a series of small wire wraps that give up the ghost after heavy or prolonged use. Click the picture to the right for a closer look at how it unwraps. The clutch is fine, but pushing the pedal only compresses the cable housing, it won't pull the clutch lever anymore. Time to replace it. |
||
 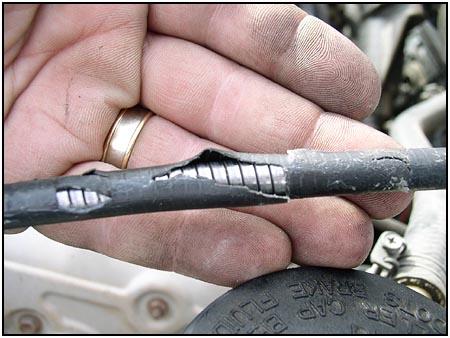 Here
you can see the difference between the original equipment cable (right) and
the aftermarket cable (right), You can see the thin metal wires that make up
the sheathing on the original. It relies on the outer casing to keep
everything together. The aftermarket cable uses a heavy gauge metal
sheathing that keeps its integrity whether there is any rubber covering or
not. This cable lost some of its covering while being stored in the spares
box. It is still good but we used a little electrical tape to seal the
covering and shield it against the elements. Here
you can see the difference between the original equipment cable (right) and
the aftermarket cable (right), You can see the thin metal wires that make up
the sheathing on the original. It relies on the outer casing to keep
everything together. The aftermarket cable uses a heavy gauge metal
sheathing that keeps its integrity whether there is any rubber covering or
not. This cable lost some of its covering while being stored in the spares
box. It is still good but we used a little electrical tape to seal the
covering and shield it against the elements. |
||
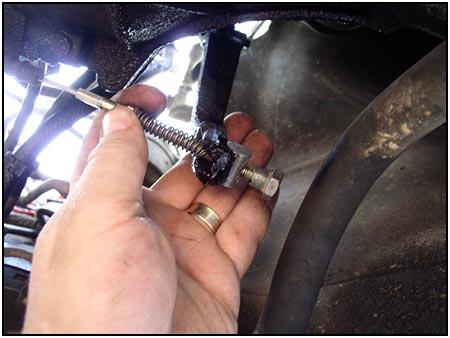  Starting
underneath the vehicle, look for the clutch lever on the passenger side of
the transmission bell housing. The nut on the end of the cable must be
removed and the cable will slide out of the arm. Starting
underneath the vehicle, look for the clutch lever on the passenger side of
the transmission bell housing. The nut on the end of the cable must be
removed and the cable will slide out of the arm.
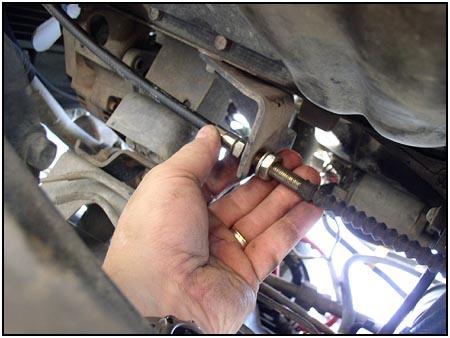
Next you must loosen the nuts that hold the cable to the engine bracket. It is next to the oil pan. |
||
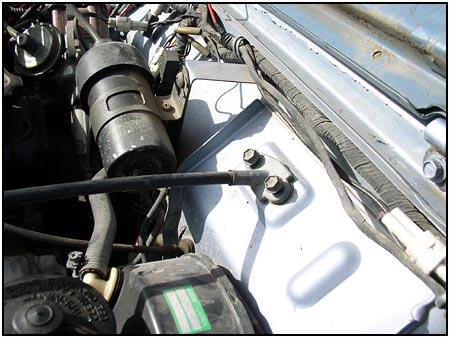 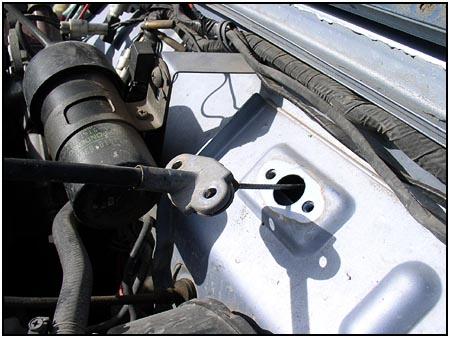 Going
up top, you need to remove the two bolts that hold the cable housing to the
firewall, this is just above the master cylinder. Pull the cable housing out
a little to give a little slack in the cable. Going
up top, you need to remove the two bolts that hold the cable housing to the
firewall, this is just above the master cylinder. Pull the cable housing out
a little to give a little slack in the cable. |
||
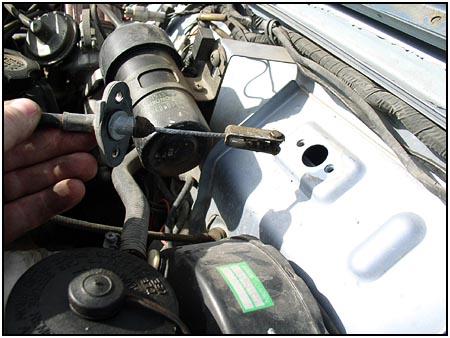  Reaching
up under the dash on the right side of the steering column, you will feel
where the cable comes through the firewall and slips over a hooked bracket.
You can see what that looks like in the picture to the left. The diagram
comes from the service manual, as the photos were too dark to see much. Once
the cable as been lifted off the hook, it will pull free through the
firewall. Reaching
up under the dash on the right side of the steering column, you will feel
where the cable comes through the firewall and slips over a hooked bracket.
You can see what that looks like in the picture to the left. The diagram
comes from the service manual, as the photos were too dark to see much. Once
the cable as been lifted off the hook, it will pull free through the
firewall. |
||
 The
diagram on the left shows the way the cable is supposed to be routed through
the engine compartment. It is drawn as if you are looking down into the
engine compartment from over the drivers front fender. The
diagram on the left shows the way the cable is supposed to be routed through
the engine compartment. It is drawn as if you are looking down into the
engine compartment from over the drivers front fender.The correct routing will keep the cable away from the exhaust header and the fan. The part of the cable that is most susceptible to abrasion is down under the radiator where it sits on the splash guard. For this, there is an additional abrasion guard that slides up and down the cable. Position it under the radiator. |
||
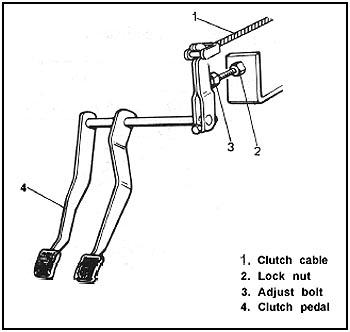
 Once
the cable is routed correctly, just attach it to the brackets the way it
came off. The diagram shows how the end nut should be adjusted. Of course,
you must check the pedal travel to make sure the clutch engages correctly.
Adjust the cable using the nuts at the engine bracket. Once
the cable is routed correctly, just attach it to the brackets the way it
came off. The diagram shows how the end nut should be adjusted. Of course,
you must check the pedal travel to make sure the clutch engages correctly.
Adjust the cable using the nuts at the engine bracket.
This is a 'must have' for your spares box, because if your Zook has gone over 100K miles and it hasn't happened yet - it will. Run your hand over the length of the cable and see if it is already starting to happen. |
||
06/03/19 19:06
