|
Upgrading to an Aluminum Radiator with Bill Johnston
|
||
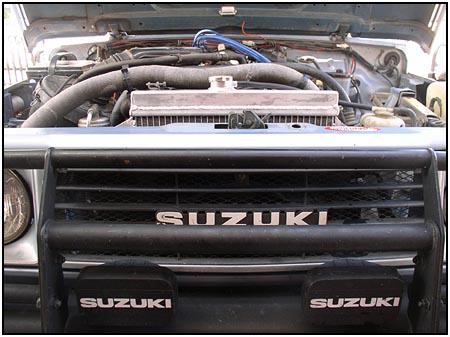
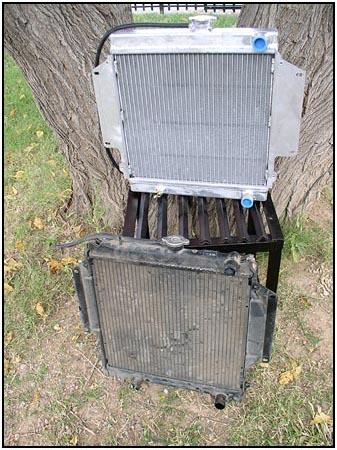  As you
can see in the pictures, the unit that Petroworks provided is built to bolt
directly into place without fabricating any brackets. Suzuki made two different radiators for the Samurai. In
1988, many changes happened to the vehicle, and one of the was adding an
extra inch of depth to the radiator. This radiator upgrade was developed
using the bracket dimensions for the early model because there were more of
them on the road. You can tell right away if it will fit. Tap the tank (top
section) and if it is brass you are golden, if it is plastic you will have
to make the adjustments mentioned below. As you
can see in the pictures, the unit that Petroworks provided is built to bolt
directly into place without fabricating any brackets. Suzuki made two different radiators for the Samurai. In
1988, many changes happened to the vehicle, and one of the was adding an
extra inch of depth to the radiator. This radiator upgrade was developed
using the bracket dimensions for the early model because there were more of
them on the road. You can tell right away if it will fit. Tap the tank (top
section) and if it is brass you are golden, if it is plastic you will have
to make the adjustments mentioned below. |
||
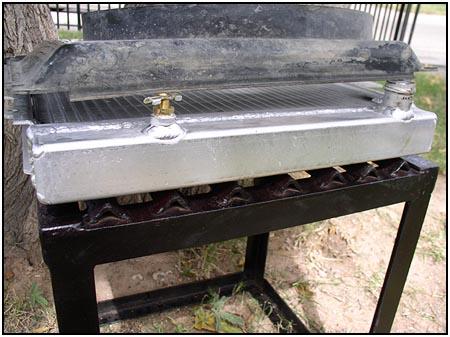
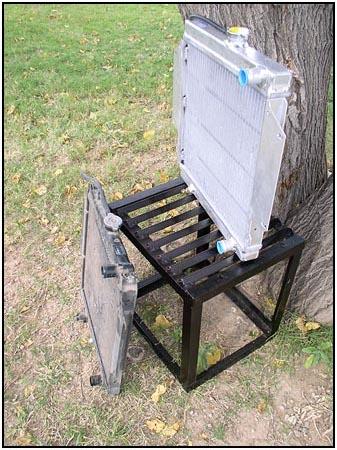
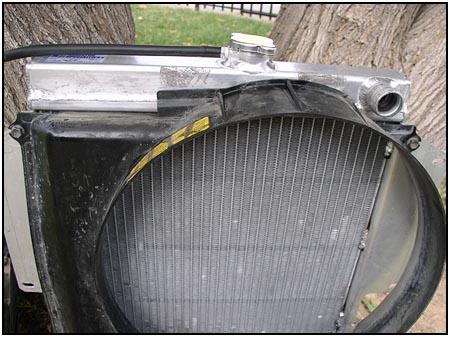
  The
first thing you notice is the size of the upper and lower water tanks, they
are huge! This gives a full 30% more coolant capacity. But, the radiator still fits under the hood of a stock Samurai
without any changes at all. The side brackets on the new unit are welded in
place, so you don't need to use the old ones. The
first thing you notice is the size of the upper and lower water tanks, they
are huge! This gives a full 30% more coolant capacity. But, the radiator still fits under the hood of a stock Samurai
without any changes at all. The side brackets on the new unit are welded in
place, so you don't need to use the old ones. |
||
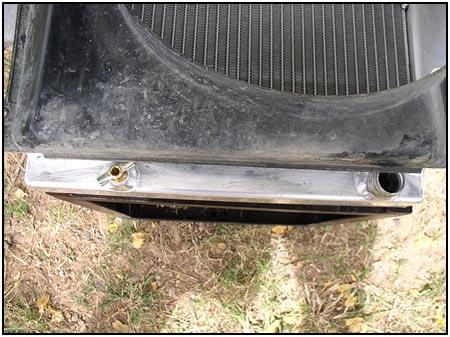
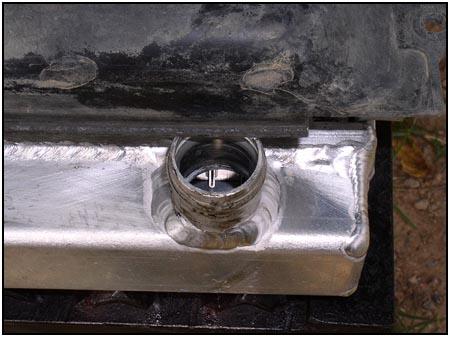
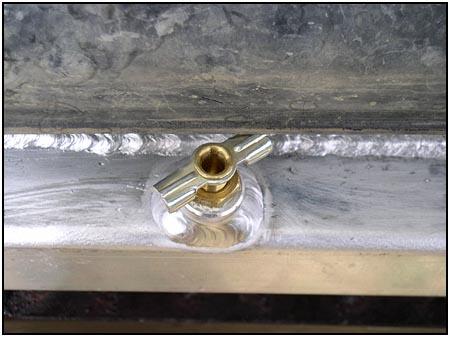
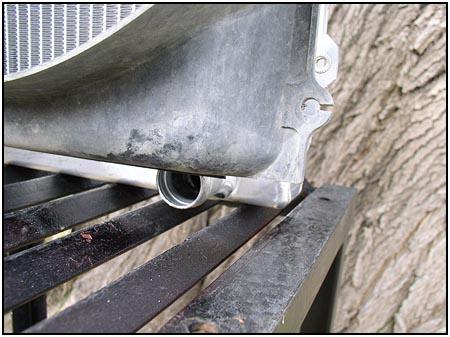
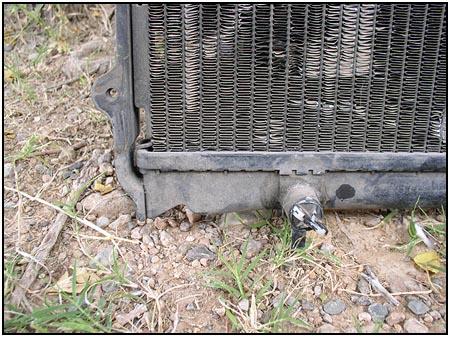 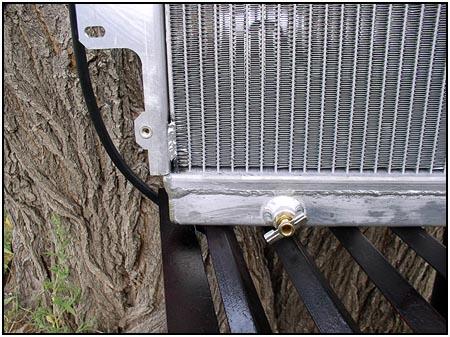 The
lower tank is also boxed to provide more capacity. The drain valve is in the
same location as the stock unit. you can also see where they included the
mounting boss for the fan shroud. If you have an early model (up to 87), the
fan shroud will fit perfectly. If you only have a late model fan shroud it
can be 'adjusted' to fit with only a little effort. The
lower tank is also boxed to provide more capacity. The drain valve is in the
same location as the stock unit. you can also see where they included the
mounting boss for the fan shroud. If you have an early model (up to 87), the
fan shroud will fit perfectly. If you only have a late model fan shroud it
can be 'adjusted' to fit with only a little effort. |
||
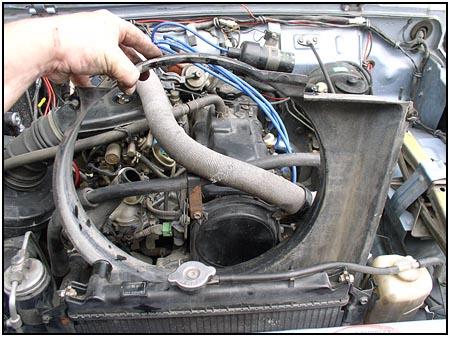
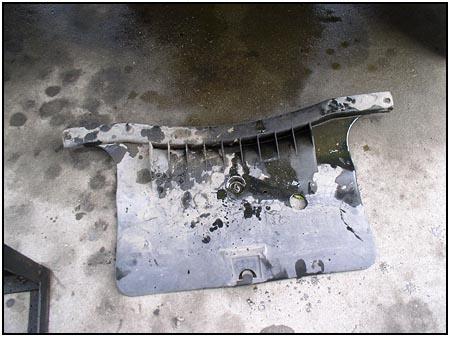   First
things first... pulling the stock unit starts with draining the radiator and
disconnecting the upper hose. The drain plug can be accessed easier if you
remove the splash pan that sits under the fan. You can drop it out by
removing the two screws at the ends of the splash pan and unhooking the
brake line retainer clip from underneath. First
things first... pulling the stock unit starts with draining the radiator and
disconnecting the upper hose. The drain plug can be accessed easier if you
remove the splash pan that sits under the fan. You can drop it out by
removing the two screws at the ends of the splash pan and unhooking the
brake line retainer clip from underneath. |
||
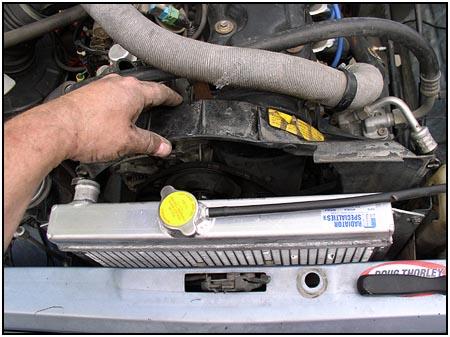
  Next
comes the fan shroud. It is bolted to the radiator with four 10mm bolts.
Don't try to remove the shroud from the engine yet, the fan will be in the
way. Next
comes the fan shroud. It is bolted to the radiator with four 10mm bolts.
Don't try to remove the shroud from the engine yet, the fan will be in the
way. |
||
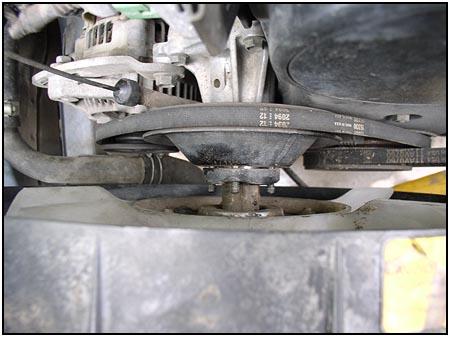
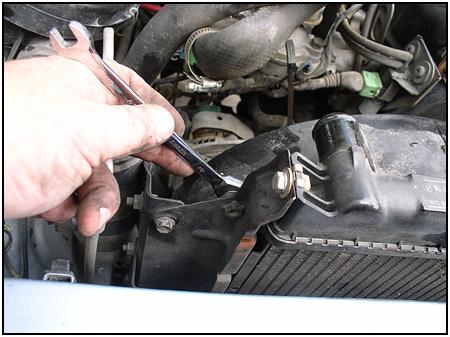
 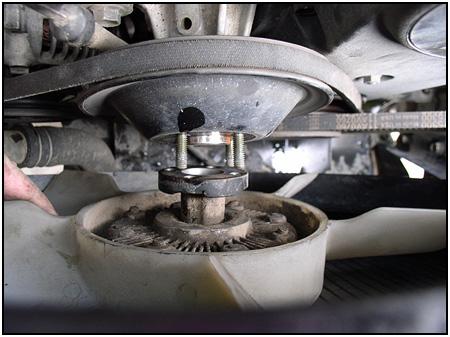 The
fan is held to the water pump studs with four 10mm nuts. Remove them, but be
careful that you don't lose them. It is also easier if you take off the
tension on the pulley by loosening the fan belt. You do that by loosening
the alternator bolts and sliding it toward the engine. The
fan is held to the water pump studs with four 10mm nuts. Remove them, but be
careful that you don't lose them. It is also easier if you take off the
tension on the pulley by loosening the fan belt. You do that by loosening
the alternator bolts and sliding it toward the engine. |
||
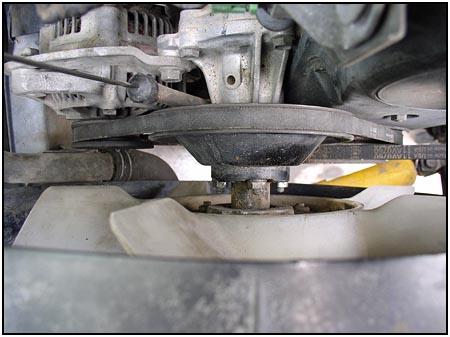
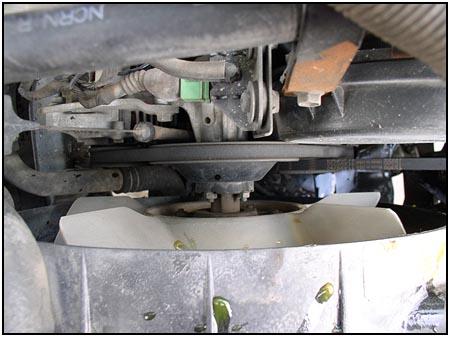
   Now
you can tilt the fan shroud toward the engine and slide the fan out. This
gives you plenty of room to get the fan shroud out. Now
you can tilt the fan shroud toward the engine and slide the fan out. This
gives you plenty of room to get the fan shroud out. |
||
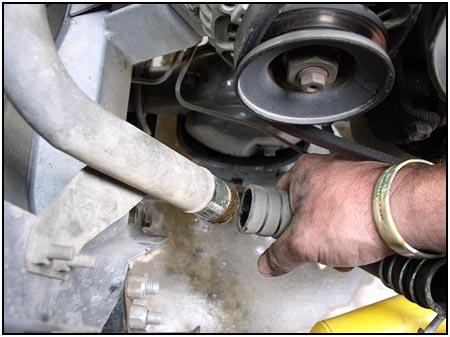
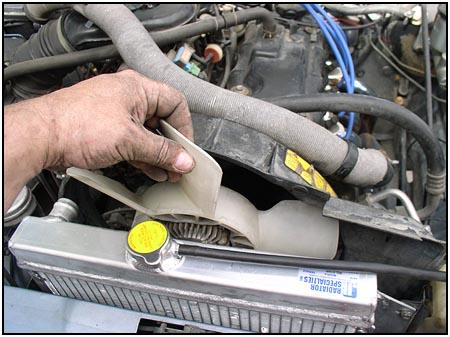
  Now
there is enough room to disconnect the lower radiator hose. Then the
overflow bottle gets disconnected. Set the bottle to the side for now and it
will give you a bit more room to remove the radiator bolts. Now
there is enough room to disconnect the lower radiator hose. Then the
overflow bottle gets disconnected. Set the bottle to the side for now and it
will give you a bit more room to remove the radiator bolts. |
||
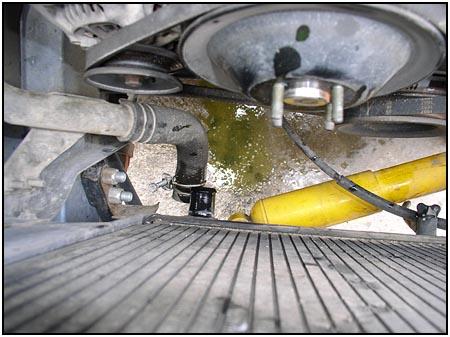
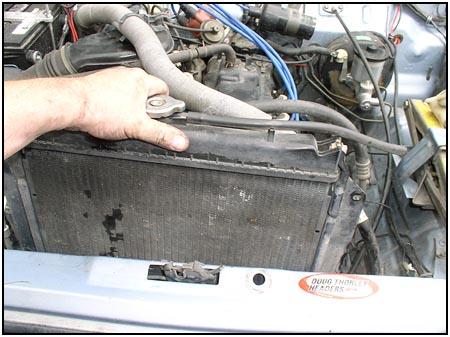
  You
are down to the last four bolts now. The top bolts are easy to get to, but
the bottom bolts have special access holes for removal. The passenger side
lower bolt can be accessed from the side through an opening in the bracket. You
are down to the last four bolts now. The top bolts are easy to get to, but
the bottom bolts have special access holes for removal. The passenger side
lower bolt can be accessed from the side through an opening in the bracket. |
||
  The
driver side lower bolt can be accessed from the front after you move the
grill out of the way. The
driver side lower bolt can be accessed from the front after you move the
grill out of the way.Then the radiator can be removed from the top. |
||
  Next,
we attach the fan shroud to the radiator to make sure it fits. The top is a
perfect fit for any year Samurai (86-95). Next,
we attach the fan shroud to the radiator to make sure it fits. The top is a
perfect fit for any year Samurai (86-95). |
||
  This
shroud is from our 88.5 Samurai. As you can see it is made for the longer
late model radiator. If you can find an early model shroud it will fit
easily. If not, you may be able to get one from Petroworks when you order
your radiator. They have a large stock of parts and you may get lucky.
Otherwise, you can make the longer shroud fit with a little trimming. This
shroud is from our 88.5 Samurai. As you can see it is made for the longer
late model radiator. If you can find an early model shroud it will fit
easily. If not, you may be able to get one from Petroworks when you order
your radiator. They have a large stock of parts and you may get lucky.
Otherwise, you can make the longer shroud fit with a little trimming. |
||
|
|
||
  As
you can see, we trimmed the lower edge and made cutouts for the lower hose
and drain outlet. You will also have to make a small (1/4") notch in the
edge of the shroud for the lower shroud bolts. The difference is about an
inch, but fit it and mark it before cutting. As
you can see, we trimmed the lower edge and made cutouts for the lower hose
and drain outlet. You will also have to make a small (1/4") notch in the
edge of the shroud for the lower shroud bolts. The difference is about an
inch, but fit it and mark it before cutting. |
||
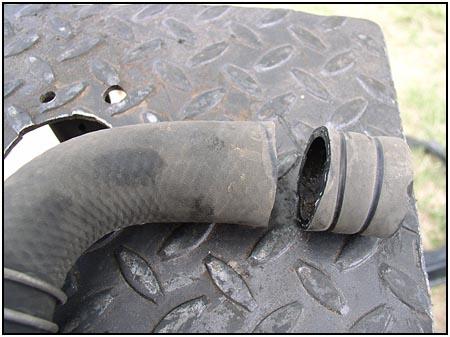
| If you have a late model Samurai, you will also have to shorten the lower radiator hose. without shortening the hose, it will kink and slow down the coolant flow. Just remove the hose, trim an inch from the vertical section and clamp it back in place. | ||
|
|
||
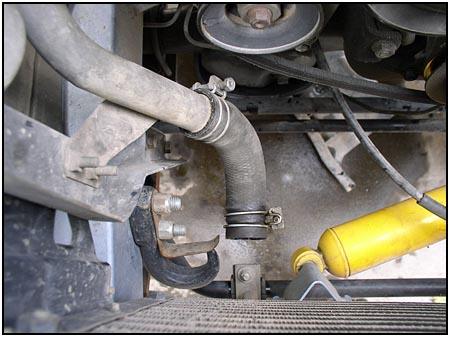
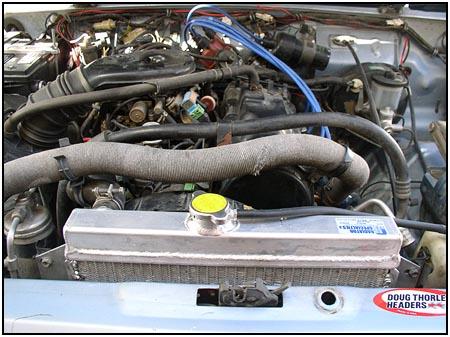
 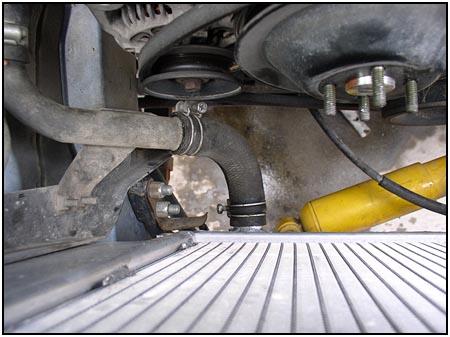  We
then lower the new radiator into place and bolt it in. The photo on the
right shows the wrench going through the access slot on the passengers side
for the lower bolt. Then when you attach the lower hose, everything lines up
perfectly. We
then lower the new radiator into place and bolt it in. The photo on the
right shows the wrench going through the access slot on the passengers side
for the lower bolt. Then when you attach the lower hose, everything lines up
perfectly. |
||
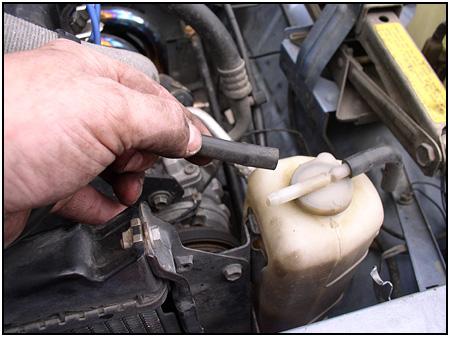
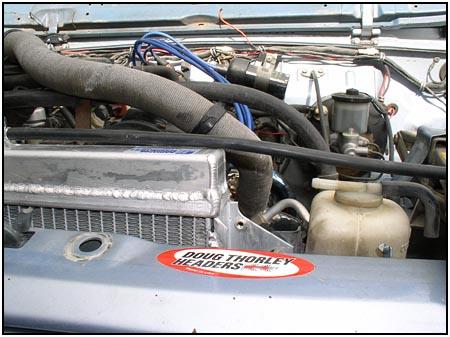   The
new radiator comes with plenty of hose to reach the overflow bottle. Put the
bottle back in place, measure the length needed and trim to fit. It's a
perfect fit and it looks like it belongs there. The
new radiator comes with plenty of hose to reach the overflow bottle. Put the
bottle back in place, measure the length needed and trim to fit. It's a
perfect fit and it looks like it belongs there. |
||
|
|
||
| The fan shroud, fan and fan nuts are installed in reverse order from above. If you try to install the fan before sliding the shroud in place you will never get the shroud in there, so pay attention to the order. Don't forget to tighten up the fan belt again, and tighten down the bolts on the alternator. Then just fill the new aluminum radiator with a 50/50 water coolant mix. | ||
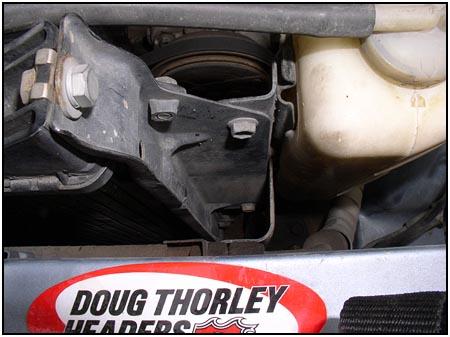
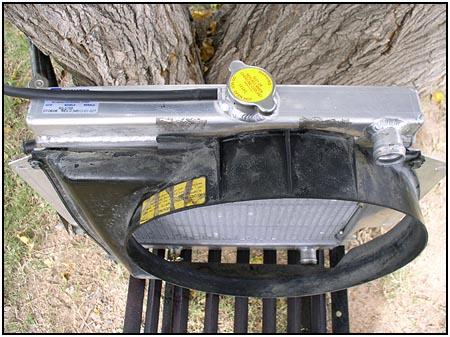
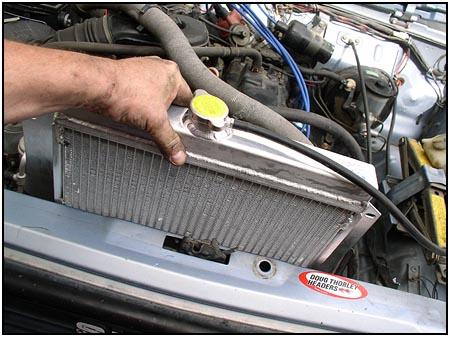
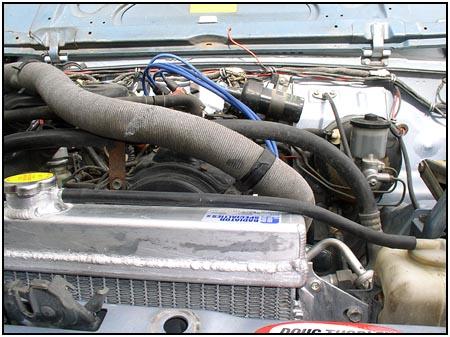
  The
new radiator looks in place. It looks much more massive than the stock
radiator, but be assured that it won't touch the hood when you drop it into
place. Also be assured that this replacement doesn't just look good. This
radiator is all aluminum. Aluminum is far more efficient at dissipating heat
then the stock model that is made from copper (fins) and brass (tanks). With
much more coolant to flow it will keep the temps down when it really needs
it. The
new radiator looks in place. It looks much more massive than the stock
radiator, but be assured that it won't touch the hood when you drop it into
place. Also be assured that this replacement doesn't just look good. This
radiator is all aluminum. Aluminum is far more efficient at dissipating heat
then the stock model that is made from copper (fins) and brass (tanks). With
much more coolant to flow it will keep the temps down when it really needs
it. |
||
|
*Editors Note |
||
 Source: Source:
Petroworks Offroad Products |
07/08/10 21:59:44