|
Petroworks CV Carb Kit 'Harley Carb' with Bill Johnston
|
||
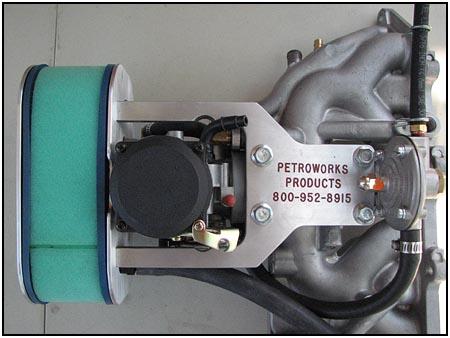
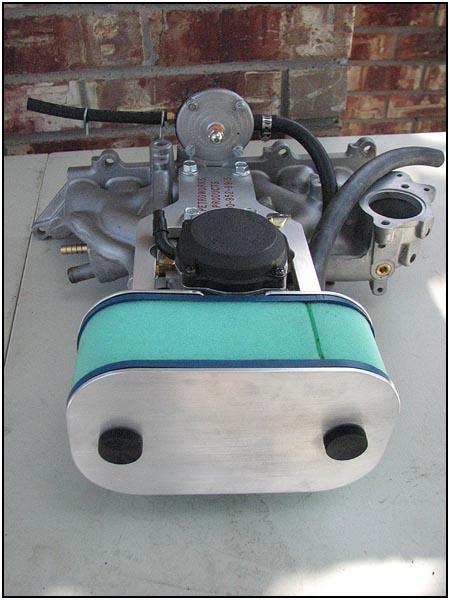 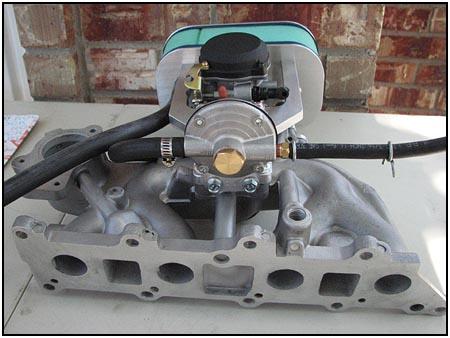 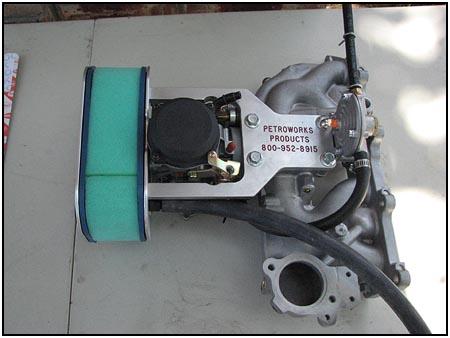 Petroworks
starts with a stock intake manifold and goes to town on it with the machine
work. Then they take a Harley Davidson 40mm or 44mm CV carb and modify it
to fit the Samurai controls. This particular kit uses the 44mm Screamin
Eagle carb. The new sidedraft carb no longer mounts from
the top like a stock Hitachi, but mounts from the side with a straight shot
through the intake to the head. The kit also comes with an intake gasket and
a manual choke cable that is already set up to work with the HD carb.
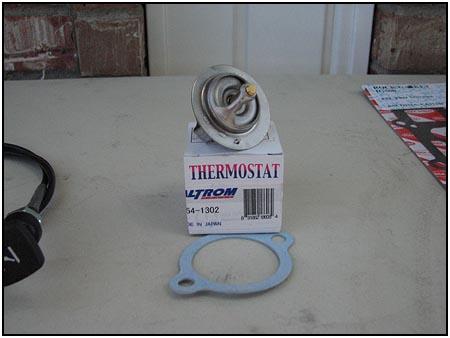
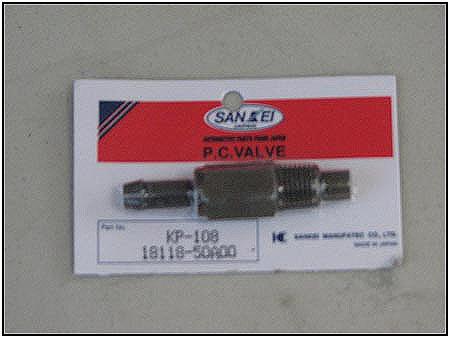
A new thermostat (with gasket) and a new PVC valve are options that are
suggested if you are still running the original equipment. Petroworks
starts with a stock intake manifold and goes to town on it with the machine
work. Then they take a Harley Davidson 40mm or 44mm CV carb and modify it
to fit the Samurai controls. This particular kit uses the 44mm Screamin
Eagle carb. The new sidedraft carb no longer mounts from
the top like a stock Hitachi, but mounts from the side with a straight shot
through the intake to the head. The kit also comes with an intake gasket and
a manual choke cable that is already set up to work with the HD carb.
A new thermostat (with gasket) and a new PVC valve are options that are
suggested if you are still running the original equipment. |
||
|
|
||
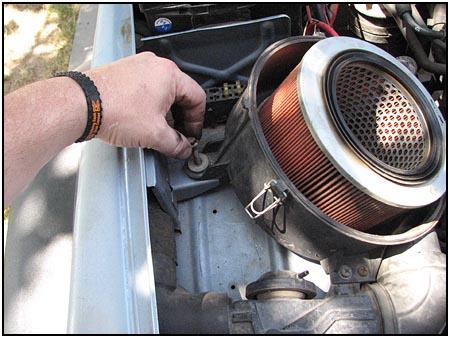
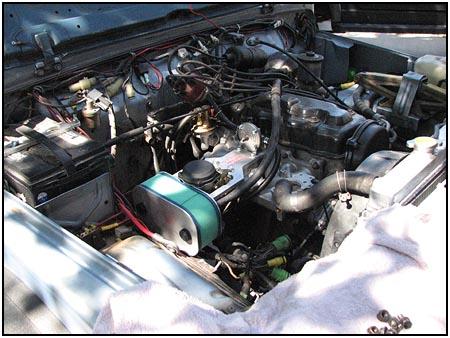
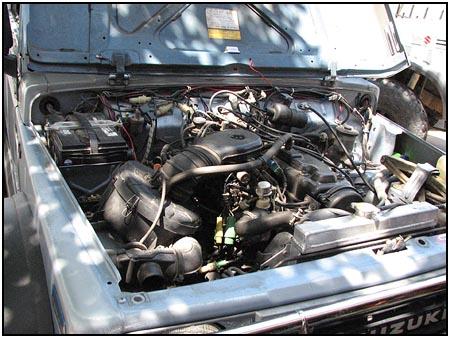  We
have all seen the engine compartment of the Samurai and know how jumbled it
can get. Here is where we get rid of some of the clutter. We disconnect the
crankcase hose, air cleaner housing and intake tunnel and set it all aside. We
have all seen the engine compartment of the Samurai and know how jumbled it
can get. Here is where we get rid of some of the clutter. We disconnect the
crankcase hose, air cleaner housing and intake tunnel and set it all aside. |
||
|
|
||
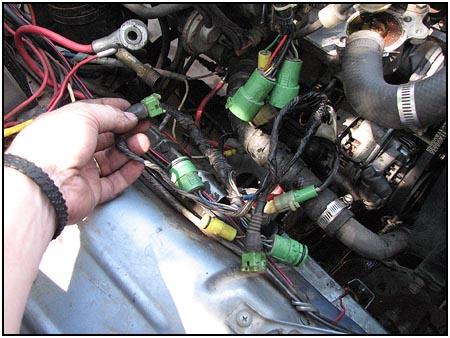  Disconnect
any electronics that attach to components on or attached to the intake
manifold. Those that don't plan to ever use the original equipment again can
weed out those connectors and remove them from the harness, but if you are
like me and want to have the option, then leave them be until a little
later. Disconnect
any electronics that attach to components on or attached to the intake
manifold. Those that don't plan to ever use the original equipment again can
weed out those connectors and remove them from the harness, but if you are
like me and want to have the option, then leave them be until a little
later. |
||
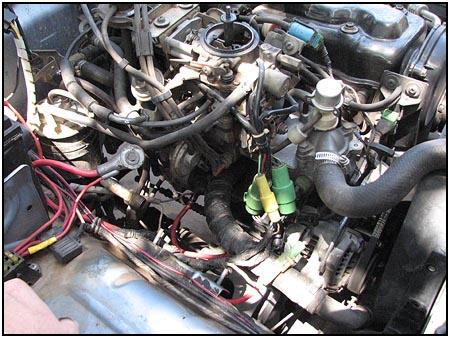
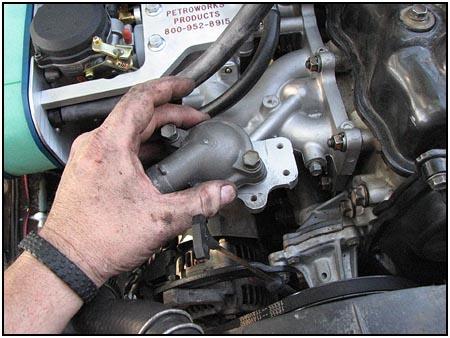
  The
stock throttle cable will hook up to the new carb, so just set it aside. The
radiator has to be drained and the thermostat housing needs to be retained
for use on the upgraded intake manifold. The
stock throttle cable will hook up to the new carb, so just set it aside. The
radiator has to be drained and the thermostat housing needs to be retained
for use on the upgraded intake manifold. |
||
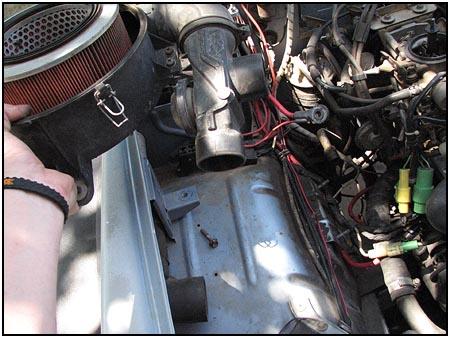
  The
intake is removed, disconnecting the water lines, vacuum lines and
electrical. The
intake is removed, disconnecting the water lines, vacuum lines and
electrical. |
||
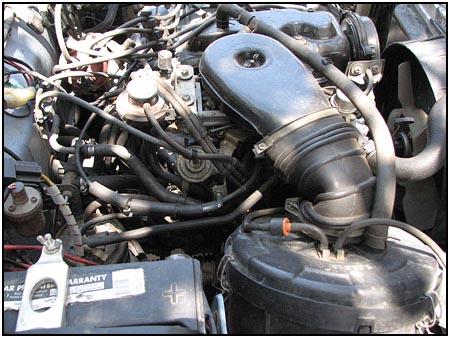
 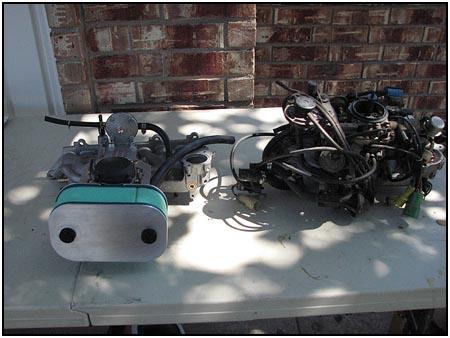 Here
we can see a major difference in the size and complexity. Click on the
pictures to get a better look at what is and isn't there. Realize that the
new system on the left is complete with air cleaner - and the stock system
on the right is not. The stock air box is again as large as the bundle you
see here. Here
we can see a major difference in the size and complexity. Click on the
pictures to get a better look at what is and isn't there. Realize that the
new system on the left is complete with air cleaner - and the stock system
on the right is not. The stock air box is again as large as the bundle you
see here. |
||
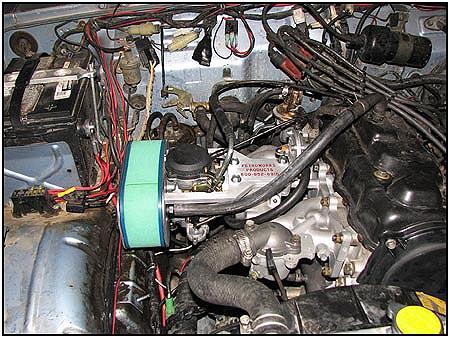
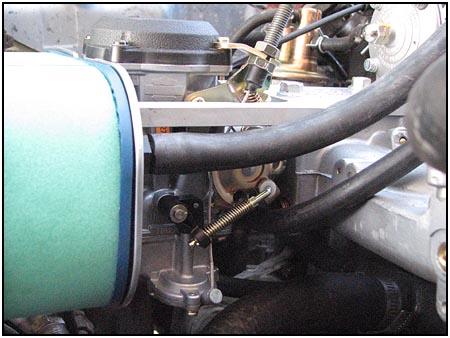
  As
you can see, the new unit takes up far less room and has only a few
hoses(crankcase vent, water lines, brake booster line and fuel line). Also
notice the fuel regulator that is already installed and set up at
Petroworks. It is set to only 1.5 which is perfect for these carbs. As
you can see, the new unit takes up far less room and has only a few
hoses(crankcase vent, water lines, brake booster line and fuel line). Also
notice the fuel regulator that is already installed and set up at
Petroworks. It is set to only 1.5 which is perfect for these carbs. |
||
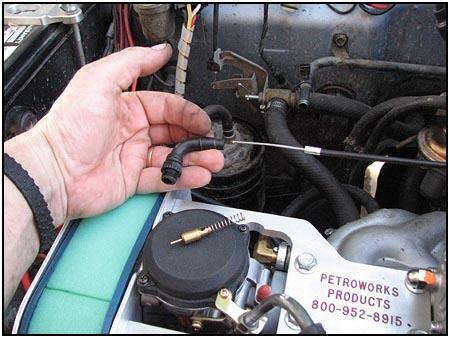
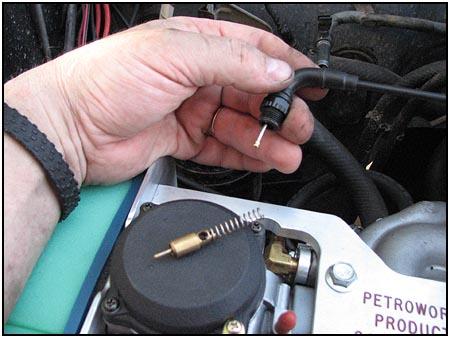
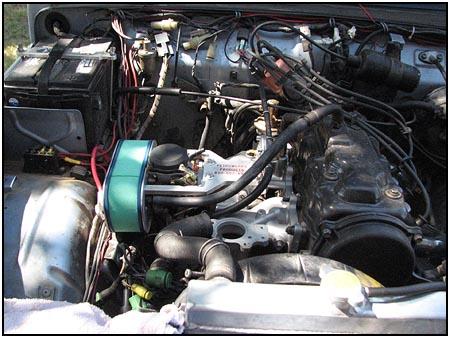
  We
fill the fluids back up and seal the thermostat, connecting the radiator
hose again. Don't forget to connect the small hose under the manifold and
the water lines in back. Following the list in the instruction packet makes
it easy to catch everything the first time. We
fill the fluids back up and seal the thermostat, connecting the radiator
hose again. Don't forget to connect the small hose under the manifold and
the water lines in back. Following the list in the instruction packet makes
it easy to catch everything the first time. |
||
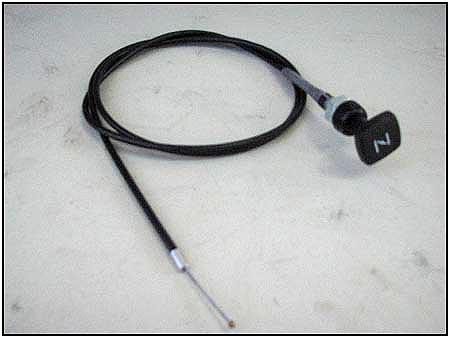
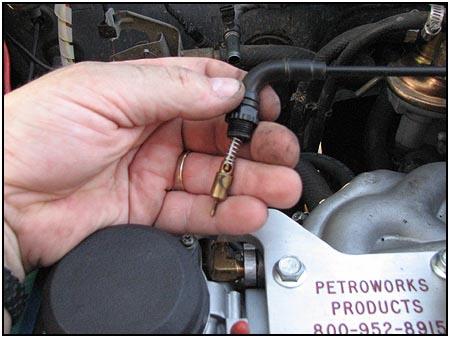
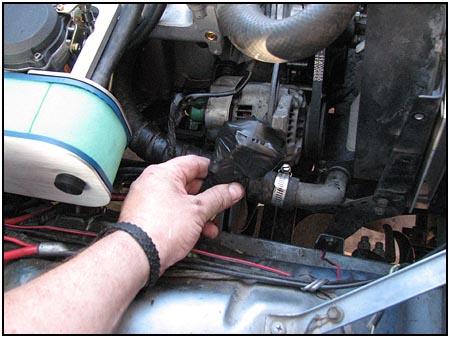
 The
stock choke is a water choke. This kit uses a manual choke that will have to
be installed in the dash. Click the pic on the left and you can see it where
the dash light dimmer control once was. The dimmer control can be relocated
to any of the switch pods in the dash. The choke is fairly simple to attach
at the carb, just follow the instructions that come with the kit and you
can't go wrong. The
stock choke is a water choke. This kit uses a manual choke that will have to
be installed in the dash. Click the pic on the left and you can see it where
the dash light dimmer control once was. The dimmer control can be relocated
to any of the switch pods in the dash. The choke is fairly simple to attach
at the carb, just follow the instructions that come with the kit and you
can't go wrong. |
||
|
|
||
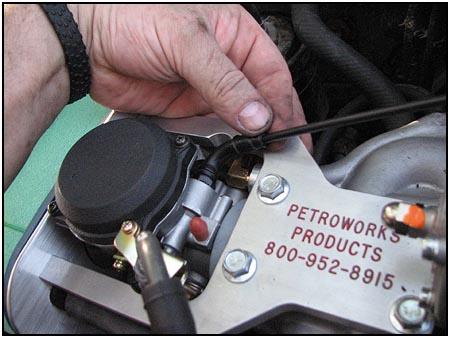
  The
throttle cable can drop right into place and easily be seen from the front
of the vehicle. This makes it easy to install without breaking you neck like
the Hitachi did. The
throttle cable can drop right into place and easily be seen from the front
of the vehicle. This makes it easy to install without breaking you neck like
the Hitachi did. |
||
  The
electrical connections can be wrapped and slid out of the way. Black
electrical tape works well and can hide the bundle easily. The
electrical connections can be wrapped and slid out of the way. Black
electrical tape works well and can hide the bundle easily. |
||
|
|
||
|
First impressions: I found that it had a very strong low to mid range. Top end did not show anything faster than stock, but getting there was pure enjoyment! The throttle response is something that you have to get used to. It is veeery responsive! Don't stomp the pedal unless you are already ready to shift. This kit will teach you how to drive again. {grin} Come see it at the Zookimelt and see what I mean. |
||
|
Source:
Petroworks Offroad Products |
07/08/10 21:59:44