|
Petroworks
Rag Joint Eliminator With Bill Johnston You are driving down the trail and you notice the steering isn't as responsive as it used to be. You remember that you 'aired down' at the trail head and figured the lower tire pressure was the culprit. You start to make a hard turn into an obstacle and suddenly the steering wheel spins and the tires now have a mind of their own! This isn't as bad when it happens on a slow trail, but what if the steering decided to let go on the street, on worse - during a turn on the highway. We really abuse our steering on these little monsters by adding larger tires and a more agile suspension. Most of the time the steering joint gets ignored until it fails, and then it's too late. Petroworks has just released a new Rag Joint Eliminator that will replace the little piece of rubber that we trust with our lives. | ||
|
| ||
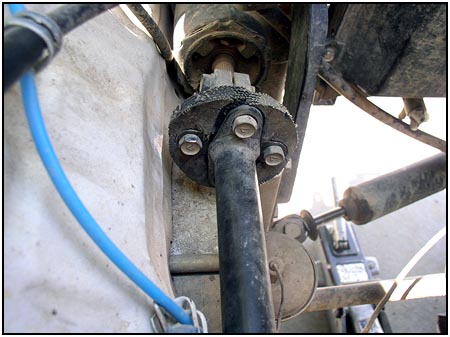
 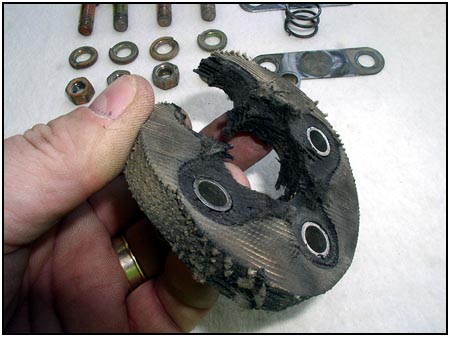 We
have removed the rag joint so we could take a closer look. You can see
that we caught this one just in time. It had already torn through on one
side. One good yank on the steering wheel would have prematurely ended
the day on the trail, and possibly a life. We
have removed the rag joint so we could take a closer look. You can see
that we caught this one just in time. It had already torn through on one
side. One good yank on the steering wheel would have prematurely ended
the day on the trail, and possibly a life. | ||
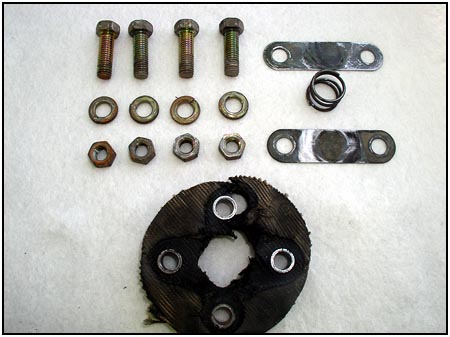
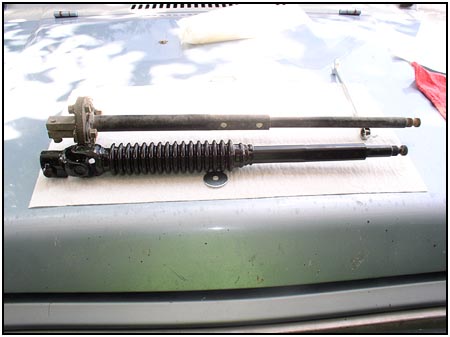 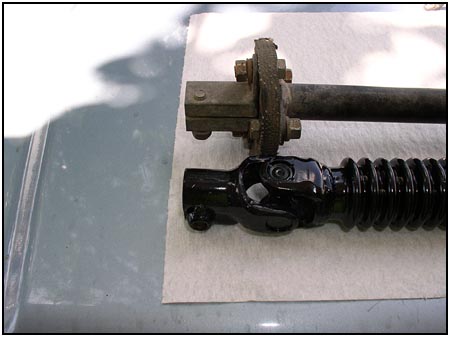 The
rubber disc (joint) has been replaced with a u-joint. The new shaft
telescopes to accommodate the movement needed during installation. It
also ensures a perfect fit. The
rubber disc (joint) has been replaced with a u-joint. The new shaft
telescopes to accommodate the movement needed during installation. It
also ensures a perfect fit. | ||
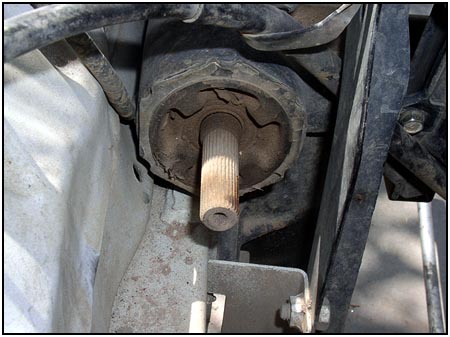  At
the steering box end (close to the radiator), after removing the rag
joint, you remove the rubber joint flange bolt and slide the flange off
of the steering box shaft. It can be removed with a 12mm wrench. At
the steering box end (close to the radiator), after removing the rag
joint, you remove the rubber joint flange bolt and slide the flange off
of the steering box shaft. It can be removed with a 12mm wrench. | ||
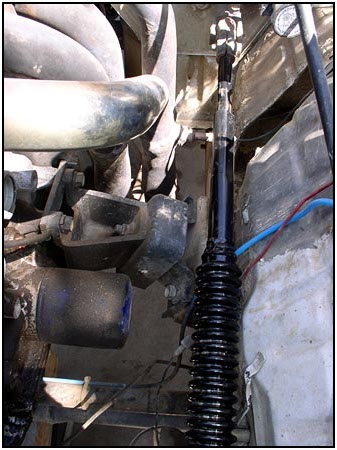  Back
up at the firewall, you can see the steering shaft joint that connects
the upper steering shaft (comes from inside the cab) to the lower
steering shaft (that you are about to replace. Here again, you have only
one bolt to remove that will let the lower steering shaft slide out. The
new RJE shaft slides up in its place and is secured with the same bolt.
Torque it to 14.5-21.5 ft-lbs (factory specs). The upper section of this
new shaft slides to allow adjustment in the length. Back
up at the firewall, you can see the steering shaft joint that connects
the upper steering shaft (comes from inside the cab) to the lower
steering shaft (that you are about to replace. Here again, you have only
one bolt to remove that will let the lower steering shaft slide out. The
new RJE shaft slides up in its place and is secured with the same bolt.
Torque it to 14.5-21.5 ft-lbs (factory specs). The upper section of this
new shaft slides to allow adjustment in the length. | ||
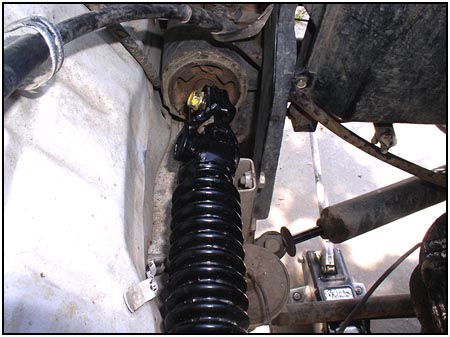  This
allows you to slide the lower section of the new shaft over the steering
box shaft. Be sure that your steering wheel and tire are straight or you
may have to adjust it later. Replace the bolt at the steering box end
and torque it as above, 14.5-21.5 ft-lbs. This
allows you to slide the lower section of the new shaft over the steering
box shaft. Be sure that your steering wheel and tire are straight or you
may have to adjust it later. Replace the bolt at the steering box end
and torque it as above, 14.5-21.5 ft-lbs.And that's it. You now have a stronger steering system that will hold up better in the rough stuff. | ||
|
Source:
Petroworks Offroad Products |
07/08/10 21:59