

| Aluminum Shackles from Spidertrax with Bill Johnston
While many companies have built wild and sophisticated designs that open, stretch, twist and do backflips... the standard lift shackle has never really changed. They are normally painted black, installed and then forgotten. Spidertrax has two new designs that take that standard lift shackle to 'the next level'. |
||
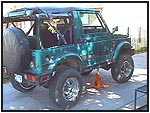 This clean green SPOA Samurai was just aching to grow up a little so it could play on the rocks. After a few changes were made to the stock spring packs, we swapped out the old shackles in about an hour. Air tools would have cut the
installation time considerably, but you DON'T want to use them in this instance. Why? Because when installing a set of shackles, you don't want to pinch the ends in from over torque. The sides of the shackle need to stay parallel for strength and stability. This clean green SPOA Samurai was just aching to grow up a little so it could play on the rocks. After a few changes were made to the stock spring packs, we swapped out the old shackles in about an hour. Air tools would have cut the
installation time considerably, but you DON'T want to use them in this instance. Why? Because when installing a set of shackles, you don't want to pinch the ends in from over torque. The sides of the shackle need to stay parallel for strength and stability. |
||
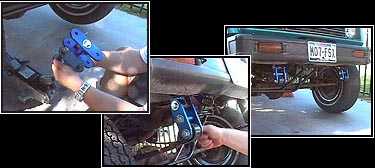 Starting with the front shackles, we supported the frame with jack stands and then used a floor jack to adjust the tension the axle placed on the spring packs. This makes removing the hardware an easier job. In the first photo on the right you can see the difference in length and construction. This is the straight model. We used a different
model for the rear. Remember, when installing a shackle lift you will only gain half of the extended length of the shackle. This is because you are only lifting one end of the spring, and the axle is back at the halfway point of that spring. A little geometry you thought you would never use, eh? The bolt in application is a very straight-forward swap. Starting with the front shackles, we supported the frame with jack stands and then used a floor jack to adjust the tension the axle placed on the spring packs. This makes removing the hardware an easier job. In the first photo on the right you can see the difference in length and construction. This is the straight model. We used a different
model for the rear. Remember, when installing a shackle lift you will only gain half of the extended length of the shackle. This is because you are only lifting one end of the spring, and the axle is back at the halfway point of that spring. A little geometry you thought you would never use, eh? The bolt in application is a very straight-forward swap. |
||
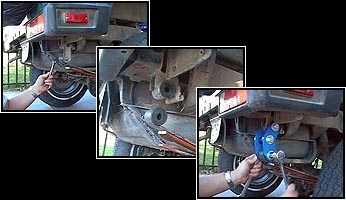 Changing out the rear shackles were a repeat of the front. But here, you can see that we used a different style shackle. Suzuki designed a small shackle stop that is very visible in the center photo (to the left). It is just to the right (forward) of the upper shackle bushing. This controls the standard shackle so that it won't travel too far
forward and run the risk of binding the spring when it droops during articulation. Although this is a good idea, there is a way to safely push the envelope. You probably noticed that the shackle looks a bit different from the front? Yup, you got it. This shackle is curved to enable the spring to droop a little more for better articulation while retaining the safety of the shackle stop. Changing out the rear shackles were a repeat of the front. But here, you can see that we used a different style shackle. Suzuki designed a small shackle stop that is very visible in the center photo (to the left). It is just to the right (forward) of the upper shackle bushing. This controls the standard shackle so that it won't travel too far
forward and run the risk of binding the spring when it droops during articulation. Although this is a good idea, there is a way to safely push the envelope. You probably noticed that the shackle looks a bit different from the front? Yup, you got it. This shackle is curved to enable the spring to droop a little more for better articulation while retaining the safety of the shackle stop. |
||
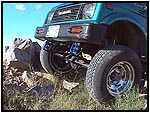
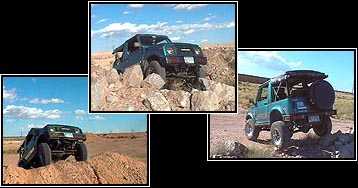 We took the rig out to beat on the rocks (oops, I meant to test...) the shackles for usability. The 3/8ths aircraft alloy aluminum construction is plenty beefy for a set of shackles. The center support in the design makes this a very solid unit. It also doesn't hurt that they are anodized a bright blue to grab your attention. Good looks and
the strength to back it up. I'd say that is the best of both worlds! We took the rig out to beat on the rocks (oops, I meant to test...) the shackles for usability. The 3/8ths aircraft alloy aluminum construction is plenty beefy for a set of shackles. The center support in the design makes this a very solid unit. It also doesn't hurt that they are anodized a bright blue to grab your attention. Good looks and
the strength to back it up. I'd say that is the best of both worlds! |
||
|
07/08/10 21:59