Installing a Winch
|
||
|
|
||
  The
winch itself uses captured nuts to make it easier to bolt in. The nuts slide
into the slots in the base and then the winch is carefully lowered into
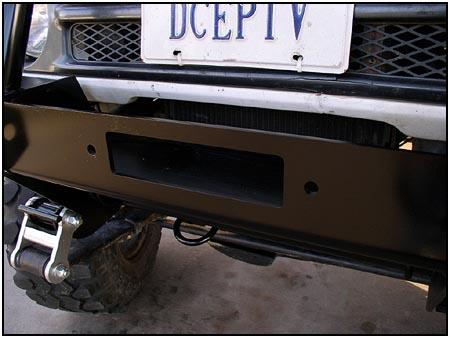
place. One thing I noticed when installing the bumper was that the slot for
the fairlead was offset to the drivers side of the bumper. You may have seen
bumpers with winches for years, but until you put one in, you may not
realize the large motor on one side keeps the cable drum from being
centered. The
winch itself uses captured nuts to make it easier to bolt in. The nuts slide
into the slots in the base and then the winch is carefully lowered into
place. One thing I noticed when installing the bumper was that the slot for
the fairlead was offset to the drivers side of the bumper. You may have seen
bumpers with winches for years, but until you put one in, you may not
realize the large motor on one side keeps the cable drum from being
centered. |
||
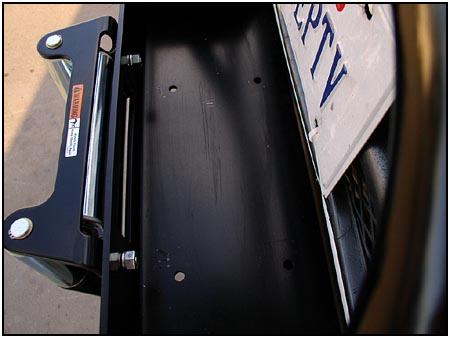
 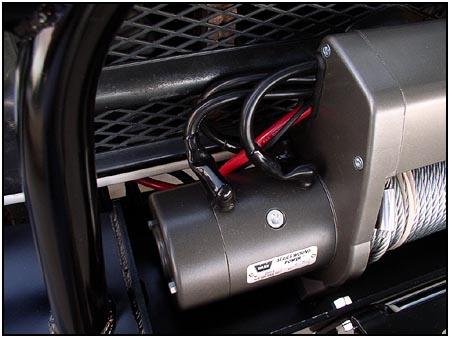 The
bolts go in from underneath and get torqued down. Warn suggests that after
the bolts are tightened, a small piece of 'c' channel should be welded over
at least one of the bolts. This keeps a thief from taking it out as quickly
as we put it in. The power cables are then routed up under the grill and
back to the battery. The
bolts go in from underneath and get torqued down. Warn suggests that after
the bolts are tightened, a small piece of 'c' channel should be welded over
at least one of the bolts. This keeps a thief from taking it out as quickly
as we put it in. The power cables are then routed up under the grill and
back to the battery. |
||
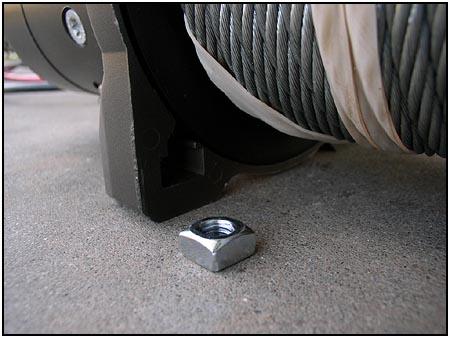
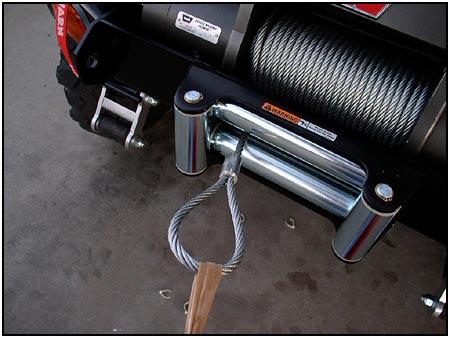 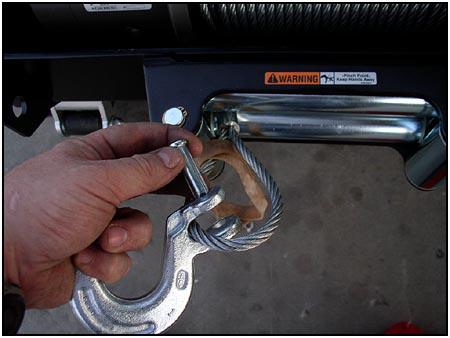 The
Warn X8000i comes with 100' of 5/16" diameter wire rope. The drum comes
prewound with the wire rope. After everything is bolted down securely then
you can thread the line through the fairlead and attach the hook provided
with the winch. Make sure you securely reinstall the safety cotter pin.
Those are the basics... now let's add some fun stuff! The
Warn X8000i comes with 100' of 5/16" diameter wire rope. The drum comes
prewound with the wire rope. After everything is bolted down securely then
you can thread the line through the fairlead and attach the hook provided
with the winch. Make sure you securely reinstall the safety cotter pin.
Those are the basics... now let's add some fun stuff! |
||
 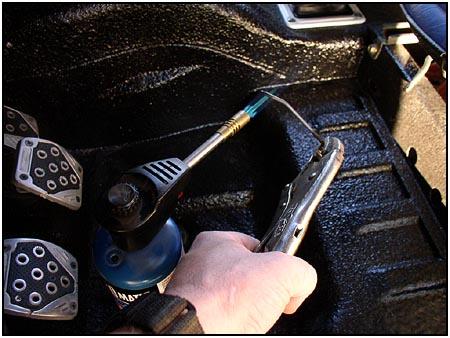 Next
we moved into the cab. When running a winch, there are times when you would
like a few more RPMs to keep the current flowing to the battery. We
installed a Thumb Throttle Kit from Roadless Gear. The easy part of the
install is attaching the thumb throttle to the shifter and then running the
cable through the shifter boot. We followed the directions in the kit and
heated up a nail. Next
we moved into the cab. When running a winch, there are times when you would
like a few more RPMs to keep the current flowing to the battery. We
installed a Thumb Throttle Kit from Roadless Gear. The easy part of the
install is attaching the thumb throttle to the shifter and then running the
cable through the shifter boot. We followed the directions in the kit and
heated up a nail. |
||
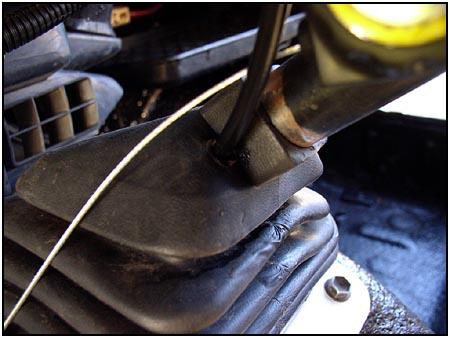  Using
the hot nail you can make a clean hole in the boot to run the cable through.
Using a nail slightly smaller than the cable makes for a nice tight seal
that looks very professional. You can then run the cable along the underside
of the transmission tunnel using the stock cable hooks. Using
the hot nail you can make a clean hole in the boot to run the cable through.
Using a nail slightly smaller than the cable makes for a nice tight seal
that looks very professional. You can then run the cable along the underside
of the transmission tunnel using the stock cable hooks. |
||
08/22/22 14:28