|
|
||
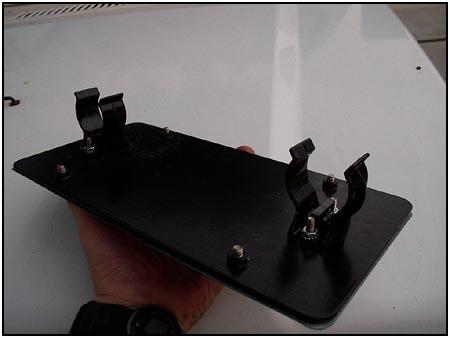
  Next,
we found a way (with more help from Roadless Gear) to control the new winch
without breaking out the winch controller from the accessory bag. They
provided their new Dash Mounted Winch Controls so that we would have full
control at our fingertips without leaving the drivers seat. The control
panel is prewired and features an on/off/on momentary toggle switch for
running the line in or out. There is also an arming switch to make sure you
don't accidentally engage the winch when you least expect it. Next,
we found a way (with more help from Roadless Gear) to control the new winch
without breaking out the winch controller from the accessory bag. They
provided their new Dash Mounted Winch Controls so that we would have full
control at our fingertips without leaving the drivers seat. The control
panel is prewired and features an on/off/on momentary toggle switch for
running the line in or out. There is also an arming switch to make sure you
don't accidentally engage the winch when you least expect it. |
||
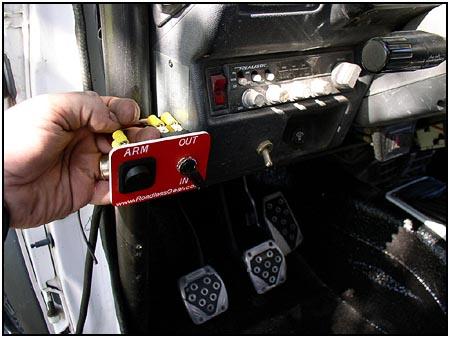 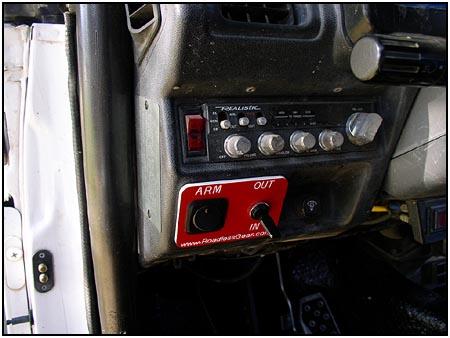 The
control panel doesn't come with any fancy mounting brackets, but that is
because of the many different mounting possibilities that there are. There
were a pair of mounting screws included, but it is up to the installer on
how they are used. We just used the switches themselves to hold the plate in
place. The
control panel doesn't come with any fancy mounting brackets, but that is
because of the many different mounting possibilities that there are. There
were a pair of mounting screws included, but it is up to the installer on
how they are used. We just used the switches themselves to hold the plate in
place. |
||
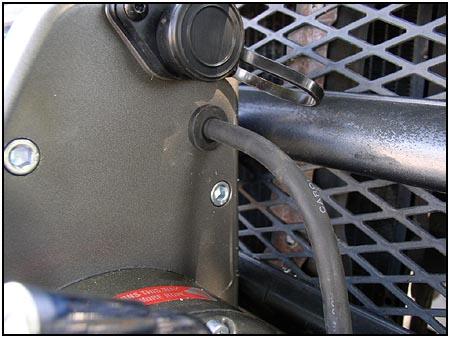
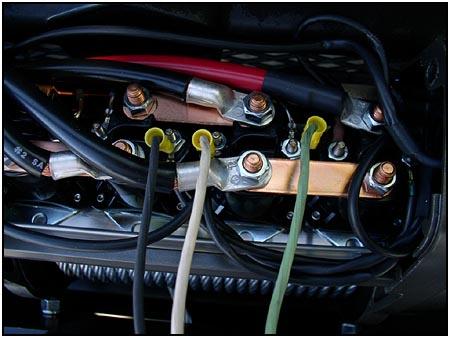
 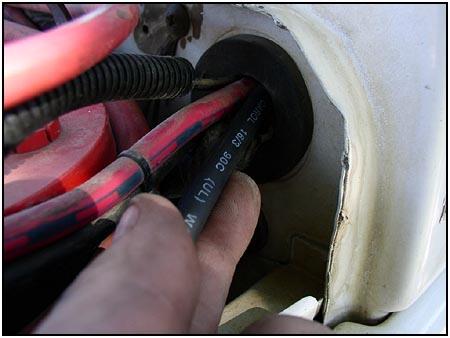 The
cabling from the control panel is routed through the firewall with the rest
of the wiring harness and brought up to the winch along the fender using the
stock wire retainers. At this point, you should make sure the winch is
disconnected from the battery. You don't want to short out the new winch, or
your electrical system, or your nervous system, etc. The
cabling from the control panel is routed through the firewall with the rest
of the wiring harness and brought up to the winch along the fender using the
stock wire retainers. At this point, you should make sure the winch is
disconnected from the battery. You don't want to short out the new winch, or
your electrical system, or your nervous system, etc. |
||
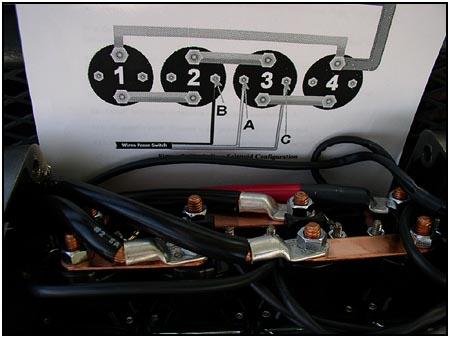
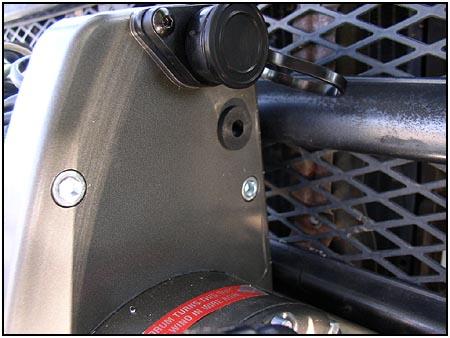
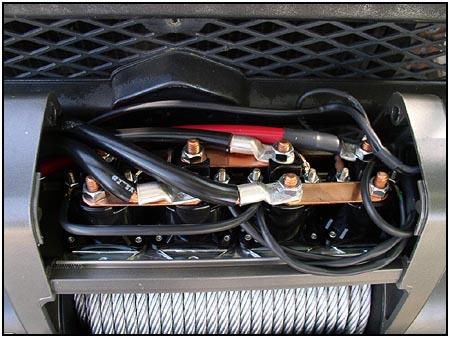  To
connect the control panel to the winch, you have to go into the case and
expose the solenoids. This was done on this X8000i by just removing the two
hex bolts in the top/rear corners of the control box. To
connect the control panel to the winch, you have to go into the case and
expose the solenoids. This was done on this X8000i by just removing the two
hex bolts in the top/rear corners of the control box. |
||
  Now
that we found where the wiring had to go, how did we get it into what was
normally a sealed casing? We found an area where we could drill into the
case while staying clear of the solenoids. After drilling the hole we added
a rubber grommet and then threaded the cable into the case. Now
that we found where the wiring had to go, how did we get it into what was
normally a sealed casing? We found an area where we could drill into the
case while staying clear of the solenoids. After drilling the hole we added
a rubber grommet and then threaded the cable into the case. |
||
|
|
||
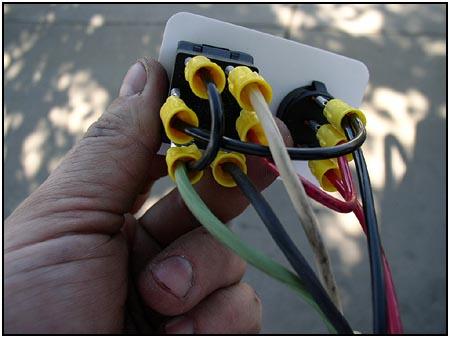
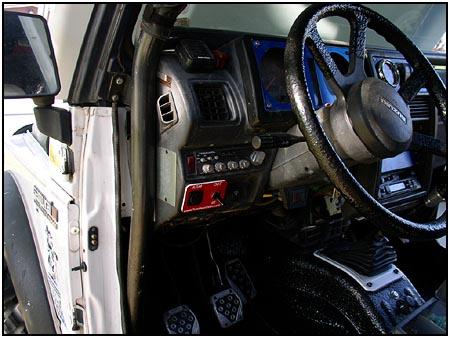  As
you can see, all of the terminations in this kit were done with solderless
crimped connectors. The last thing we did before calling this installation
complete was to solder all of the connectors for a more reliable
connection. The completed installation makes for a really clean look. This
vehicle had already had its optional switch area replaced with a CB radio
built into the dash, otherwise the Dash Mounted Winch Control would have
been install there. As
you can see, all of the terminations in this kit were done with solderless
crimped connectors. The last thing we did before calling this installation
complete was to solder all of the connectors for a more reliable
connection. The completed installation makes for a really clean look. This
vehicle had already had its optional switch area replaced with a CB radio
built into the dash, otherwise the Dash Mounted Winch Control would have
been install there. |
||
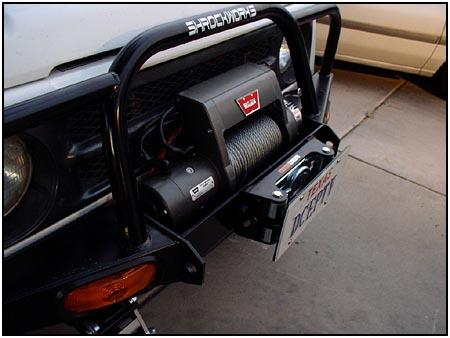
  There was one last consideration
we had to take care of. The state of Texas (where this vehicle is
registered) has a law that says it must have both front and rear license
plates. You may have noticed in earlier shots where the front plate had been
temporarily moved up to the grill when the ShrockWorks winch bumper was installed. With
the installation of the winch, the grill was almost totally obscured so it
had to find a more permanent home. We found a kit that made use of the new roller fairlead,
a set of mag light brackets and a license plate blank to relocate the plate
to the front of the winch where it could be quickly removed on the trail if
the winch was needed. Convenient AND legal. Cool. There was one last consideration
we had to take care of. The state of Texas (where this vehicle is
registered) has a law that says it must have both front and rear license
plates. You may have noticed in earlier shots where the front plate had been
temporarily moved up to the grill when the ShrockWorks winch bumper was installed. With
the installation of the winch, the grill was almost totally obscured so it
had to find a more permanent home. We found a kit that made use of the new roller fairlead,
a set of mag light brackets and a license plate blank to relocate the plate
to the front of the winch where it could be quickly removed on the trail if
the winch was needed. Convenient AND legal. Cool. |
||
 Source: Source:
Roadless Gear
L.L.C. |
08/22/22 14:28
[footer.htm]