
| Back to Page 1 | ||
  You
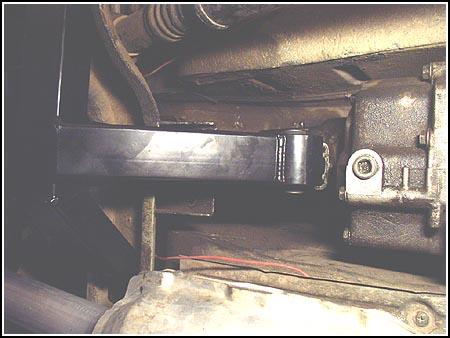
can see on the left how the new transmission mount is formed by an arm
extending from the new crossmember. You
can see on the left how the new transmission mount is formed by an arm
extending from the new crossmember.
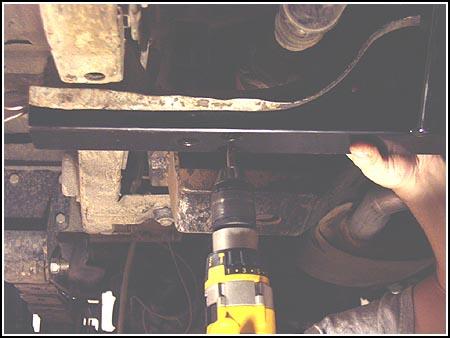
We drilled the mounting points using a 5/16" drill bit. |
||
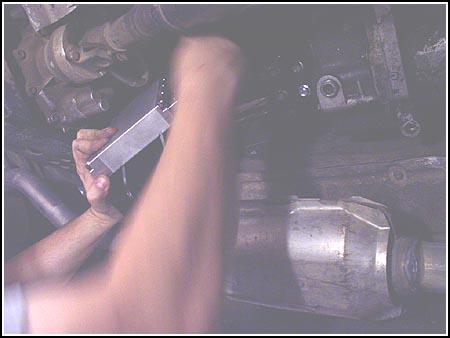
  The
drivers side mounting holes are very close to the exhaust system, so be
careful. If you have aftermarket exhaust on your rig, you may have to do a
little 'massaging' to get around it. If the installer followed the stock
exhaust path you won't have any problem at all. We then removed the
crossmember and scribed some lines to follow with the sawzall. Make sure
you locate the cut lines at least 3/4" to the inside of the mounting
holes that were just drilled. You need enough 'meat' for the new
crossmember to hold onto. The
drivers side mounting holes are very close to the exhaust system, so be
careful. If you have aftermarket exhaust on your rig, you may have to do a
little 'massaging' to get around it. If the installer followed the stock
exhaust path you won't have any problem at all. We then removed the
crossmember and scribed some lines to follow with the sawzall. Make sure
you locate the cut lines at least 3/4" to the inside of the mounting
holes that were just drilled. You need enough 'meat' for the new
crossmember to hold onto. |
||
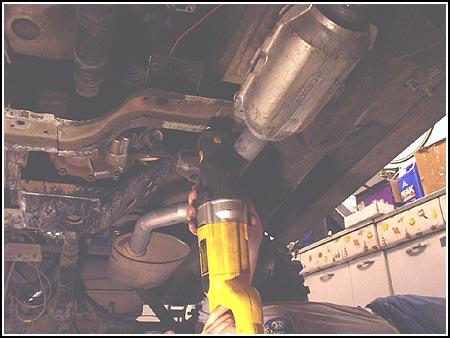  When
cutting the crossmember you will realize just how flimsy the stock unit
is. The new component is quite a bit stronger. Be sure you cut to the
inside of the holes... Don't cut off the new mounting points you just
drilled or you will be dragging out the welder! When
cutting the crossmember you will realize just how flimsy the stock unit
is. The new component is quite a bit stronger. Be sure you cut to the
inside of the holes... Don't cut off the new mounting points you just
drilled or you will be dragging out the welder! |
||
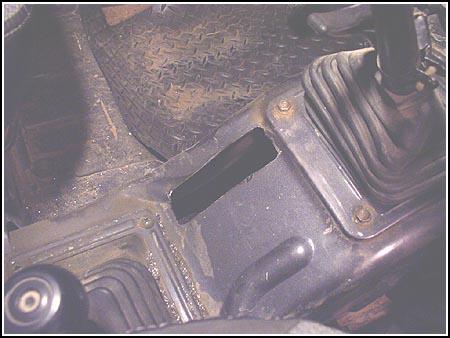
 We
then moved to the inside of the cab to make a place for the new shifter to
come through. There is a good template that is included with the
instructions. Just line up the template as instructed and mark the corners
of the new hole. We just used a metal punch to to mark them. We
then moved to the inside of the cab to make a place for the new shifter to
come through. There is a good template that is included with the
instructions. Just line up the template as instructed and mark the corners
of the new hole. We just used a metal punch to to mark them. |
||
  You
can use a sabre saw or sawzall to cut out the small hole in the tunnel. We
decided to use the cutoff wheel to make the cuts with more
precision. You
can use a sabre saw or sawzall to cut out the small hole in the tunnel. We
decided to use the cutoff wheel to make the cuts with more
precision. |
||
 Time
to fill the case with oil. Trail Tough recommends GL-5 type 90 weight gear
oil. Time
to fill the case with oil. Trail Tough recommends GL-5 type 90 weight gear
oil.
The Rock Block goes up into the space where the jack shaft had once been. The ends look exactly like the ends on the jack shaft, so slide the splined fitting into the back of the transmission and bolt the rear flange to the transfer case. |
||
08/22/2022